Tesla Model 3: Hall Sensor - Exterior Release - Door - Front - LH (Remove and Replace)
Tesla Model 3 2017-2026 Service Manual / Closures / Exterior Door Handles / Hall Sensor - Exterior Release - Door - Front - LH (Remove and Replace)
Remove
- Remove the LH front door trim panel. See Panel - Door Trim - Front - LH (Remove and Install).
- Remove the LH front door inner belt seal. See Seal - Inner Belt - Front Door - LH (Remove and Replace).
- Remove the front LH door glass. See Glass - Door - LH - Front (Remove and Replace).
- Remove the LH front door speaker. See Speaker - Front Door - LH (Remove and Replace).
- Remove the LH front door closeout panel. See Closeout Panel - Door - Front - LH (Remove and Install).
- Remove the front LH door exterior release handle. See Handle - Exterior Release - Door - Front - LH (Remove and Replace).
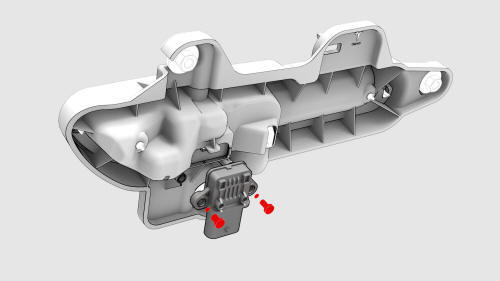
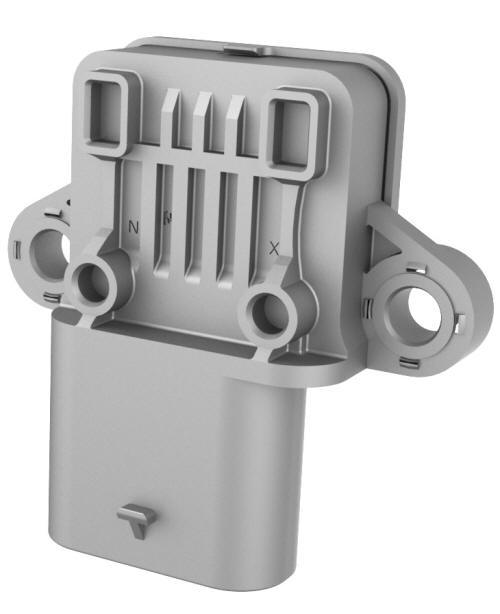
- Remove the screws that attach the hall sensor to the LH door exterior
release handle, and then remove the hall sensor from the release handle.
Install
- Install the screws that attach the hall sensor to the LH door exterior release handle. Torque 1.2 Nm
- Install the front LH door exterior release handle. See Handle - Exterior Release - Door - Front - LH (Remove and Replace).
- Install the LH front door closeout panel. See Closeout Panel - Door - Front - LH (Remove and Install).
- Install the LH front door speaker. See Speaker - Front Door - LH (Remove and Replace).
- Install the front LH door glass. See Glass - Door - LH - Front (Remove and Replace).
- Install the LH front door trim panel. See Panel - Door Trim - Front - LH (Remove and Install).
READ NEXT:
 Hall Sensor - Exterior Release - Door - Rear - LH (Remove and Replace)
Remove
Remove the rear LH door trim panel. See Panel - Door Trim - Rear - LH
(Remove and Install).
Remove the LH rear door inner belt seal. See Seal - Inner Belt - Rear
Door - LH (Remove and
Handle - Exterior Release - Door - Front - LH (Adjust)
SPECIAL TOOLS
Gauge, Taper Step (1080552-00-A)
Procedure
Remove the LH front door exterior release handle. See Handle - Exterior
Release - Door - Front - LH (Remove and Replace).
Exercise the
Handle - Exterior Release - Door - Front - LH (Remove and Replace)
Warning: The side impact airbag deployment depends on the front door
sensor's ability to detect a side impact from air pressure. Make sure that there
are no uncovered holes in the front door shel
SEE MORE:
Windows
Opening and Closing
Press down on a switch to lower the
associated window. Window switches operate
at two levels:
To lower a window fully, press the switch
all the way down and immediately release.
To lower a window partially, press the
switch gently and release when the
window is whe
Valance - Front Fascia (Remove and Replace)
Remove
Remove the front aero shield panel.
Release the clips (x2) that attach the valance to the stabilizer bar
brackets.
Remove the push clips (x4) that attach the LH and RH sides of the
valance to the wheel liners.
Note: Remove the outer clips as necessary to allow for easier
ac
© 2019-2026 Copyright www.tmodel3.com
