Tesla Model 3: Hall Sensor - Exterior Release - Door - Rear - LH (Remove and Replace)
Tesla Model 3 2017-2026 Service Manual / Closures / Exterior Door Handles / Hall Sensor - Exterior Release - Door - Rear - LH (Remove and Replace)
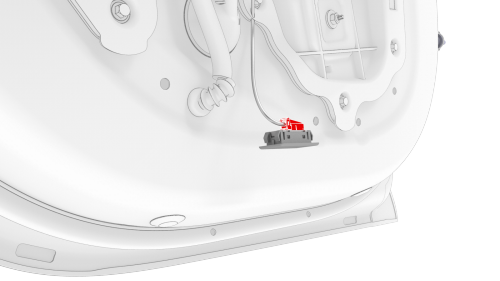
Remove
- Remove the rear LH door trim panel. See Panel - Door Trim - Rear - LH (Remove and Install).
- Remove the LH rear door inner belt seal. See Seal - Inner Belt - Rear Door - LH (Remove and Replace).
- Remove the rear LH door glass. See Glass - Door - LH - Rear (Remove and Replace).
- Remove the LH rear window motor/regulator assembly. See Window Motor / Regulator Assembly - Rear - LH (Remove and Replace).
- Remove the LH rear door exterior release handle. See Handle - Exterior Release - Door - Rear - LH (Remove and Replace).
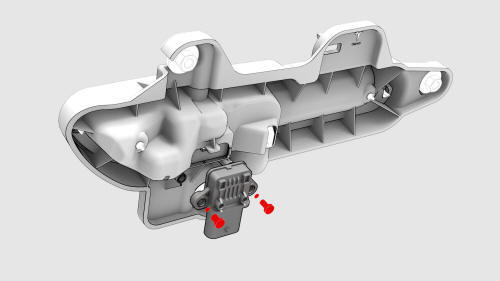
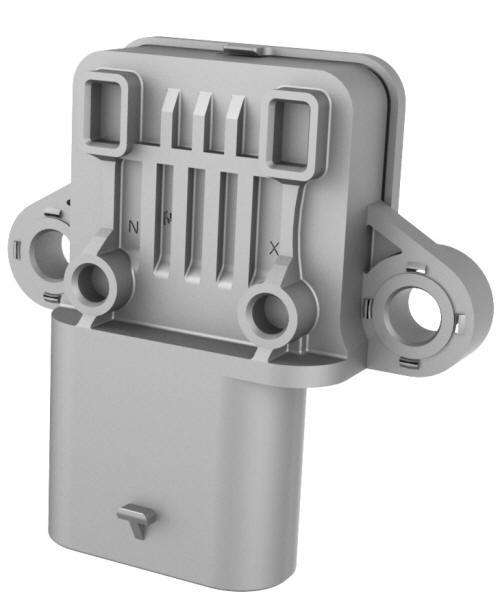
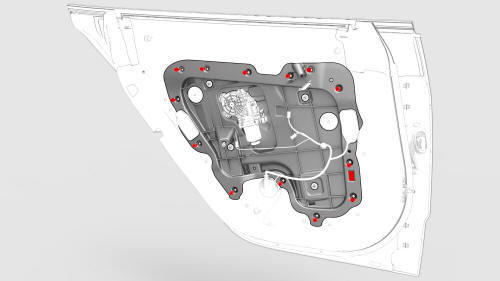
- Remove the screws that attach the hall sensor to the LH rear door
exterior handle, and then remove the sensor from the handle.
Install
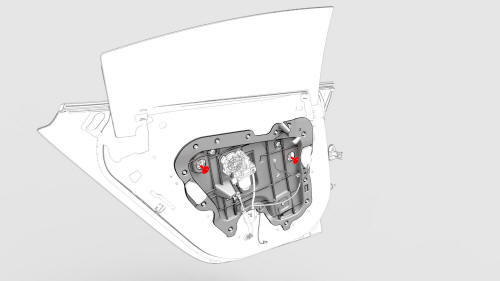
- Install the screws (x2) that attach the new hall sensor to the door
handle.
 Torque 1.2 Nm
 - Install the LH rear door exterior release handle. See Handle - Exterior Release - Door - Rear - LH (Remove and Replace).
- Position the LH rear window motor/regulator assembly onto the door for installation.
- Install the bolts that attach the LH rear window motor/regulator
assembly to the door.
 Torque 4 Nm
Note: Hand start the bolts to avoid stripping the threads.
- Install the clips (x2) that attach the manual latch release cable to the window regulator panel.
- Position the window glass onto the door for installation.
- Install the new bolts that attach the window glass to the regulator
isolator clamps.
 Torque 12 Nm
 - Install the clips (x6) that attach the inner belt seal to the door.
- Connect the window switch special tool.
- Connect the electrical connector to the LH rear door puddle light.
- Raise the window fully and close the LH rear door.
- Adjust the gap and flush of the door glass, if necessary. See Glass - Door - LH - Rear (Adjust).
- Disconnect the window switch special tool.
- Connect the LH rear window motor/regulator assembly electrical connector.
- Install the plugs (x2) that cover the LH rear window motor/regulator assembly bolts.
- Disconnect the electrical connector from the LH rear door puddle light.
- Install the rear LH door trim panel. See Panel - Door Trim - Rear - LH (Remove and Install).
- Connect a laptop with Toolbox to the vehicle.
- Get into the driver seat, and then close the LH front door.
- In Toolbox, type "window" in the search field.
Note: Make sure "Actions" is selected, if not already.
- Click on the Play button next to "TEST-SELF_VCLEFT_REAR-L_CALIBRATE-WINDOW", and then select Run.
- Press the LH rear window switch down to the lowest position to activate the auto-lower function, and allow the window to lower completely.
Note: If the window does not lower completely, repeat step 20 and step 21.
- Pull on the switch to the highest position to activate the auto-raise function, and allow the window to raise completely.
Note: If the window does not raise completely, repeat step 20 and step 21.
READ NEXT:
 Handle - Exterior Release - Door - Front - LH (Adjust)
SPECIAL TOOLS
Gauge, Taper Step (1080552-00-A)
Procedure
Remove the LH front door exterior release handle. See Handle - Exterior
Release - Door - Front - LH (Remove and Replace).
Exercise the
Handle - Exterior Release - Door - Front - LH (Remove and Replace)
Warning: The side impact airbag deployment depends on the front door
sensor's ability to detect a side impact from air pressure. Make sure that there
are no uncovered holes in the front door shel
Handle - Exterior Release - Door - Rear - LH (Adjust)
SPECIAL TOOLS
Gauge, Taper Step (1080552-00-A)
Procedure
Remove the LH rear door exterior release handle. See Handle - Exterior
Release - Door - Rear - LH (Remove and Replace).
Exercise the ha
SEE MORE:
Platter Enclosure Coolant (Drain and Refill)
SPECIAL TOOLS
Drive Unit Pressure Test Fixture (1053600-00-C)
Kit, Coolant Leak Test Adapters, Model 3 (1132185-00-B)
Kit, Coolant Drain & Fill Adapters, M3 (1133843-00-A)
Kit, Svc Plug, Cooling Hose, Model 3 (1135762-00-A)
Kit, Battery Coolant Drain and Fill (GSN-TL-000564)
Drain
Disconnect 1
Speaker - Dash - Center (Remove and Replace)
Remove
Remove the LH and RH instrument panel end caps. See End Cap - Instrument
Panel - LH (Remove and Replace).
Remove the LH and RH middle A-pillar trims. See Trim - A-Pillar - Middle
- LH (Remove and Replace).
Remove the LH and RH upper A-pillar trims. See Trim - A-Pillar - Upper -
LH
© 2019-2026 Copyright www.tmodel3.com
