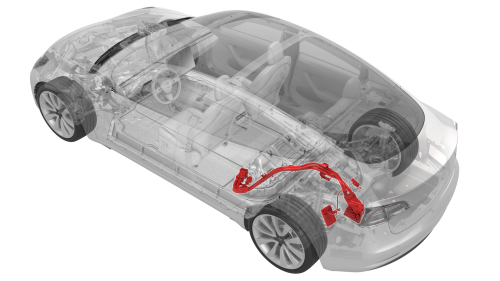
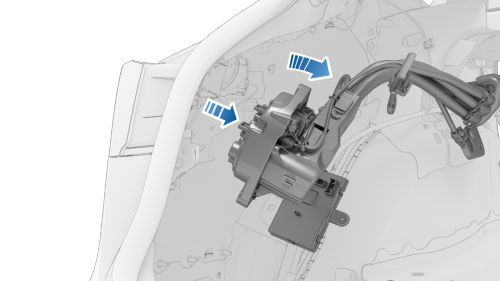
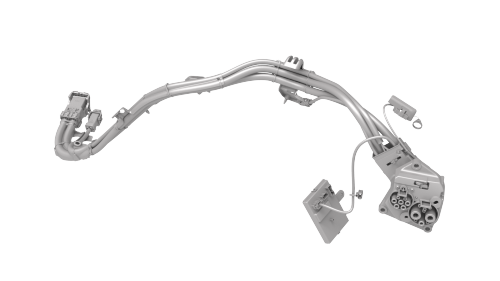
Tesla Model 3: Harness - Charge Port to HV Battery (Three-Phase) (Remove and Replace)
Remove
Caution:
Do not damage the LV electrical harness.
Note: Have a second person hold the rear of the
charge port harness (charge port inlet side) as
the front side of the harness is fed through and
underneath the LV electrical harness.
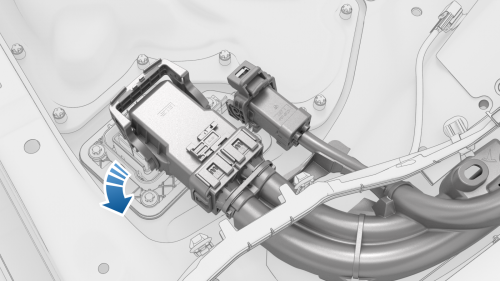
Install Caution:
Install the charge port harness carefully to
prevent damage to the harness.
Caution:
Install the charge port harness carefully to
prevent damage to the harness.
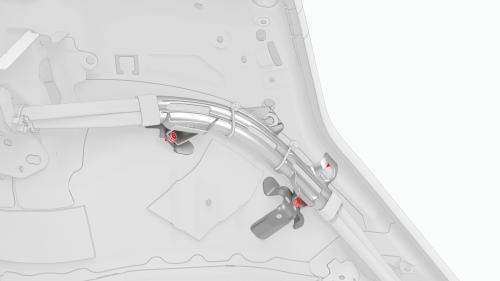
Note: The number of clips on newer vehicles
might vary.
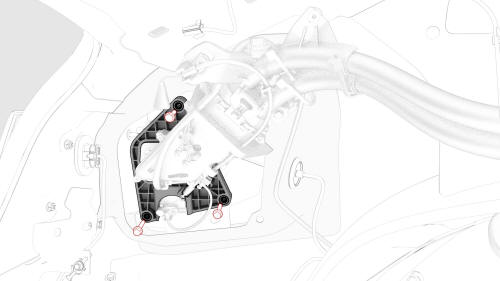
Note: Use one hand to support the charge port
harness connector while the other hand latches
the locking tab. Once installed, verify that the
latch is not damaged and is fully secured into
the latched position.
Note: Push down the red locking tab to secure
the connector.
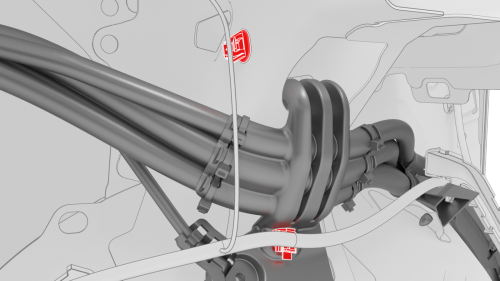
Note: Lift the charge port harness reference
point up and over the body. The reference point
should be reset into the body.
Note: If there are no firmware packages
available, there might be a firmware package
staged on the vehicle; skip to step 34.
Note: Check the touchscreen after the displayed
firmware installation time to ensure that the
firmware package was successfully installed.
Harness - HV Battery to Front Drive Unit (Remove and Replace) SPECIAL TOOLS Lever Lock, HV Connector, Model 3 (1140311-00-A) Remove Refer to the procedure to remove the HV battery center rail ski for
dual-motor vehicles. See
Ski - Center Rail - HV Battery (Dual Motor) (Remove and Replace). Install Refer to the procedure to install the HV battery center rail ski for
dual-motor vehicles. See
Ski - Center Rail - HV Battery (Dual Motor) (Remove and Replace). Harness - HV Battery to PTC Heater and A/C Compressor (Dual Motor) (Remove
and Replace) SPECIAL TOOLS Lever Lock, HV Connector, Model 3 (1140311-00-A) Remove Refer to the procedure to remove the HV battery center rail ski for
dual-motor vehicles. See
Ski - Center Rail - HV Battery (Dual Motor) (Remove and Replace) Install Refer to the procedure to install the HV battery center rail ski for
dual-motor vehicles. See
Ski - Center Rail - HV Battery (Dual Motor) (Remove and Replace). Harness - HV Battery to PTC Heater and A/C Compressor (RWD) (Remove and
Replace) SPECIAL TOOLS Lever Lock, HV Connector, Model 3 (1140311-00-A) Remove Refer to the procedure to remove the HV battery center rail ski for rear
wheel drive vehicles. See
Ski - Center Rail - HV Battery (RWD) (Remove and Replace). Install Refer to the procedure to install the HV battery center rail ski for rear
wheel drive vehicles. See
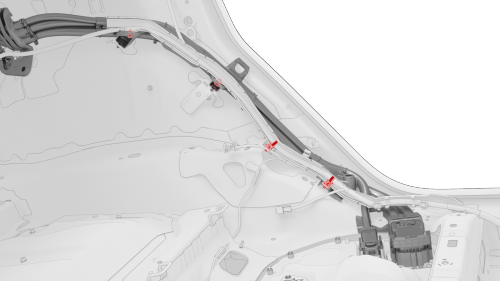
Ski - Center Rail - HV Battery (RWD) (Remove and Replace).Harness - Charge Port to HV Battery (Three-Phase) - Remove
.jpg)
.png)

.jpg)
.jpg)
.jpg)
.jpg)
.jpg)
.jpg)
.jpg)
.jpg)
Harness - Charge Port to HV Battery (Three-Phase) - Install
.jpg) Torque 10 Nm
Torque 10 Nm
.jpg)
.jpg)
.jpg) Torque 6 Nm
Torque 6 Nm
READ NEXT:
 Harness - HV Battery to Rear Drive Unit (Remove and Replace)
Harness - HV Battery to Rear Drive Unit - Remove
SPECIAL TOOLS
Lever Lock, HV Connector, Model 3 (1140311-00-A)
Remove
SEE MORE:
Brightwork - Upper - LH (Remove and Replace)
Remove
Open the LH doors.
Pull down to release the front and rear primary body seals from the LH
upper brightwork.
Note: It is not necessary to release the seals from the top
of the B-pillar applique.
Remove the push rivet and the screws (x10) that attach the LH upper
brightwor
Harness - AC Inlet - HV Battery (Remove and Replace)
Harness - AC Inlet - HV Battery- Remove
SPECIAL TOOLS
Resistance meter, microohm, Hioki RM 3548 (1076927-00-A)
Warning:
Only technicians who have been trained in High Voltage Awareness are
permitted to perform this procedure. Proper personal protective equipment (PPE)
and insulating HV gloves w
