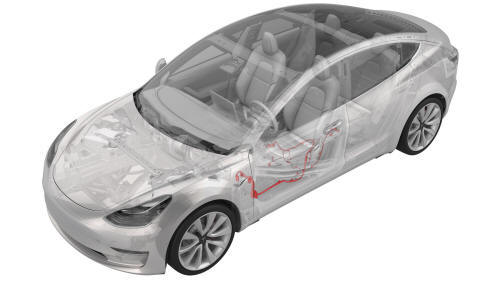
Tesla Model 3: Harness - Door - Front - LH (Remove and Replace)
Tesla Model 3 2017-2026 Service Manual / Electrical / Harnesses / Harness - Door - Front - LH (Remove and Replace)
Remove
- Partially raise the vehicle to a comfortable working height. See Raise Vehicle - 2 Post Lift.
- Remove the 2nd row lower seat cushion. See Seat Cushion - Lower - 2nd Row (Remove and Replace).
- Remove the rear underhood apron. See Underhood Apron - Rear (Remove and Replace).
- Disconnect 12V power. See 12V Power (Disconnect and Connect).
- Remove the LH front door trim panel. See Panel - Door Trim - Front - LH (Remove and Install).
- Remove the LH front door speaker. See Speaker - Front Door - LH (Remove and Replace).
- Remove the LH front door closeout panel. See Closeout Panel - Door - Front - LH (Remove and Install).
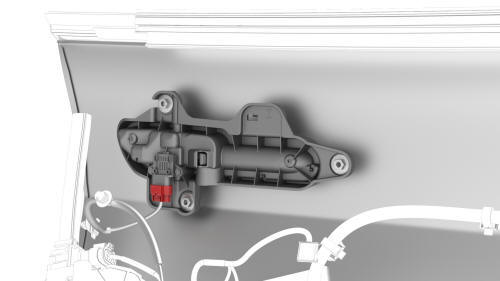
- Release the locking tab, and then disconnect the harness from the LH front door exterior release handle.
.png)
- Disconnect the electrical harness from the door latch connector.
.jpg)
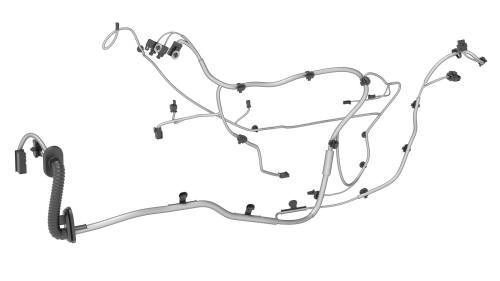
- Release the clips that attach the LH front door harness to the LH front door.
- Remove the LH instrument panel end cap. See End Cap - Instrument Panel - LH (Remove and Replace).
- Remove the LH middle A-pillar trim. See Trim - A-Pillar - Middle - LH (Remove and Replace).
- Remove the LH lower A-pillar trim. See Trim - A-Pillar - Lower - LH (Remove and Replace).
.jpg)
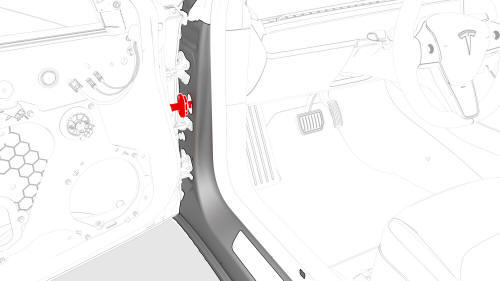
- Disconnect the LH front door harness connectors (x4) from the LH body controller module.
.jpg)
- Release the clip that attaches the LH front door harness to the LH body controller module.
Release the grommet from the door frame
- Release the grommet, and then push the door wiring harness through the A-pillar bulkhead.
.jpg)
Push the connectors through the bulkhead
- Push the wiring harness connectors (x4) through the LH front door
bulkhead, and then remove the harness from the door.
Install
Installation procedure is the reverse of removal.
READ NEXT:
 Harness - Door - Rear - LH (Remove and Replace)
Warning: The side impact airbag deployment depends on the front door
sensor's ability to detect a side impact from air pressure. Make sure that there
are no uncovered holes in the front door shell
Harness - Drive Unit - Front (Remove and Replace)
Remove
Partially raise the vehicle to a comfortable working height. See Raise
Vehicle - 2 Post Lift.
Remove the 2nd row lower seat cushion. See Seat Cushion - Lower - 2nd
Row (Remove and Repl
Harness - Headliner (Remove and Replace)
Remove
Remove the headliner. See Headliner (Remove and Install).
Disconnect the electrical harness from the LH headliner tweeter
connector.
Disconnect the electrical harness from the front ove
SEE MORE:
Trim - C-Pillar - Rear - LH (Remove and Replace)
Trim - C-Pillar - Rear - LH (Remove and Replace) - Remove
Remove
Remove the 2nd row lower seat cushion. See
Seat Cushion - Lower - 2nd Row (Remove and Replace).
Remove the LH 2nd row seat side bolster. See
Bolster - Side - Seat - 2nd Row - LH (Remove and Replace).
Remove the LH side rail tr
Grille - Speaker - Instrument Panel (Remove and Replace)
Remove
Remove the LH and RH instrument panel end caps. See
End Cap - Instrument Panel - LH (Remove and Replace).
Remove the LH and RH middle A-pillar trims. See
Trim - A-Pillar - Middle - LH (Remove and Replace).
Remove the LH and RH upper A-Pillar trims. See
Trim - A-Pillar - Upper - LH (
© 2019-2026 Copyright www.tmodel3.com
