Tesla Model 3: Harness - Drive Unit - Front (Remove and Replace)
Tesla Model 3 2017-2026 Service Manual / Electrical / Harnesses / Harness - Drive Unit - Front (Remove and Replace)
Remove
- Partially raise the vehicle to a comfortable working height. See Raise Vehicle - 2 Post Lift.
- Remove the 2nd row lower seat cushion. See Seat Cushion - Lower - 2nd Row (Remove and Replace).
- Remove the rear underhood apron. See Underhood Apron - Rear (Remove and Replace).
- Disconnect 12V power. See 12V Power (Disconnect and Connect).
- Fullly raise the vehicle.
- Remove the front aero shield panel. See Panel - Aero Shield - Front (Remove and Replace).
- Release the grey locking tab, and then press on the tab to disconnect the front drive unit logic connector near the LH side of the front subframe.
- Release the locking tab, and then push the handle downward to disconnect the front drive unit inverter logic connector.
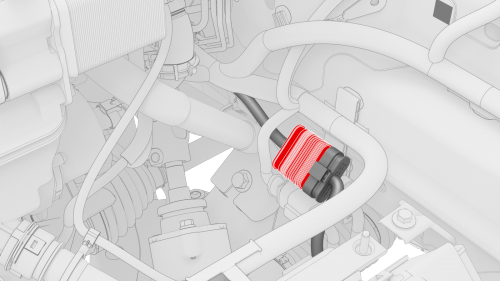
- Release the red locking tab, and then press down on the tab to disconnect the resolver logic connector.
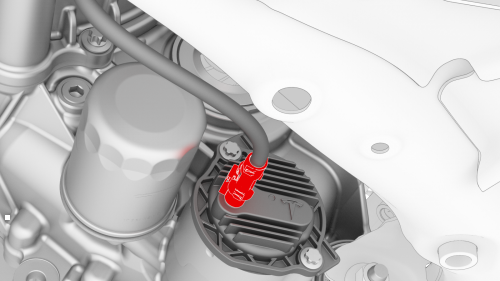
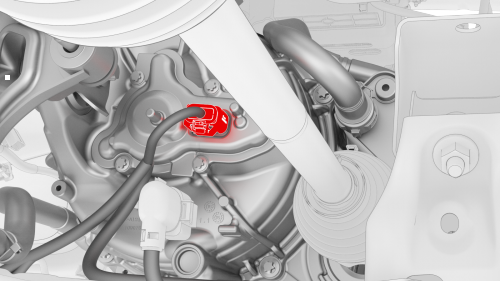
- Release the grey locking tab, and then press down on the tab to disconnect the oil pump connector.
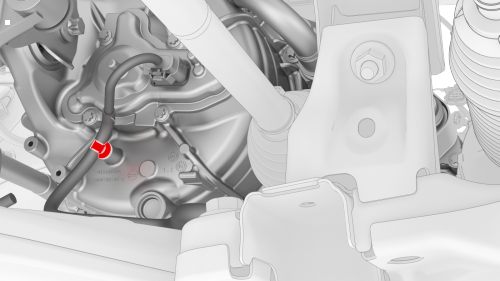
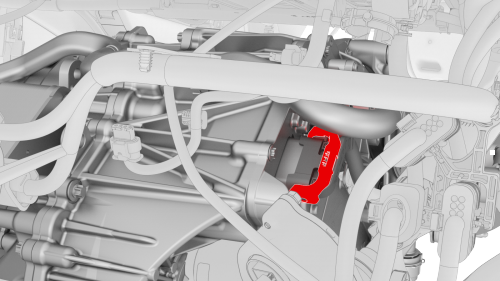
- Release the clip that attaches the front drive unit harness to the front drive unit motor.
Other assemblies hidden for clarity
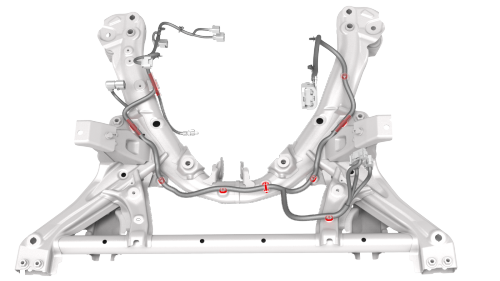
- Release the clips that attach the front drive unit harness to the front subframe.
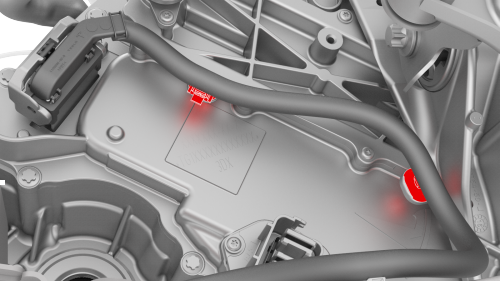
- Release the clips that attach the front drive unit harness to the inverter.
- Remove the front drive unit harness from the front subframe.

Install
Installation procedure is the reverse of removal, except for the following:
Caution:
Perform a push-pull test on the front drive unit harness connectors to verify that the connectors are fully attached.
READ NEXT:
 Harness - Headliner (Remove and Replace)
Remove
Remove the headliner. See Headliner (Remove and Install).
Disconnect the electrical harness from the LH headliner tweeter
connector.
Disconnect the electrical harness from the front ove
Harness - Instrument Panel (Remove and Replace)
Remove
Remove the rear underhood apron. See Underhood Apron - Rear (Remove and
Replace).
Remove the cabin intake duct. See Duct - Cabin Intake (Remove and
Replace).
Remove the hood latch cov
Harness - Main Front (Remove and Replace)
Harness - Main Front- Remove
Remove
Open the front LH and front RH doors
Open the hood.
Place wheel chocks on both rear wheels.
Put vehicle in Neutral.
Disconnect 12V power. See 12V Power (Dis
SEE MORE:
Reservoir - Windshield Washer (Remove and Replace)
Remove
Remove the rear underhood apron. See
Underhood Apron - Rear (Remove and Replace).
Remove the cabin intake duct. See
Duct - Cabin Intake (Remove and Replace).
Remove the hood latch cover. See
Cover - Hood Latch (Remove and Replace).
Remove the underhood storage unit. See
Underhood S
Actuator - Bleed - LH (Remove and Replace)
Remove
Remove the cross car beam. See
Beam - Cross Car (Remove and Replace).
Disconnect the electrical wiring harness connector from the LH bleed
actuator.
Remove the bolts that attach the actuator to the HVAC module, and then
remove the actuator from the module.
Torque 2.3 Nm
© 2019-2026 Copyright www.tmodel3.com
