Tesla Model 3: Harness - Subframe - Rear (Remove and Replace)
Tesla Model 3 2017-2026 Service Manual / Electrical / Harnesses / Harness - Subframe - Rear (Remove and Replace)
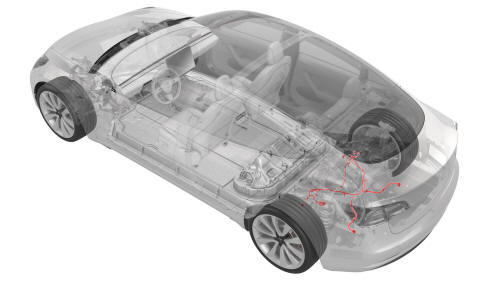
Remove
- Remove the rear subframe. See Subframe Assembly - Rear (Remove and Install).
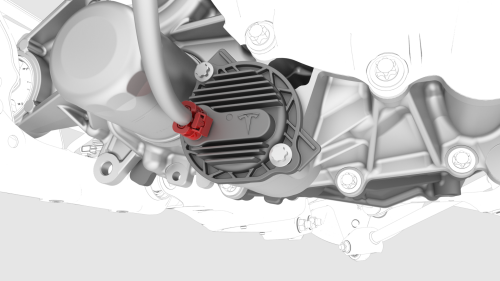
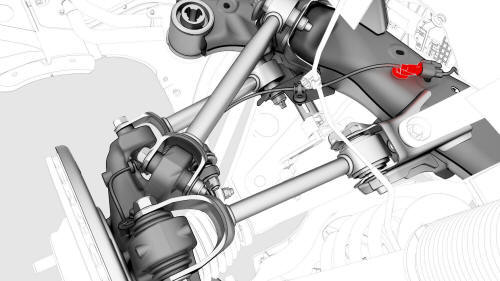
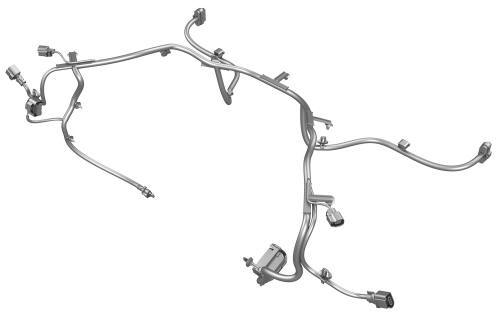
- Disconnect the electrical connector from the oil pump.
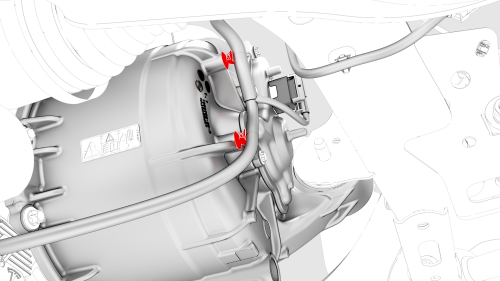
- Release the clips that attach the electrical harness to the rear drive unit.
- Disconnect the resolver electrical connector.
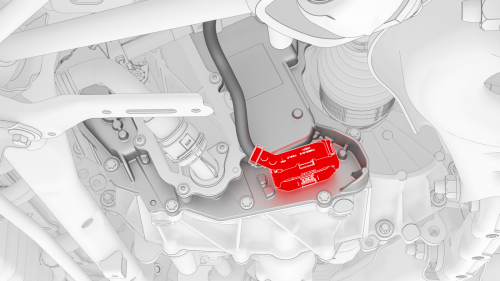
- Release the clip that attaches the RH rear ABS wheel speed sensor connector to the subframe, and then disconnect the connector from the rear subframe harness.
.png) Tip: Use a mechanical pickup tool to hold the connector in place, and then
release the connector clip with a screwdriver.
Tip: Use a mechanical pickup tool to hold the connector in place, and then
release the connector clip with a screwdriver.
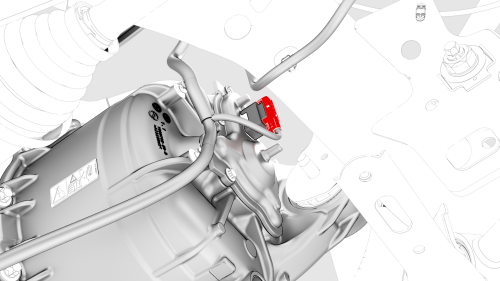
- Disconnect the 12V electrical connector from the rear drive unit.
- Release the clip that attaches the rear drive unit electrical harness to the rear subframe at the lower LH side of the rear drive unit.
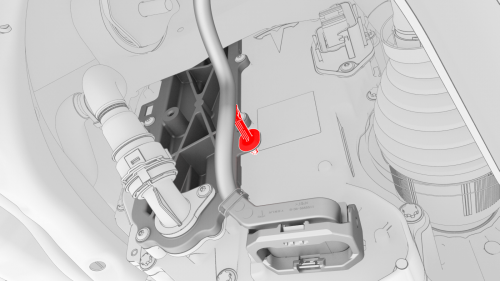
- Release the clip that attaches the LH rear ABS wheel speed sensor connector to the subframe, and then disconnect the connector from the rear subframe harness.
Tip: Use a mechanical pickup tool to hold the connector in place, and then
release the connector clip with a screwdriver.
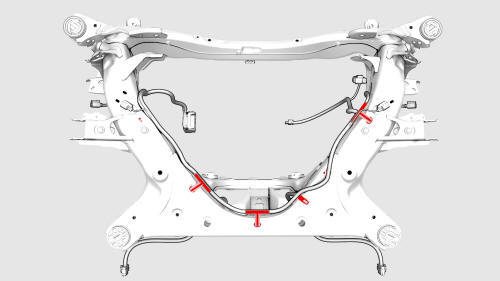
Top view of the rear subframe
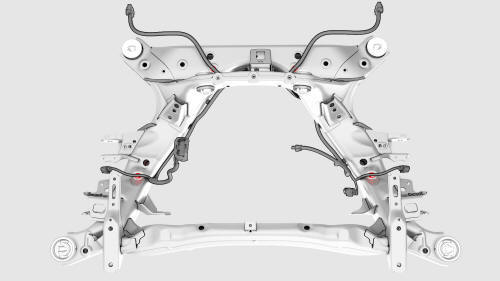
Bottom view of the rear subframe
- Release the clips that attach the subframe electrical harness to the
bottom and top of the rear subframe, and then remove the electrical harness
from the rear subframe.
Install
Installation procedure is the reverse of removal.
READ NEXT:
 Harness - Thermal Beam (Remove and Replace)
Harness - Thermal Beam- Remove
Remove the underhood storage unit. See Underhood Storage Unit (Remove
and Replace).
Disconnect 12V power. See 12V Power (Disconnect and Connect).
Release the c
SEE MORE:
Four Wheel Alignment (Check)
SPECIAL TOOLS
SEAT COVER (1096767-00-A)
Ballast Bag, 25lb (1145158-00-A)
CHASSIS HEIGHT MEASURING TOOL (1071271-00-A)
STEERING WHEEL LEVEL (1049463-00-A)
Procedure
Make sure the tire pressures are to specification.
Note: Use the tire sticker values displayed on the door jam. If
unavailable, use
Light - Turn Signal / Fog - Front - LH (Remove and Replace)
Remove
Remove the LH front wheel. See
Wheel (Remove and Install).
Remove the LH front wheel arch liner. See
Wheel Arch Liner - Front - LH (Remove and Replace).
Disconnect the electrical connector from the LH front turn signal/fog
light.
Release the clips that attach the fascia elect
© 2019-2026 Copyright www.tmodel3.com
