Tesla Model 3: Headlights - Adjust - NA (Tool Method)
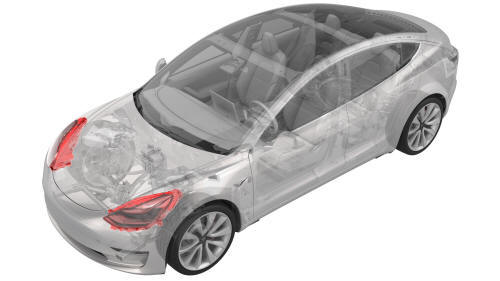
Adjust Headlights Using a Headlight Tester
- Park the vehicle on a level surface.
- Make sure that all 4 tires are inflated to specification.
- Open the front trunk hood.
- On the touchscreen, enter headlight adjustment mode: Controls > Service > Adjust Headlights.
- Turn on the headlights.
- Position the headlight tester tool ~11 in. (30 cm) from the front of the LH headlight lens.
- Connect the headlight tester tool to an electrical outlet, and then turn on the headlight tester tool.
- Adjust the knobs on the base of the headlight tester tool until the tool is leveled, as indicated by the bubble gauge on the tool.
Note: The bubble must be entirely inside of the center ring in order to properly align the headlights
Special tools required for this procedure:
Supplier /Part Number /Description
Tesla/ 1133367-00-A/ Beissbarth Headlight Tester, Model 815
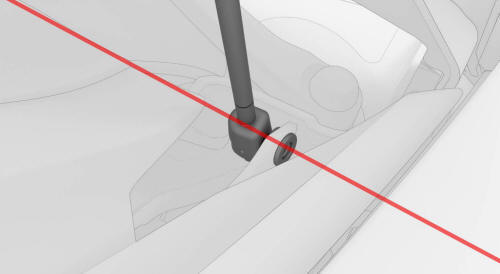
LH Hood Strut
- Turn on the alignment laser near the top of the tool, and then rotate the tool as necessary to align the laser with the base of both hood struts.
- On the headlight tester tool, select Test US, then select Applications >Free Test.
- On the headlight tester tool, select Headlight, and then use the + or - buttons to change the Headlight type to "VOR".
- On the headlight tester tool, select Light, and then use the + or - buttons to change the Light type to "LED."
- On the headlight tester tool, select Inclination, and then use the + or - buttons to set the inclination.
Note: Inclination information is located on the headlight.
- On the headlight tester tool, select Height.
- On the headlight tester tool, select Laser, and then position the laser in the middle of the headlight.
- Move the headlight tester tool up or down on the column to the indicated height.
- On the headlight tester tool, select OK
- Choose settings to test and adjust the fog lights, if necessary. See Light - Fog - Front (Adjust).
Note: Or click OK to skip the Fog Light setup screen.
- On the headlight tester tool, select Laser to turn on the headlight laser guide.
- On the headlight tester tool, select Left low beam, and then select Low beam near the bottom of the screen.
Note: The "L" and "R" indicators at the bottom of the screen are reversed. For example, "L" is on the right side and "R" is on the left side.
- Adjust the headlight laser guide crosshair to line up with the vertical and horizontal marks on the LH headlight.
Note: Or place a piece of paper against the LH headlight, and then adjust the tool to place the headlight laser guide crosshair over the brightest spot on the paper.
- On the headlight tester tool, select Laser to turn off the headlight laser guide.
- On the steering wheel, use the left scroll wheel to adjust the beam level: Target 0.00" +/- 1.0"
Caution: Do not sit in the vehicle, as this will affect headlight alignment.
Note: There might be a delay between the scroll wheel input and actual headlight adjustment output.
- On the headlight tester tool, select Save to record the results.
- Roll the headlight tester tool to the RH headlight, and then position the tool ~30 cm from the front of the RH headlight lens.
- On the headlight tester tool, select Right low beam, and then select Low beam near the bottom of the screen.
Note: Make sure that High beam is not selected.
Note: The "L" and "R" indicators at the bottom of the screen are reversed. For example, "L" is on the right side and "R" is on the left side.
- Adjust the headlight laser guide crosshair to line up with the vertical and horizontal marks on the RH headlight.
- On the headlight tester tool, select Laser to turn off the headlight laser guide.
- On the steering wheel, use the right scroll wheel on the steering wheel to adjust the beam level: Target 0.00" +/- 1.0"
Caution: Do not sit in the vehicle while using the scroll wheel as this will affect headlight alignment.
Note: There might be a delay between the scroll wheel input and actual headlight adjustment output.
- On the headlight tester tool, select Save to record the results.
- Test and adjust the fog lights, if necessary. See Light - Fog - Front (Adjust).
- On the headlight tester tool, select Save again to view test results.
- Close the front trunk hood.
- On the touchscreen, select Done.
READ NEXT:
 Headlights - Adjust - NA (Wall Method)
Adjust Headlights Using a Wall
Position the vehicle for adjusting the headlights. The vehicle should be:
Located in a darkened area.
Parked on a level surface.
Perpendicular to a wall that ha
Headlight - LH (Remove and Replace)
Headlight - LH- Remove
It is recommended that the vehicle be powered down before executing headlight
replacement to ensure that the new headlights are recognized during vehicle
firmware update.
Re
SEE MORE:
Bushing - Gearbox - Front Drive Unit (Remove and Replace)
Bushing - Gearbox - Front Drive Unit - Remove
SPECIAL TOOLS
Engine Motor Stand, 1000 lb. (NA, APAC)
(1053595-00-A)
Engine Stand, 1000 lbs (EMEA) (1053595-01
Seatbelt - 2nd Row - LH (Remove and Replace)
Remove
Remove the rear underhood apron. See Underhood Apron - Rear (Remove and
Replace).
Remove the cabin intake duct. See Duct - Cabin Intake (Remove and
Replace).
Disconnect 12V power. See 12V Power (Disconnect and Connect).
Remove the LH 2nd row seat side bolster. See Bolster - Side -
