Tesla Model 3: Heat Exchanger - Rear Drive Unit (Remove and Replace)
Tesla Model 3 2017-2026 Service Manual / Rear Drive Unit / Rear Gearbox and Halfshafts / Heat Exchanger - Rear Drive Unit (Remove and
Replace)

Remove
Note: Rear subframe assembly components have been removed from illustrations for clarity. It is not necessary to remove the rear drive unit from the rear subframe assembly to perform this procedure.- Remove the rear subframe assembly. See Subframe Assembly - Rear (Remove and Install).
.png)
- Release the clips (x3) that attach the coolant outlet hose to the motor and heat exchanger body.
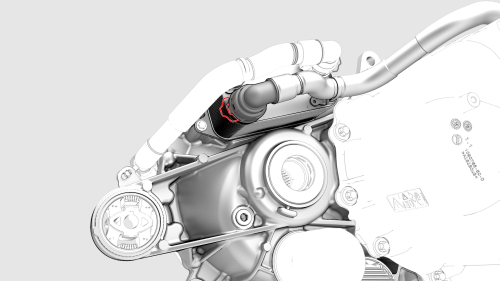
- Disconnect the coolant outlet hose from the heat exchanger.
.png)
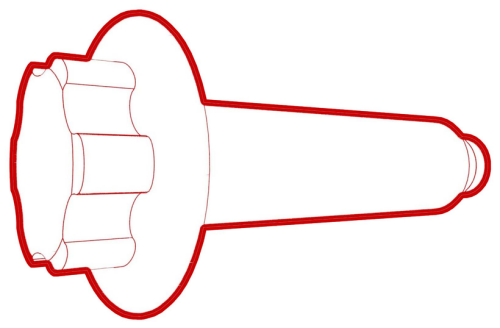
- Release the clips (x4) that attach the coolant inlet hose to the LH mount, gearbox, and heat exchanger body.
.png)
- Disconnect the coolant inlet hose from the heat exchanger.
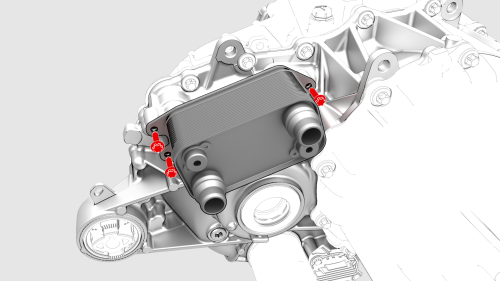
- Remove the bolts (x3) that attach the heat exchanger
to the rear drive unit, and then remove the heat
exchanger from the rear drive unit.
 Torque 5 Nm +30 deg
Install
Installation procedure is the reverse of removal.Caution: Perform a push-pull test to verify that the hose is fully seated.
READ NEXT:
 Oil Pump - Rear Drive Unit(Remove and Replace)
Remove
Disconnect 12V power. See
12V Power (Disconnect and Connect).
Drain the gearbox fluid from the rear drive unit. See
Gearbox Fluid - Rear Drive Unit (Drain and Refill).
Remove the bo
Oil Screen - Rear Drive Unit
(Remove and Replace)
SPECIAL TOOLS
Tool, Oil Pump Screen Removal, Model 3 (1140378-00-A)
Remove
Remove the oil pump. See
Oil Pump - Rear Drive Unit (Remove and Replace).
Use the special tool to remove the oil sc
Seal - Oil - Differential to
Halfshaft - Rear Drive Unit - LH
(Remove and Replace)
SPECIAL TOOLS
Adapter, Coolant Reservoir Pressure Test (1130942-00-B)
Install Tool, Output Seal, Model 3 (1131206-00-A)
Remove
Remove the LH rear drive unit halfshaft. See
Halfshaft - Rear Driv
SEE MORE:
Skid Plate - HV Battery - Rear (Remove and Replace)
DRAFT
Warning:
This procedure was derived from pre-production computer models, and
might not reflect the real-world situation. Warnings and cautions might be
missing. Follow safety requirements and use extreme caution when working on or
near high voltage systems and components.
Do not redistri
Fluids and Capacities
Fluids
Component / System
Description
Air Conditioning
Depending on its intended
sales region, the air conditioning system is filled with R134a or
R1234yf refrigerant.
1012403-00-B, REFRIGERANT, R134a
2006643-00-A, REFRIGERANT, R1234yf
If
© 2019-2026 Copyright www.tmodel3.com
