Tesla Model 3: Heater - PTC- Remove
Tesla Model 3 2017-2024 Service Manual / Thermal Management / Cabin HVAC / Heater - PTC (Remove and Replace) / Heater - PTC- Remove
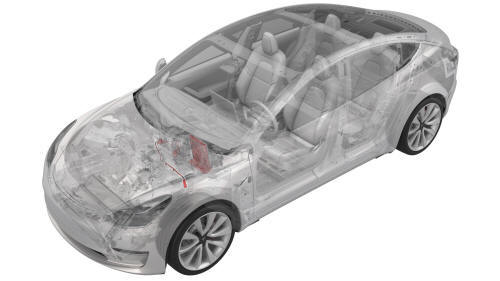
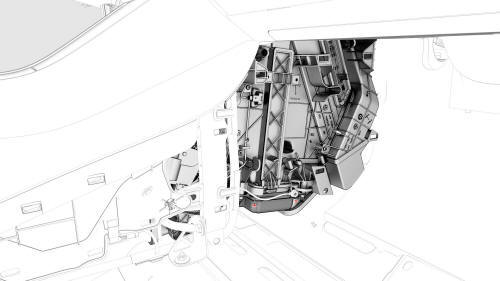
Remove
- Raise and support the vehicle on a 2 post lift. See Raise Vehicle - 2 Post Lift.
- Remove the rear underhood apron. See Underhood Apron - Rear (Remove and Replace).
- Remove the 2nd row lower seat cushion. See Seat Cushion - Lower - 2nd Row (Remove and Replace).
- Remove the LH center console side panel carpet. See Carpet - Side Panel - Center Console - LH (Remove and Replace).
- Remove the RH instrument panel end cap. See End Cap - Instrument Panel - LH (Remove and Replace).
- Remove the RH middle A-pillar trim. See Trim - A-Pillar - Middle - LH (Remove and Replace).
- Remove the RH lower A-pillar trim. See Trim - A-Pillar - Lower - LH (Remove and Replace).
- Remove the RH center console side panel carpet. See Carpet - Side Panel - Center Console - LH (Remove and Replace).
- Remove the RH footwell cover. See Cover - Footwell - Passenger (LHD) (Remove and Replace).
- Disconnect 12V power. See 12V Power (Disconnect and Connect).
- Perform the vehicle electrical isolation procedure. See Vehicle Electrical Isolation Procedure.
.png)
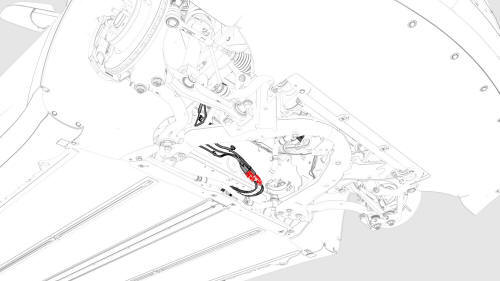
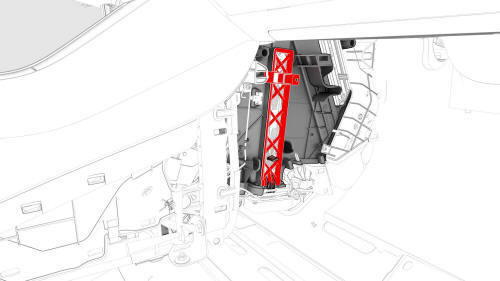
- Remove the HV cap that covers the HV harness located on the LH side of the penthouse.
- Remove the LH 2nd row seat side bolster. See Bolster - Side - Seat - 2nd Row - LH (Remove and Replace).
- Remove the LH rear sill panel trim. See Trim - Sill Panel - Rear - LH (Remove and Replace).
.jpg)
- Remove the bolts that attach the wiring harness bracket at the penthouse.
- Release the clips that attach the wiring harness bracket, and then remove the bracket from the vehicle.
.jpg)
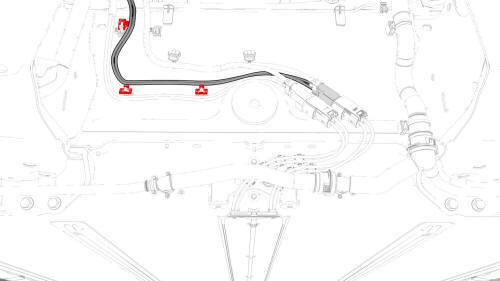
- Release the clip that attaches the wiring harness to the LH lower C-pillar.
.jpg)
- Raise the handle to disconnect the electrical harness from the DC Input assembly.
- Remove the front area shield panel. See Panel - Aero Shield - Front (Remove and Replace).
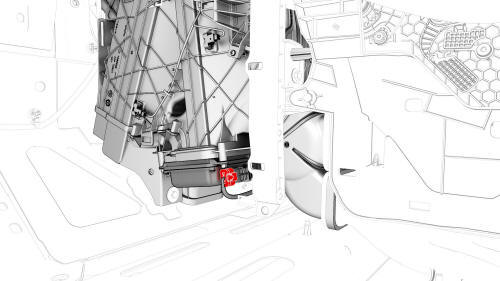
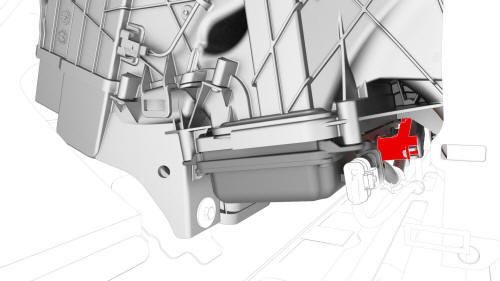
- Disconnect the HV harness connector from the PTC heater.
Note: Release the bracket from the body for better access to the connector.
- Release the clips that attach the PTC heater electrical connector to the body.
- Lower the vehicle.
- Remove the front passenger knee airbag. See Airbag - Knee - Front Passenger (Remove and Replace).
- Remove the RH footwell duct. See Duct - Footwell - RH (Remove and Replace).

- Release the clips that attach the front RH carpet to the vehicle, and then fold the front RH carpet rearwards.
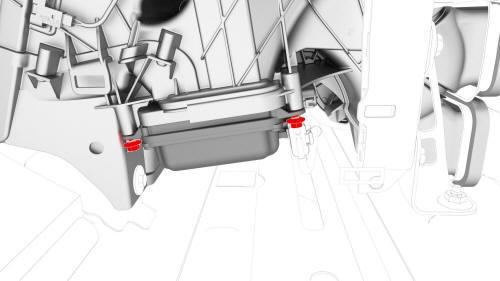
- Disconnect the 12V electrical connector from the PTC heater.
- Release the clip that attaches the PTC heater electrical harness to the HVAC assembly.
- Remove the bolts that attach the LH side of the PTC heater to the HVAC assembly.
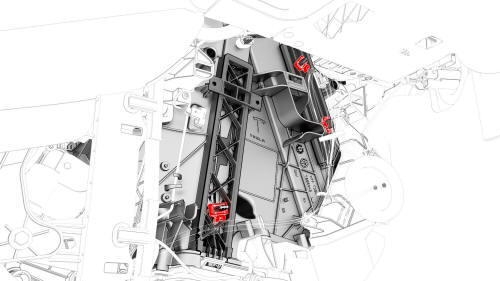
- Remove the clips that attach the PTC heater electrical harness to the HVAC assembly.
.jpg)
- Remove the nut that attaches the instrument panel harness ground strap to the PTC heater.
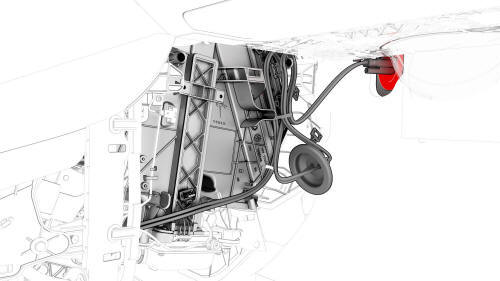
- Remove the grommet, and then carefully pull the HV cable through the bulkhead.
Caution:
Do not damage the HV cable while feeding through the bulkhead.
- Remove the bolts that attach the RH side of the PTC heater to the HVAC assembly, and then lower the PTC heater from the HVAC assembly.
- Use a razor blade to carefully cut the inner edge of the airbox side cover, and then remove and discard the airbox side cover.
Caution:
Use caution when cutting the airbox. Avoid contact with the PTC heater.
- Slide the PTC heater out of the HVAC assembly, and then remove the PTC heater from the vehicle.
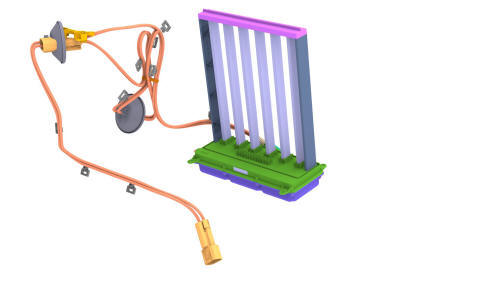
- Remove the sealing plate from the PTC heater.
Note: Replace the sealing plate, if damaged.
READ NEXT:
 Heater - PTC- Install
Install
Install the sealing plate onto the new PTC heater.
Note: Failure to transfer the sealing plate has the potential of
introducing air or water leakage.
Slide the PTC heater into the HVAC a
HVAC Assembly- Remove
SPECIAL TOOLS
Kit, EPB Release, Handheld (1134520-00-A)
XP-10 Power Supply, XP-10 (1129348-00-A)
Remove
Remove the rear underhood apron. See
Underhood Apron - Rear (Remove and Replace).
Remove t
SEE MORE:
Drive Unit - Front
- Remove
SPECIAL TOOLS
Tool, Axle Extraction, Model 3 (1133386-00-A)
Lifting Sling, Drive Unit, Model 3 (NA, APAC)
(1130279-00-A)
Trim - Side Rail - LH (Remove and Install)
Remove
Open the LH rear door.
Release the push clips (x2) that attach the LH side rail trim to the LH
side rail.
Tip:
Release the top clip first (closest to the coat hanger) and work towards the
trunk.
Release the side rail trim tethers (x2) from the side rail trim one at a
t
© 2019-2024 Copyright www.tmodel3.com
