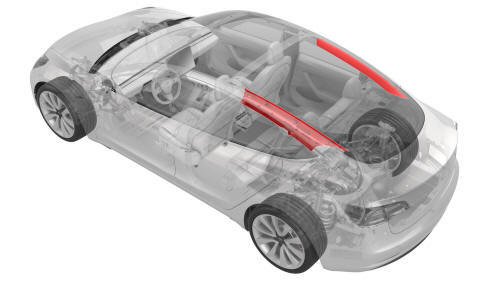
Tesla Model 3: Trim - Side Rail - LH (Remove and Install)
Tesla Model 3 2017-2026 Service Manual / Interior Trim / Pillar and Sill Trim / Trim - Side Rail - LH (Remove and Install)
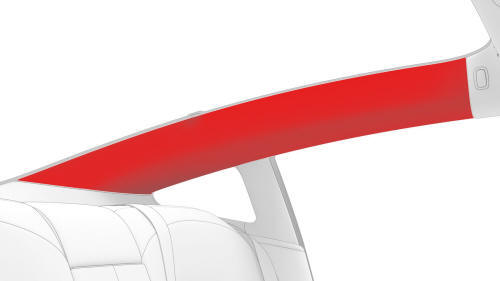
Remove
- Open the LH rear door.
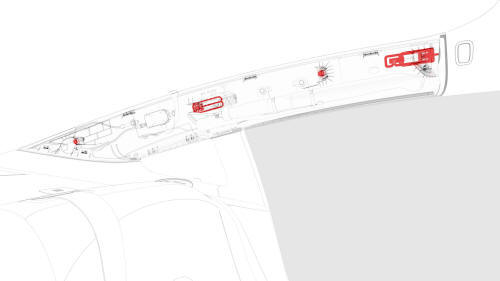
- Release the push clips (x2) that attach the LH side rail trim to the LH side rail.
.png) Tip:
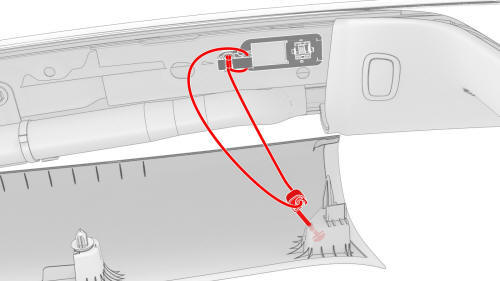
Release the top clip first (closest to the coat hanger) and work towards the
trunk.
Tip:
Release the top clip first (closest to the coat hanger) and work towards the
trunk.
- Release the side rail trim tethers (x2) from the side rail trim one at a time by twisting and pulling away from the trim.
Caution:
Do not remove the side rail trim tethers from the body side. If removed from the body side, the tethers will have to be replaced.
- Remove the side rail trim from the vehicle.
Note: Remove any remaining LH side rail trim push clips from the LH
side rail, and remove all push clips from the LH side rail trim.
Install
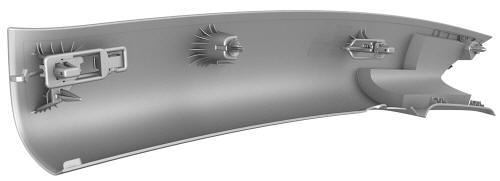
- Install new push clips (x2) onto the LH side rail trim.
- Make sure that the side rail tethers are undamaged, and at the correct positions on the LH side rail.
- Hook the side rail trim tethers (x2) on the side rail trim, and then position the side rail trim on the vehicle.
- Firmly fasten the push clips that attach the LH side rail trim to the LH side rail.
Note: Fasten the top clip first near the coat hanger, and work towards the trunk.
Important: Make sure each clip makes an audible snap as they engage with the side rail. If there is no audible snap, the clip has not properly attached. Remove the side rail trim, inspect the clips, replace any damaged clips, and then re-install the trim.
READ NEXT:
 Trim - Side Rail - LH (Remove and Replace)
Remove
Remove the LH side rail trim. See
Trim - Side Rail - LH (Remove and Install).
Release the clips that attach the old LH side rail tethers to the LH
side rail, and then remove and d
Trim - Sill Panel - Rear - LH (Remove and Replace)
Remove
Open all doors.
Lower all windows.
Remove the 2nd row lower seat cushion. See
Seat Cushion - Lower - 2nd Row (Remove and Replace).
Remove the LH 2nd row seat side bolster. See
Bolster
SEE MORE:
Fuse - Power Conversion System - HV Battery (Remove and Replace)
Fuse - Power Conversion System - HV Battery-
Remove
SPECIAL TOOLS
Ratchet, 1/4" Sq Dr, HV Insulated (1057602-00-A)
Ext Bar, Wobble, 1/4" Dr, HV Insulated (1057603-00-A)
Skt, 1/4" Sq Dr, 8mm, HV Insulated (1057604-00-A)
Magnet, Flexible, HV Insulated, 18" (1057607-00-A)
Asy, Service Cover, Penthou
Handle - Exterior Release - Door - Rear - LH (Adjust)
SPECIAL TOOLS
Gauge, Taper Step (1080552-00-A)
Procedure
Remove the LH rear door exterior release handle. See Handle - Exterior
Release - Door - Rear - LH (Remove and Replace).
Exercise the handle mechanism, pulling the handle to the maximum
position and releasing it, 5 times.
If the hand
© 2019-2026 Copyright www.tmodel3.com
