Tesla Model 3: Panel - Door Trim - Front - LH (Remove and Install) - Remove
Tesla Model 3 2017-2024 Service Manual / Interior Trim / Door Trim / Panel - Door Trim - Front - LH (Remove and Install) / Panel - Door Trim - Front - LH (Remove and Install) - Remove
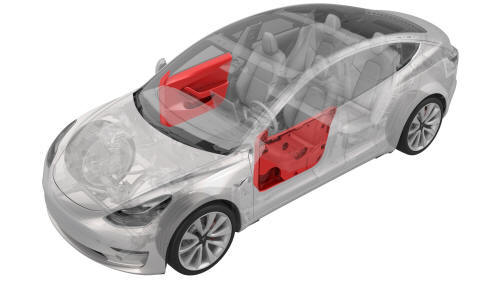
Remove
- Open the front LH door, and fully lower the window.
- Remove the front LH door tweeter. See Tweeter - Front Door - LH (Remove and Replace).
- Remove the LH front door puddle light. See Puddle Light - Front Door - LH (Remove and Replace).
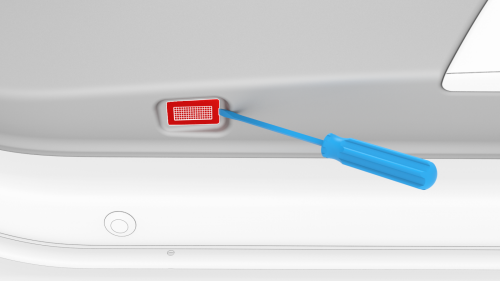
- Release the clips that attach the reflector to the rear edge of the LH front door trim panel and the screw cover to the front of the armrest, and then remove the reflector and cover from the trim panel.
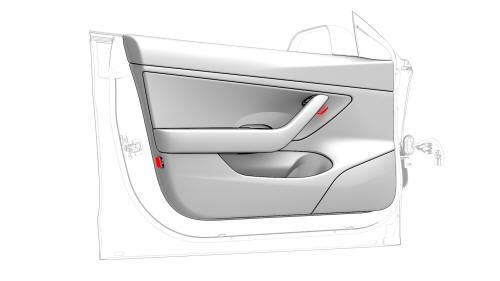
Rear
Middle
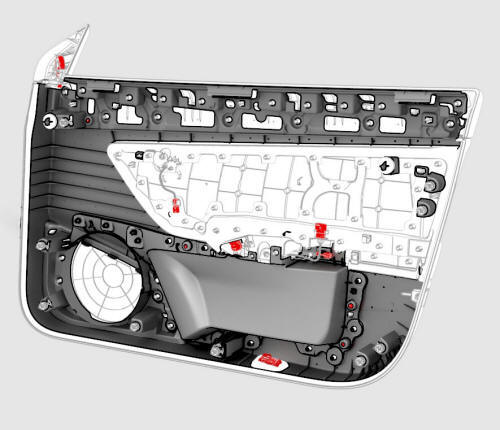
- Remove the screws that attach the trim panel to the door.
Front
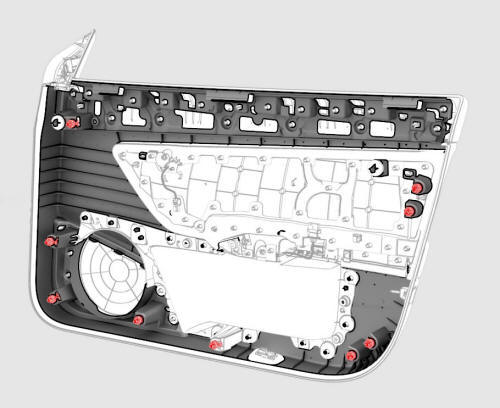
Trim Panel Clip Locations
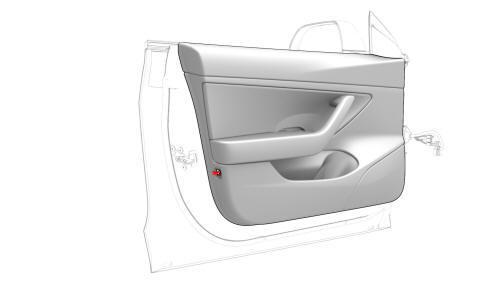
- Pull out on the trim panel from the puddle light opening to release the clips that attach the trim panel to the door.
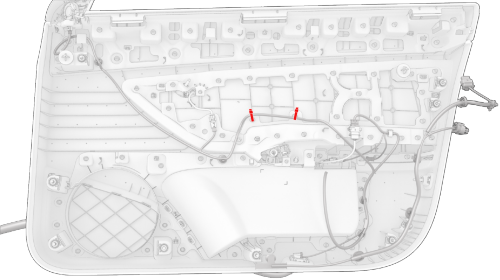
Door Clip Locations
Caution:
Do not remove the trim panel from the door at this time.
- Continue to pull and release all of the clips around the edge of the trim panel, working from the bottom up.
Caution:
Do not remove the trim panel from the door at this time.
- Remove the manual release cable collar from the trim panel, and pivot the collar down to a vertical orientation.

- Slide the cable barrel end out of the release lever, and remove the cable from the trim panel.
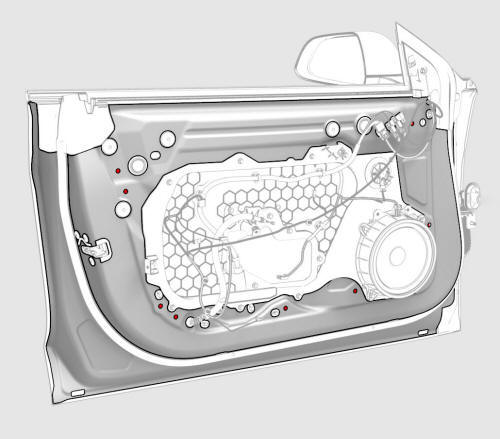
Trim Panel Connectors
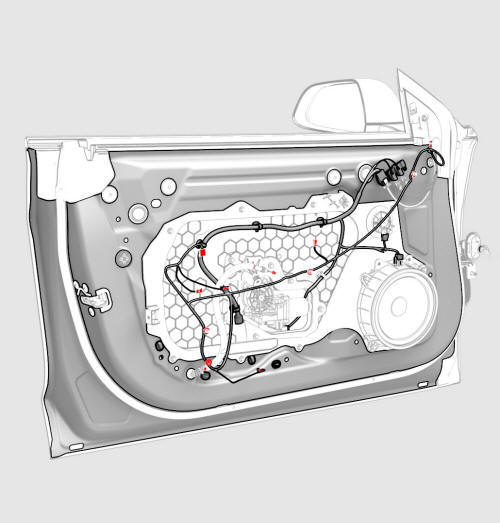
Door Electrical Harness Connectors
- Disconnect the electrical harness from the connectors, and then release the clips that attach the electrical harness to the trim panel.
Caution:
Do not remove the trim panel from the door at this time.
- If present, remove and discard the cable ties that attach the electrical harness to the door trim panel.
- Raise the trim panel up to unhook it from the door, and then remove the
panel from the door.

READ NEXT:
 Panel - Door Trim - Front - LH (Remove and Install) - Install
Install
Inspect the condition of the LH front door and the LH front door trim
panel. Replace any broken clips and repair any damage.
Bring the trim panel to the door, and rest it on the door edge
Panel - Door Trim - Front - LH (Remove and Replace) -
Remove
Remove
Open the front LH door, and fully lower the window.
Remove the front LH door tweeter. See
Tweeter - Front Door - LH (Remove and Replace).
Remove the LH front door puddle light. See
SEE MORE:
Retrieving Footage
To retrieve video footage from the flash drive, remove the flash drive from the front USB port and use a personal computer or other device to access the files. Navigate to the "TeslaCam" folder on the flash drive.
Within the "TeslaCam" folder, there are three sub-folders: Recent
Visual and Audio Feedback
When you shift to Reverse, the Park Assist
view displays on the touchscreen, showing
objects that are in close proximity to the front
and rear of Model 3. This view closes when
you shift into Drive unless an object is
detected close to the front of Model 3, in
which case the Park Assist view c
© 2019-2024 Copyright www.tmodel3.com
