Tesla Model 3: Phone Tray - Center Console (Remove and Replace)
Tesla Model 3 2017-2026 Service Manual / Interior Trim / Center Console / Phone Tray - Center Console (Remove and Replace)
Remove
- Open both the forward and rearward center console rotating lids.
- Remove and secure the customer's belongings from the phone tray, if needed.
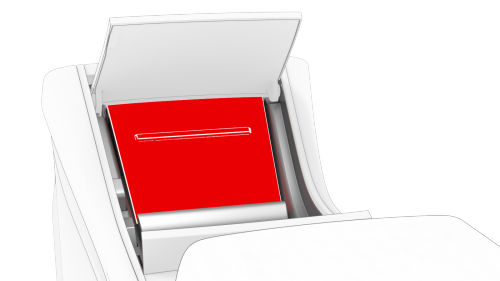
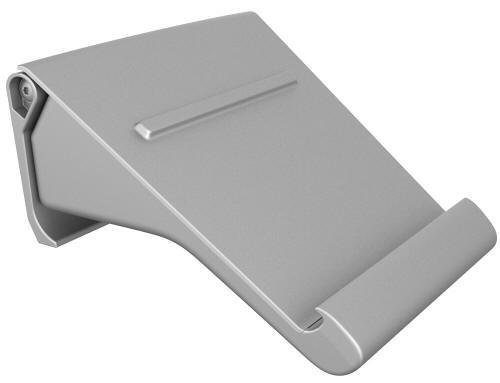
- Remove the phone dock mat from the center console.
- If any cables are installed into the center console phone tray routing, raise the phone tray, slide the phone tray bar to the left, and then remove the bar from the phone tray.
- Remove any cables from the center console phone tray routing, if installed, and then move the cables through the opening in the center console phone tray.
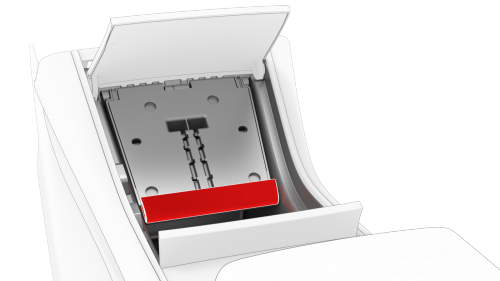
- Raise the center console phone tray to access the screws.
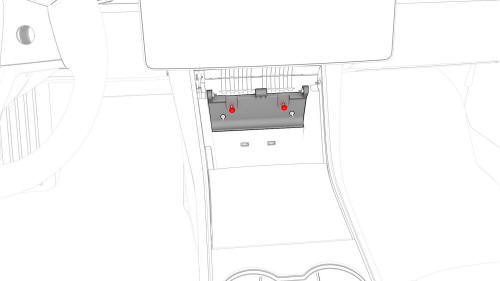
- Remove the screws that attach the center console phone tray to the
center console.
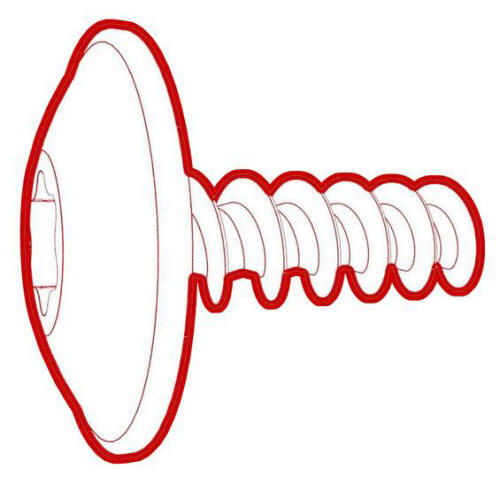 Torque 1 Nm
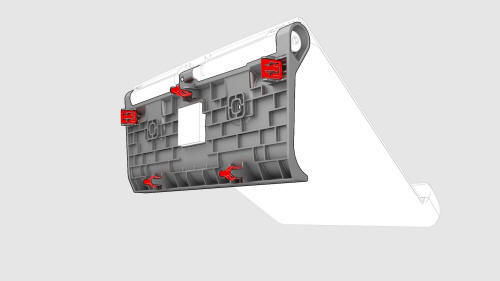
- Release the clips (x5) that attach the center console phone tray to the
center console, and remove the tray from the vehicle.
Install
Installation procedure is the reverse of removal, except for the following:
Note: Make sure the magnet and the felt tape holding the magnet have not moved out of place before installation.
READ NEXT:
 Coat Hook - Rear - LH (Remove and Replace)
Remove
Remove the headliner. See
Headliner (Remove and Install).
Release the clips that attach the bezel to the LH rear coat hook, and
then remove the coat hook from the headliner.
Headliner (Remove and Install)
Remove
Remove the RH side rail trim. See
Trim - Side Rail - LH (Remove and Replace).
Push to open the RH rear coat hook.
Pry open the RH rear coat hook screw cover with a small flat head
SEE MORE:
Seat Back - 2nd Row - LH (Remove and Install)
Remove
Remove the 2nd row lower seat cushion. See
Seat Cushion - Lower - 2nd Row (Remove and Replace).
Remove the LH 2nd row seat side bolster. See
Bolster - Side - Seat - 2nd Row - LH (Remove and Replace).
Release the clips that attach the bolster bracket, and remove the
bracket fro
Fluid Coupling (55 Degrees) - Rear Drive Unit (Remove and Replace)
SPECIAL TOOLS
Kit, Svc Plug, Cooling Hose, Model 3
(1135762-00-A)
Remove
Remove the mid aero shield panel. See Panel - Aero
Shield - Mid
© 2019-2026 Copyright www.tmodel3.com
