Tesla Model 3: Stabilizer Bar - Rear (Remove and Replace)
Remove
- Raise and support the vehicle. See Raise Vehicle - 2 Post Lift.
- Remove the mid aero shield panel. See Panel - Aero Shield - Mid (Remove and Replace).
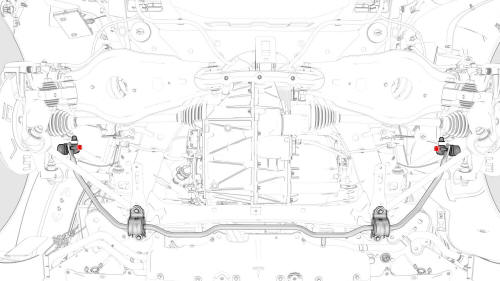
- Remove and discard the nuts that attach the stabilizer bar to the end links.
Note: Loosen the nut first, and then continue to remove the nut by counter-holding the ball joint with a hex wrench.
Note: Might need to move the rear stabilizer bar up/down to get the correct angle in order to remove the end links.
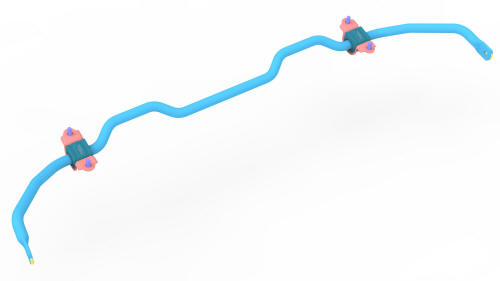
- Support the center of the rear stabilizer bar with a support stand.
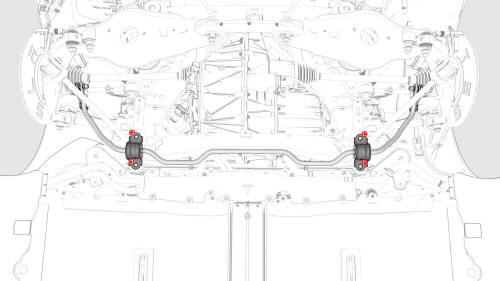
- Remove and discard the bolts that attach the rear stabilizer bar to the rear subframe.
- Lower the support stand, and then remove the rear
stabilizer bar from the vehicle.
Install
- Place the rear stabilizer bar into position for installation onto the vehicle, and then raise the support stand to support the rear stabilizer bar.
- Install new bolts that attach the rear stabilizer
bar to the rear subframe.
 Torque 30 Nm
 - Align the LH end link with the rear stabilizer bar.
Note: Move the rear stabilizer bar up/down to get the correct angle to install the rear link.
- Hand-tighten the new nut that attaches the LH end link to the rear stabilizer bar.
Note: Counter-hold the ball joint with a hex wrench.
- Tighten the nut that attaches the LH end link to the
rear stabilizer bar. Mark the nut with a paint pen.
 Torque 55 Nm
 - Align the RH end link with the rear stabilizer bar.
Note: Move the rear stabilizer bar up/down to get the correct angle to install the rear link.
- Hand-tighten the new nut that attaches the RH end link to the rear stabilizer bar.
Note: Counter-hold the ball joint with a hex wrench.
- Tighten the nut that attaches the RH end link to the
rear stabilizer bar. Mark the nut with a paint pen.
Torque 55 Nm
- Remove the support stand from underneath the vehicle.
- Install the mid aero shield panel. See Panel - Aero Shield - Mid (Remove and Replace).
- Lower the vehicle from the lift.
READ NEXT:
 Suspension - Rear (Check Torque)
SPECIAL TOOLS
Tool, Spring Compressor, Hook, Model 3
(1135103-00-A)
3/4 Ton Underhoist Stan
Toe Link - Rear - LH (Remove and Replace)
Remove
Remove the LH rear wheel. See Wheel (Remove and
Install).
SEE MORE:
Coolant - HV Battery (Drain and Refill)
SPECIAL TOOLS
Drive Unit Pressure Test Fixture (1053600-00-B)
Adapter, Coolant Reservoir Pressure Test (1130942-00-B)
Kit, Coolant Leak Test Adapters, Model 3 (1132185-00-B)
Kit, Coolant Drain & Fill Adapters, M3 (1133843-00-A)
Kit, Svc Plug, Cooling Hose, Model 3 (1135762-00-A)
Kit, Battery C
Mount - Front Drive Unit - LH (Remove and Replace)
Remove
Remove the front subframe assembly from the vehicle. See
Subframe Assembly - Front (Dual Motor) (Remove and Install).
Release the clips that attach the front drive unit harness to the front
drive unit inverter.
Remove the bolts that attach the LH front drive unit mount to the
