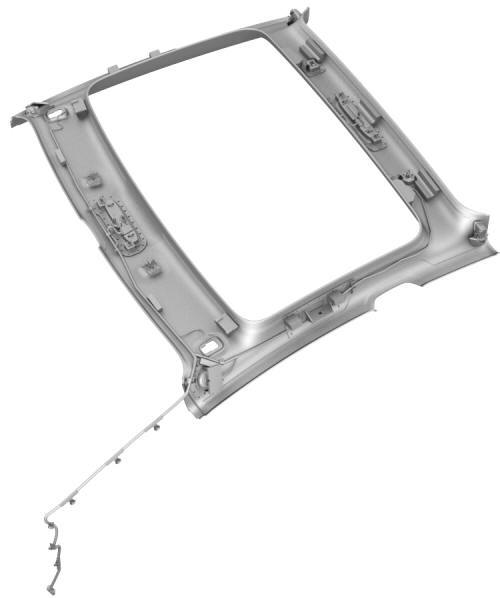
Tesla Model 3: Headliner (Remove and Install)
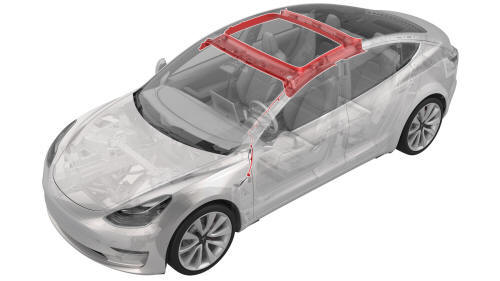
Remove
- Remove the RH side rail trim. See Trim - Side Rail - LH (Remove and Replace).
- Push to open the RH rear coat hook.
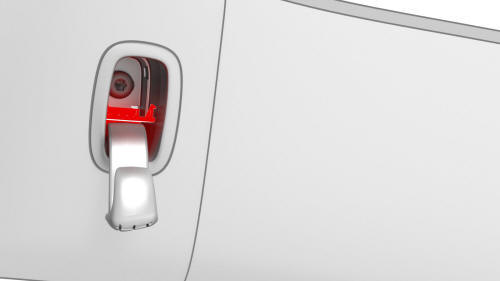
- Pry open the RH rear coat hook screw cover with a small flat head screwdriver.
.jpg)
LH shown, RH similar
- Remove the screw that attaches the RH rear coat hook to the body.
.jpg) Torque 2.5 Nm
Torque 2.5 Nm - Release the clips that attach the RH upper B-pillar trim to the vehicle, and then move the upper B-pillar trim aside.
Note: It is not necessary to completely remove the upper B-pillar trim from the vehicle; only remove the trim with the seat belt still going though the upper B-pillar trim and set it aside.
- Repeat step 1 through step 5 on the LH side of the vehicle.
- Remove the LH instrument panel end cap. See End Cap - Instrument Panel - LH (Remove and Replace).
- Remove the LH middle A-pillar trim. See Trim - A-Pillar - Middle - LH (Remove and Replace).
- Remove the LH lower A-pillar trim. See Trim - A-Pillar - Lower - LH (Remove and Replace).
- Remove the LH upper A-pillar trim. See Trim - A-Pillar - Upper - LH (Remove and Replace).
- Remove the driver sun visor. See Sun Visor - Driver (Remove and Replace).
- Remove the driver sun visor check base. See Check Base - Sun Visor - Driver (Remove and Replace).
- Remove the lower quad camera cover. See Quad Camera Cover - Lower (Remove and Replace).
- Remove the rear view mirror. See Mirror - Rear View (Remove and Replace).
- Repeat step 7 through step #GUID-87FD8D3D-05FF-471F-B2AC-EC4D65ED3E08/GUID-D41B944C-6C94-474F-8DCF-74D98C578CB8 on the RH side of the vehicle.
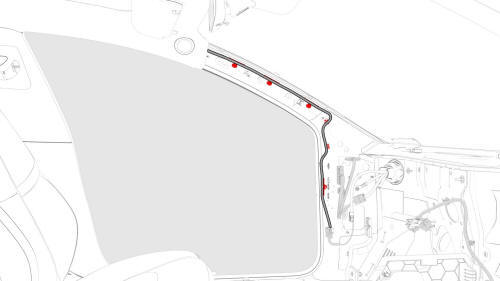
- Release the clips that attach the headliner electrical harness to the LH A-pillar area.
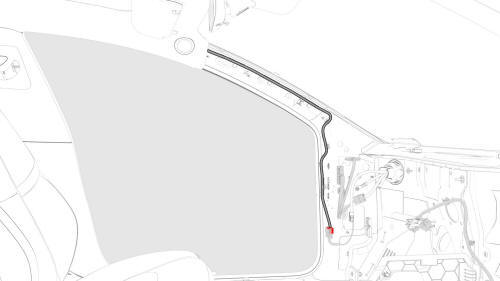
- Disconnect the headliner electrical harness.
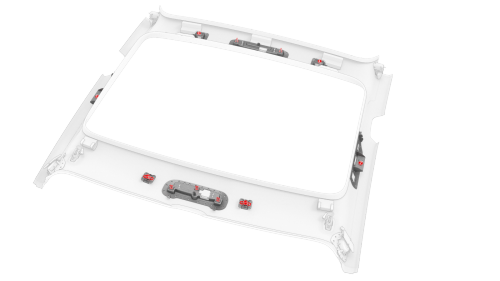
- Release the clips that attach the headliner to the body.
- With an assistant, remove the headliner from the vehicle.
Note: Remove the headliner through the front passenger door.
READ NEXT:
 Headliner (Remove and Replace)
Remove
Remove the headliner. See
Headliner (Remove and Install).
Release the clips that attach the LH and RH headliner tweeter covers to
the headliner, and remove the tweeter covers from
Overhead Console - Front (Remove and Replace)
Remove
Release the clips (x2) that attach the front overhead console to the
headliner, and then lower the console from the headliner.
Caution:
To avoid damaging the headliner, do not pry a
Overhead Console - Rear (Remove and Replace)
Remove
Release the clips (x2) that attach the rear overhead console to the
headliner, and then lower the console from the headliner.
Caution:
To avoid damaging the headliner, do not pry
SEE MORE:
Bracket - License Plate - Front (NA) (Retrofit)
Retrofit
Clean the front center surface of the front fascia.
Remove the backing from the long horizontal tape strip on the new front
license plate bracket.
Fold the backing of the vertical tape strips out at a 90 degree angle.
Hold the license plate bracket horizontally and
Spoiler - Rear (Retrofit using Tape)
Procedure
Clean the installation surface of the spoiler with isopropyl alcohol
(IPA) wipes, and allow it to dry before continuing.
Note: Clean any moisture or contaminates that might be
present from rain or vehicle washing, otherwise this might result in poor
adhesion of the rear spoiler.
© 2019-2026 Copyright www.tmodel3.com
