Tesla Model 3: Pipe - High Pressure - Compressor to Condenser - Install
Tesla Model 3 2017-2024 Service Manual / Thermal Management / Refrigerant System / Pipe - High Pressure - Compressor to Condenser (Remove and Replace) / Pipe - High Pressure - Compressor to Condenser - Install
Install
- Install the compressor-to-condenser high pressure pipe into the vehicle.
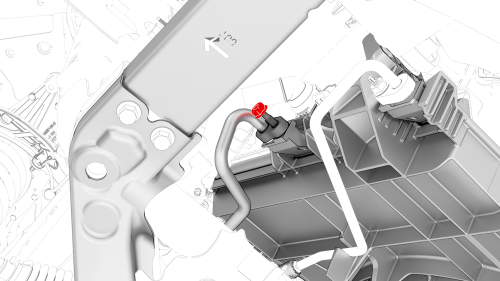
- Connect the high pressure transducer electrical connector.
- Install a new O-ring to the compressor-to-condenser high pressure pipe.
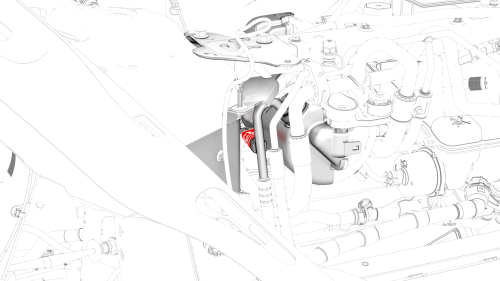
- Position the compressor-to-condenser high pressure pipe into the A/C
compressor, and then install the nut that attaches the
compressor-to-condenser high pressure pipe to the A/C compressor.
 Torque 22 Nm
.png)
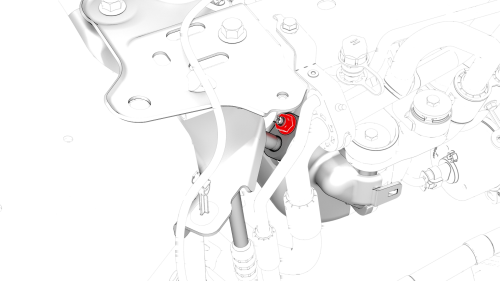
- Position the compressor-to-condenser high pressure pipe into the EXV
assembly, and then install the bolt that attaches the liquid line to the
chiller and EXV assembly.
.png) Torque 22 Nm
Torque 22 Nm
.png)
- Connect the electrical connector to the low pressure transducer.
.png)
- Position the suction/liquid lines bracket into the shock tower, and then
install the bolt that attaches the suction/liquid lines bracket to the shock
tower brace.
.png) Torque
5.5 Nm
Torque
5.5 Nm - Fully raise the vehicle.
- Install the nut that attaches the compressor-to-condenser high pressure
pipe to the cooling fan module.
Torque 22 Nm
- Install the front fascia valance. See Valance - Front Fascia (Remove and Replace).
- Install the front aero shield panel. See Panel - Aero Shield - Front (Remove and Replace).
- Connect 12V power. See 12V Power (Disconnect and Connect).
- Perform the A/C refrigerant. See A/C Refrigerant (Recovery and Recharge).
- Install the underhood storage unit. See Underhood Storage Unit (Remove and Replace).
- Install the hood latch cover. See Cover - Hood Latch (Remove and Replace).
- Install the cabin intake duct. See Duct - Cabin Intake (Remove and Replace).
- Install the rear underhood apron. See Underhood Apron - Rear (Remove and Replace).
READ NEXT:
 Pipes - Refrigerant - High / Low Pressure (Remove and Replace)
DRAFT
Warning:
This procedure was derived from pre-production computer models, and
might not reflect the real-world situation. Warnings and cautions might be
missing. Follow safety requirements and
Pressure Transducer - High Pressure (Remove and Replace)
Remove
Remove the underhood storage unit. See Underhood Storage Unit (Remove
and Replace).
Perform the A/C refrigerant recovery. See A/C Refrigerant (Recovery and
Recharge).
Remove the outer
Pressure Transducer - Low Pressure (Remove and Replace)
Remove
Recover the A/C refrigerant. See A/C Refrigerant (Recovery and Recharge).
Note: Completely recover the refrigerant before continuing this
procedure.
Disconnect 12V power. See 12V Power
SEE MORE:
Beam - 12V Battery (RWD) - Install
Install
Install the 12V battery bracket beam on the vehicle.
Caution:
Keep the 12V battery ground terminal away to avoid catching between the
beam and the bracket.
Install the bolts that attach the 12V battery bracket beam to the body.
Torque 9 Nm
Install the bolts that attach the fr
Housing - Center Display (Remove and Replace)
Remove
Remove the touchscreen. See
Touchscreen (Remove and Replace).
Remove the screws that attach the center display housing to the
touchscreen, and then slide the center display housing from the touchscreen.
Torque 3 Nm
Install
Installation procedure is the reverse of rem
© 2019-2024 Copyright www.tmodel3.com
