Tesla Model 3: Seal - Hood (Remove and Replace)
Tesla Model 3 2017-2026 Service Manual / Closures / Seals Body Closures / Seal - Hood (Remove and Replace)
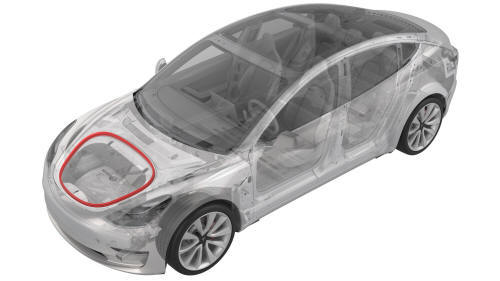
Remove
- Open the hood.
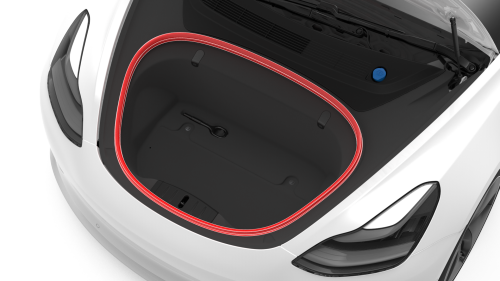
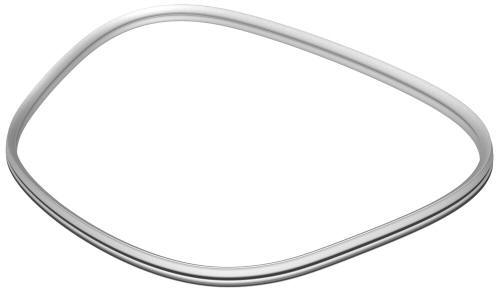
- Release the seal from the underhood storage unit, and then remove the
seal from the underhood storage unit.
Install
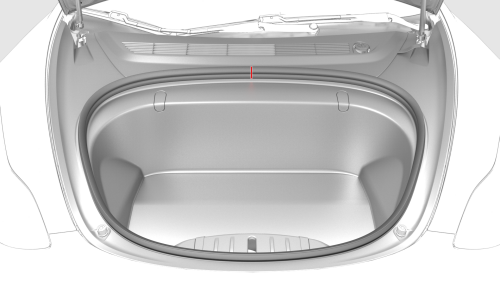
Installation procedure is the reverse of removal, except for the following:
During installation, align the line from the seal to the line from the underhood storage unit.
READ NEXT:
 Seal - Inner Belt - Front Door - LH (Remove and Replace)
Remove
Remove the LH front door trim panel. See
Panel - Door Trim - Front - LH (Remove and Replace).
Remove the rear of the inner belt seal from the door.
Release the rest of the seal fro
Seal - Inner Belt - Rear Door - LH (Remove and Replace)
Remove
Remove the LH rear door trim panel. See
Panel - Door Trim - Rear - LH (Remove and Install).
Release the clips that attach the rear and front pieces of the inner
belt seal to the r
Seal - Outer Belt - Front Door - LH (Remove and Replace)
Remove
Remove the LH front door trim panel. See
Panel - Door Trim - Front - LH (Remove and Install).
Pull up to release the seal that attaches the LH front door outer belt
seal to the fr
SEE MORE:
Harness - Windshield (Remove and Replace)
Harness - Windshield- Remove
Remove
Remove the LH instrument panel end cap. See End Cap - Instrument Panel -
LH (Remove and Replace).
Remove the LH middle A-pillar trim. See Trim - A-Pillar - Middle - LH
(Remove and Replace).
Remove the LH lower A-pillar trim. See Trim - A-Pillar - Lower -
Fascia - Rear (Remove and Install)
Remove
Remove the 2nd row lower seat cushion
Remove the trunk sill trim.
Remove the LH and RH taillights.
On each side of the vehicle, remove the bolt that attaches the corner of
the rear fascia to the body.
Torque 4 Nm
Raise the vehicle partially.
Release the clips and the push nut
© 2019-2026 Copyright www.tmodel3.com
