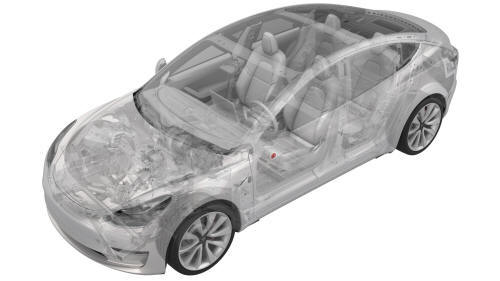
Tesla Model 3: Sensor - Airbag - Door - Front (Remove and Replace)
Tesla Model 3 2017-2026 Service Manual / Safety and Restraint / Sensors / Sensor - Airbag - Door - Front (Remove and Replace)
Note: This procedure was formulated using a release candidate or production model. Follow safety requirements and use extreme caution when working on or near high-voltage systems and components
Remove
- Remove the 2nd row lower seat cushion. See Seat Cushion - Lower - 2nd Row (Remove and Replace).
- Remove the rear underhood apron. See Underhood Apron - Rear (Remove and Replace).
- Disconnect 12V power. See 12V Power (Disconnect and Connect).
- Remove the front LH door trim panel. See Panel - Door Trim - Front - LH (Remove and Install).
- Disconnect the electrical connector from the front door airbag sensor.
- Twist the tabs counterclockwise and remove the front door airbag sensor from the closeout panel.
Install
Installation procedure is the reverse of removal.
READ NEXT:
 Sensor - Airbag - Front - Center (Remove and Replace)
Note:
This procedure was formulated using a release candidate or production
model. Follow safety requirements and use extreme caution when working on or
near high-voltage systems and components.
Sensor - Airbag - Front - LH (Remove and Replace)
Remove
Remove the front LH wheel arch liner. See Wheel Arch Liner - Front - LH
(Remove and Replace).
Disconnect the electrical wiring harness connector from the LH front
airbag sensor.
SEE MORE:
Cover - Rear Suspension - LH (Remove and Replace)
Remove
Remove the bolt that attaches the rear suspension cover to the LH lower
rear control arm assembly.
Torque 6 Nm
Release the tabs (x2) that attach the rear suspension cover to the LH
lower rear control arm assembly, and then remove the rear suspension cover
from the vehicle.
I
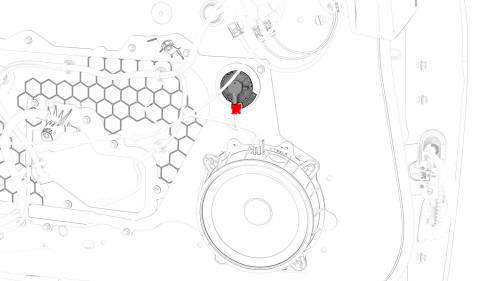
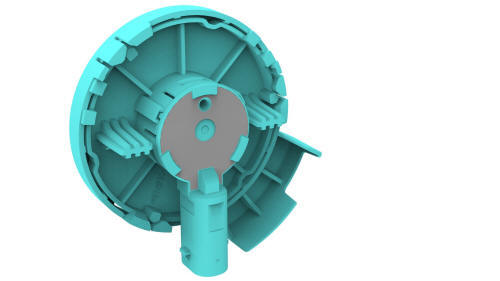
Tweeter - Front Door - LH (Remove and Replace)
Remove
Pull straight up to release the clips that attach the LH front door
tweeter assembly to the door.
Caution: Do not pull the tweeter assembly too far from the door panel,
as the tweeter electrical connector is still attached.
Disconnect the electrical connector from the tweeter, and
© 2019-2026 Copyright www.tmodel3.com
