Tesla Model 3: Sensor - Rear Motor - Speed (Remove and Replace)
Special tool required for this procedure:
- 1451839-00-A SKT, EP10 LOW PROFILE
- 1115031-00-A EXT, WOBBLE, 1/4" DR, 1.25"
Remove
- Drain the oil from the rear drive unit. See Gearbox Fluid - Rear Drive Unit (Drain and Refill).
.png)
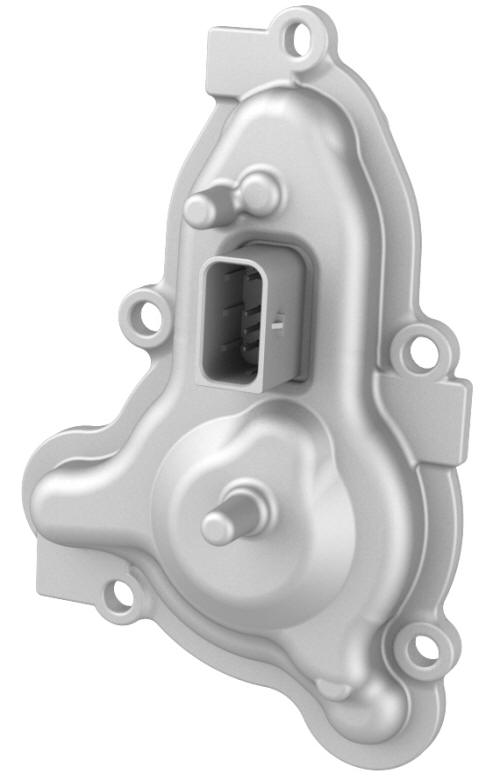
- Disconnect the electrical harness from the resolver connector.
.png)
- Release the clips that attach the harness to the rear drive unit.
Use the low profile EP10 inverted socket (1451839-00-A) with the 1/4-inch drive wobble extension (1115031-00-A) to remove the lower bolt.
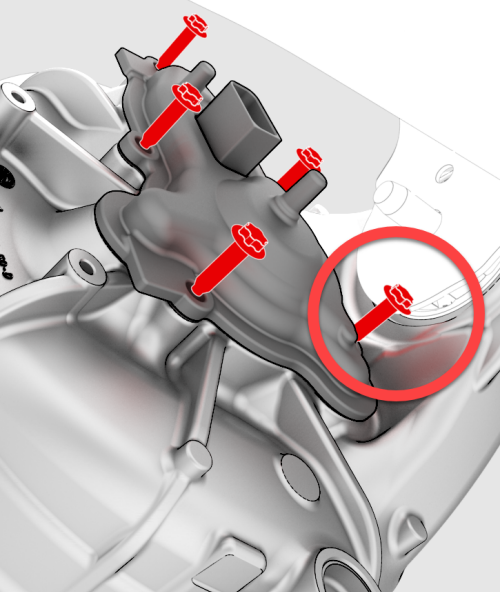
Note: The resolver is spring-loaded and might move during bolt removal.
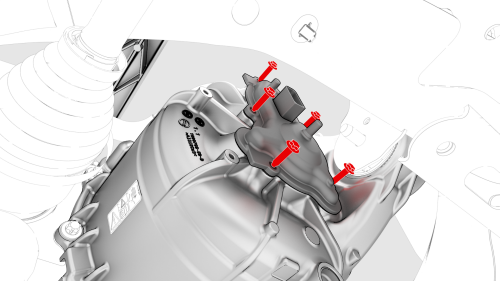
- Remove the bolts that attach the resolver to the
drive unit (1451839-00-A SKT, EP10 LOW PROFILE).
Install
Installation procedure is the reverse of removal, except for the following:- Install a new resolver gasket if none is supplied with the resolver.
- Install a new oil filter and refill the rear drive unit with oil. See Gearbox Fluid - Rear Drive Unit (Drain and Refill).
READ NEXT:
 HV Header - Inverter - Rear Drive Unit (Remove
and Replace)
HV Header - Inverter - Rear Drive Unit (Remove
and Replace)
HV Header - Inverter - Rear Drive Unit - Remove
SPECIAL TOOLS
Extractor, Drive Unit HV Header, Model 3
(1142608-00-B)
SEE MORE:
Pressure Transducer - Low Pressure (Remove and Replace)
Remove
Recover the A/C refrigerant. See A/C Refrigerant (Recovery and Recharge).
Note: Completely recover the refrigerant before continuing this
procedure.
Disconnect 12V power. See 12V Power (Disconnect and Connect).
Disconnect the electrical connector to the low pressure transducer.
Module - Restraint Control (Remove and Replace)
Note:
This procedure was formulated using a release candidate or production
model. Follow safety requirements and use extreme caution when working on or
near high-voltage systems and components.
Remove
Remove the LH and RH center console side panel carpets. See Carpet -
Side Panel - Center
