Tesla Model 3: Shield - Dust - Brake - Rear - LH (Remove and Replace)
SPECIAL TOOLS
Card, Magnetic Field Viewer (1062500-00-A)
Tool, Hub Puller, Hydraulic (1096075-00-A)
Remove
Tip:
While holding the hub in position, turn the
hydraulic hub puller tool handle clockwise to
separate the LH rear drive unit halfshaft from
the hub splines.
Install
Caution:
Do not apply any lubricant to the halfshaft
splines. If lubricant is mistakenly applied,
wipe the splines clean with a shop towel.
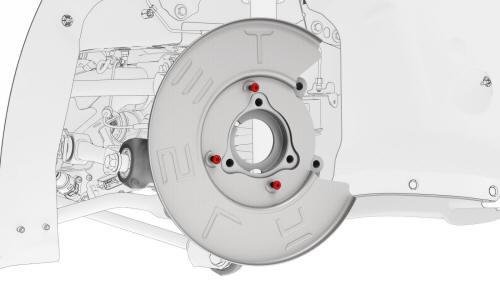
Shield - Dust - Brake - Rear - LH - Remove

.png)
.jpg)
.png)
Halfshaft hidden for clarity
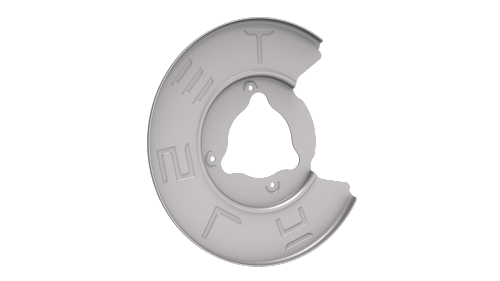
Shield - Dust - Brake - Rear - LH - Install
 Torque 8 Nm
 .jpg)
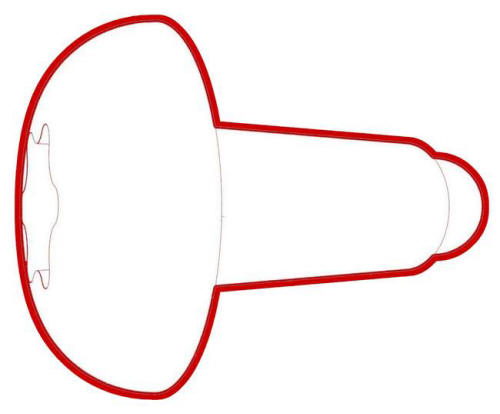
Lubricate the area highlighted red
Halfshaft hidden for clarity
.png) Torque 78 Nm
Torque 78 Nm
.png) Torque 245 Nm
Torque 245 Nm
READ NEXT:
 Shield - Dust - Brake - Rear - LH and RH (Retrofit)
Shield - Dust - Brake - Rear - LH and RH (Retrofit) - Remove
SPECIAL TOOLS
Card, Magnetic Field Viewer (1062500-00-A)
SEE MORE:
Hinge - Trunk - LH (Remove and Replace)
Remove
Remove the trunk assembly. See Trunk (Remove and Install).
Remove the LH side trunk trim. See Trim - Side - Trunk - LH (Remove and
Replace).
Use masking tape to mark the position of the trunk hinge on the body.
Remove the LH trunk gas strut. See Gas Strut - Trunk - LH (Remove and
Doors
Keyless Locking and Unlocking
Locking and unlocking Model 3 is easy and
convenient. Just carry your authenticated
phone or paired key fob with you. Model 3
recognizes the presence of an authenticated
phone or paired key fob and automatically
unlocks when you press a door handle, and
locks when
