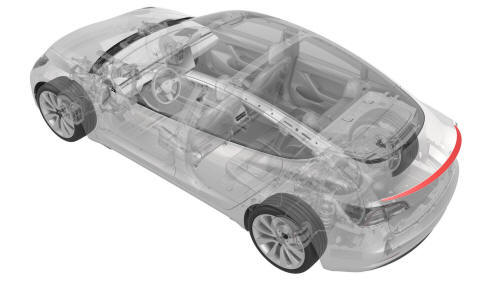
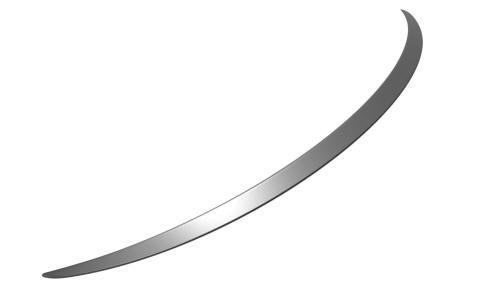
Tesla Model 3: Spoiler - Rear (Retrofit using Tape)
Procedure
- Clean the installation surface of the spoiler with isopropyl alcohol (IPA) wipes, and allow it to dry before continuing.
Note: Clean any moisture or contaminates that might be present from rain or vehicle washing, otherwise this might result in poor adhesion of the rear spoiler.
Note: If the trunk surface requires any paint correction, request assistance from the body shop or shop detailer before the installation of the rear spoiler.
Note: It is recommended to perform this procedure indoors. Acceptable ambient and part temperature for installation is 15-43 degrees Celsius (60-110 degrees Fahrenheit) for proper adhesion.
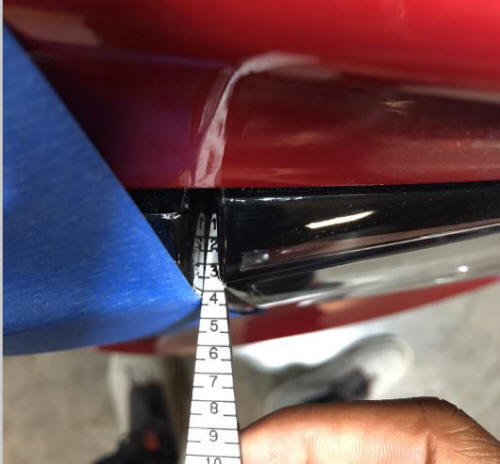
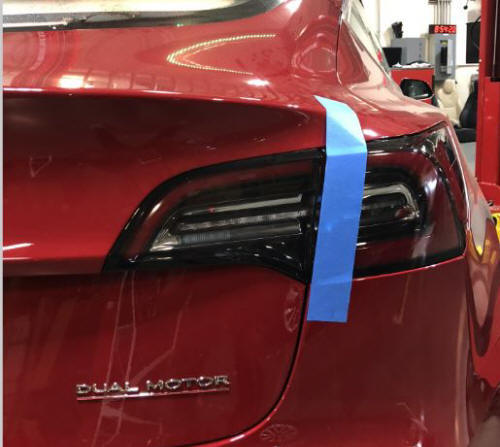
- Check the gap between the LH rear fog/reverse light and the LH taillight. The gap specification is 3 mm. If the gap is out of specification, adjust it as needed.
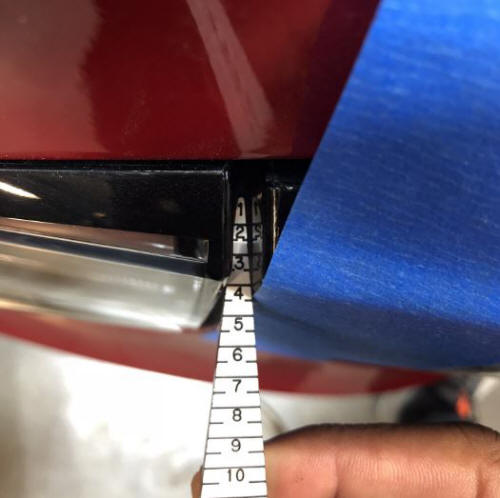
- Check the gap between the RH rear fog/reverse light and the RH taillight. The gap specification is 3 mm. If the gap is out of specification, adjust it as needed.
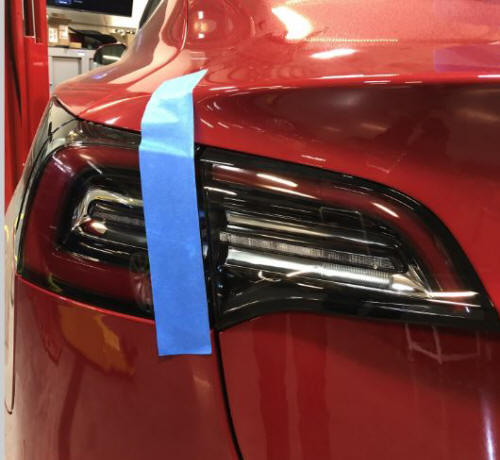
- Apply masking tape along the inner edge of the LH and RH taillights.
- Dry fit the rear spoiler between the taped areas.

- Apply masking tape to the center of the rear spoiler. Leave excess masking tape to apply to the trunk lid later in this procedure.
- Verify the rear spoiler fitment on the trunk lid.
Note: Each rear spoiler might have a slightly different contour. Make sure the rear spoiler is centered on the trunk lid and its corners are laying flat.
- Adhere the center of the masking tape to the trunk lid.
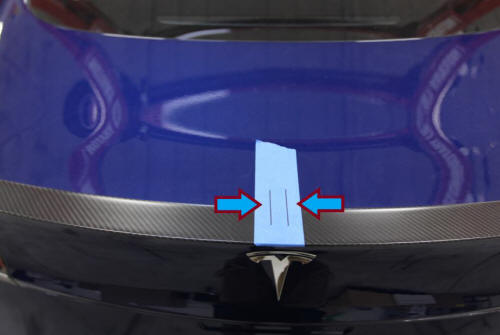
- Mark approximately 25 mm spacing between the centering lines on the masking tape using a paint marker.
- Cut the masking tape to allow removal of the rear spoiler.
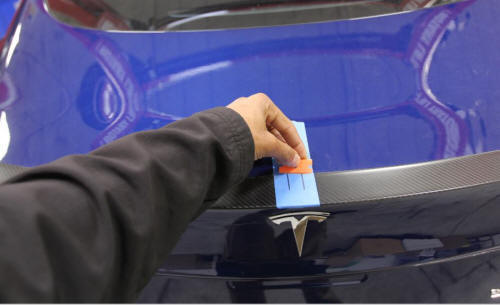
- Remove the tape backing on the rear spoiler to expose the adhesive tape.
- Align the two marks on the masking tape on the rear spoiler with the two marks on the masking tape on the trunk lid. Hold the corners of the rear spoiler away from the trunk lid to install the center section of the rear spoiler first.
- Secure each end of the rear spoiler to the trunk lid.
- Perform the wet out of the adhesive: Starting at the center, firmly push downward and in towards the front of the vehicle, and then continue outwards towards both ends of the spoiler.
- Remove the masking tape from the vehicle, and then clean the work area.
Note: Make sure that the rear spoiler corners are laid flat to the trunk lid and symmetrical.
- Perform the Toolbox routine (refer to SI-18-12-002).
READ NEXT:
 Cover - Shock Tower - LH (Remove and Replace)
Remove
Remove the rear underhood apron. See
Underhood Apron - Rear (Remove and Replace).
Remove the cabin intake duct. See
Duct - Cabin Intake (Remove and Replace).
Remove the hood latch cove
Panel - Cowl Screen (Remove and Replace)
Remove
Remove the rear underhood apron. See
Underhood Apron - Rear (Remove and Replace).
Remove the cabin intake duct. See
Duct - Cabin Intake (Remove and Replace).
Remove the hood latch cove
SEE MORE:
Phone Tray - Center Console (Remove and Replace)
Remove
Open both the forward and rearward center console rotating lids.
Remove and secure the customer's belongings from the phone tray, if
needed.
Remove the phone dock mat from the center console.
If any cables are installed into the center console phone tray routing,
raise t
Autopilot
This is a thorough rundown of the Autopilot Advanced Driver Assistance System (ADAS). It discusses autopilot's features and constraints while highlighting how it improves driving safety and comfort.
This section gives a summary of the functioning of several Autopilot features, including Traffic-Awa
