Tesla Model 3: Striker - Seat Back - 2nd Row - LH (Remove and Replace)
Tesla Model 3 2017-2026 Service Manual / Seats / 2nd Row Seat Assemblies and Hardware / Striker - Seat Back - 2nd Row - LH (Remove and Replace)
Remove
- Remove the 2nd row lower seat cushion. See Seat Cushion - Lower - 2nd Row (Remove and Replace).
- Remove the LH and RH 2nd row seat side bolsters. See Bolster - Side - Seat - 2nd Row - LH (Remove and Replace).
- Remove the LH side rail trim. See Trim - Side Rail - LH (Remove and Replace).
- Remove the LH upper C-pillar trim. See Trim - C-Pillar - Upper - LH (Remove and Replace).
- Remove the RH side rail trim. See Trim - Side Rail - LH (Remove and Replace).
- Remove the RH upper C-pillar trim. See Trim - C-Pillar - Upper - LH (Remove and Replace).
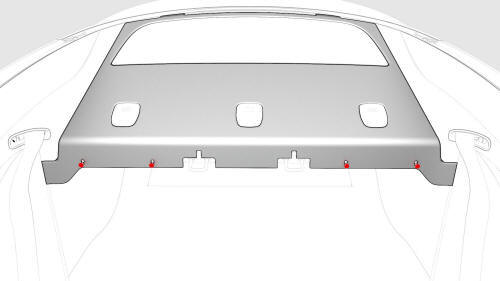
- Release the clips (x4) that attach the front of the package tray to the body.
- Pull the package tray forward, and then lift up the package tray to access the seat back striker.
Note: Support the package tray in the raised position.
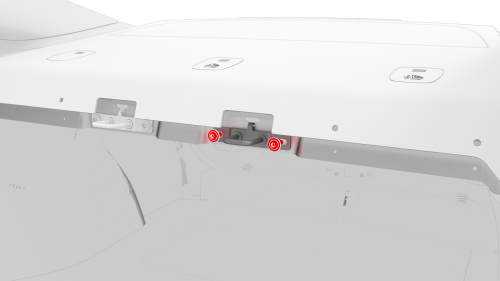
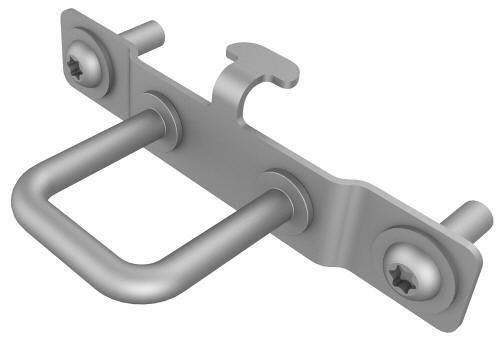
- Remove the bolts that attach the seat back striker to the body, and then
remove the striker from the vehicle.
Torque 16 Nm
Install
Installation procedure is the reverse of removal.
READ NEXT:
 Striker - Seat Back - 2nd Row - RH (Remove and Replace)
Remove
Remove the 2nd row lower seat cushion. See
Seat Cushion - Lower - 2nd Row (Remove and Replace).
Remove the LH and RH 2nd row seat side bolsters. See
Bolster - Side - Seat - 2nd Row - LH
Cover - Outer Side - Driver Seat (Remove and Install)
SPECIAL TOOLS
Key, Seat Belt Release, Model 3 (1133787-00-A)
Remove
Open the LH front door.
Move the driver's seat fully forward, and adjust the seat cushion height
to maximum.
Caution:
Do n
SEE MORE:
Suspension - Rear (Check Torque)
SPECIAL TOOLS
Tool, Spring Compressor, Hook, Model 3
(1135103-00-A)
3/4 Ton Underhoist Stand (1081765-00-A)
1/2 Ton Economy Transmission Jack (10
Roadside Assistance
This is crucial information for owners who have breakdowns or emergencies while driving. It gives a summary of the services and contact details available for Tesla's roadside assistance program.
This section describes what an emergency is—such as a flat tire, malfunctioning car, issue with th
© 2019-2026 Copyright www.tmodel3.com
