Tesla Model 3: Superbottle (Dual Motor) - Install
Tesla Model 3 2017-2025 Service Manual / Thermal Management / Cooling System / Superbottle (Dual Motor) (Remove and Replace) / Superbottle (Dual Motor) - Install
Install

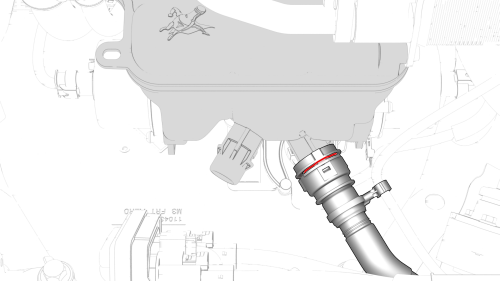
- Connect the front drive unit heat exchanger-superbottle hose to the superbottle, and then install the clip.
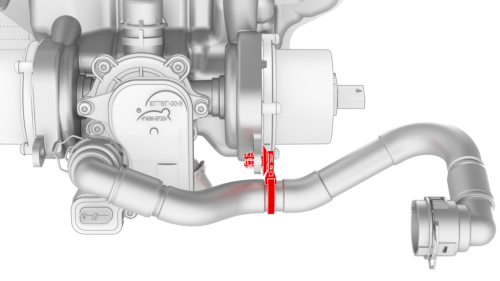
- Install the clip that attaches the front drive unit heat exchanger-superbottle hose to the superbottle.
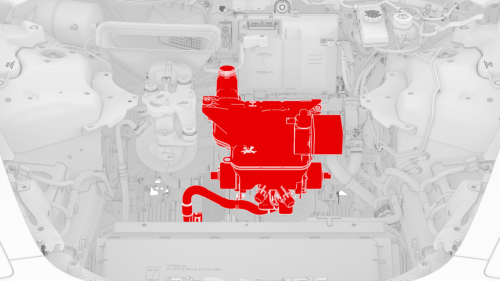
- Position the superbottle in the vehicle.
.png)
- Connect the electrical harness to the 5-way valve actuator connector.
.png)
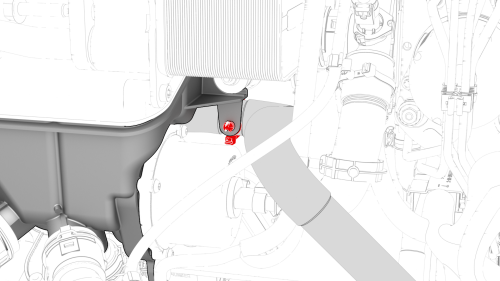
- Install the clip that attaches the electrical harness to the lower LH side of the superbottle.
- Install the clip that attaches the battery return hose to the superbottle.
- Connect the battery return hose to the superbottle, and then install the clip.
.jpg)
- Connect the electrical harness to the superbottle level sensor connector.
.jpg)
- Install the clip that attaches the electrical harness to the RH side of the superbottle.
.png)
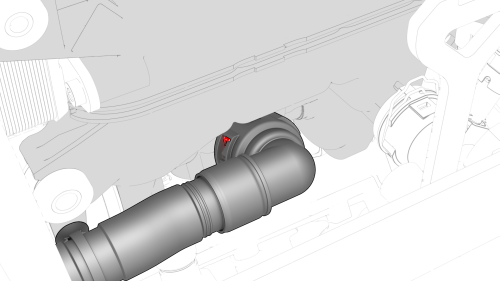
- Install the clip that attaches the suction/liquid lines to the superbottle.
- Connect the powertrain pump-sill connector hose to the superbottle, and then install the clip.
.jpg)
- Connect the electrical harness to the powertrain pump-sill connector hose coolant temperature sensor.
.png)
- Connect the electrical harness to the powertrain coolant pump connector.
- Connect the electrical harness to the HV battery coolant pump connector.
.jpg)
.png)
- Connect the coolant hose to the chiller and EXV assembly, and then install the clip.
Note: Perform a push-pull test on the hose to verify that the hose is fully attached.
.png)
- Connect the electrical harness to the chiller and EXV assembly hose coolant temperature sensor.
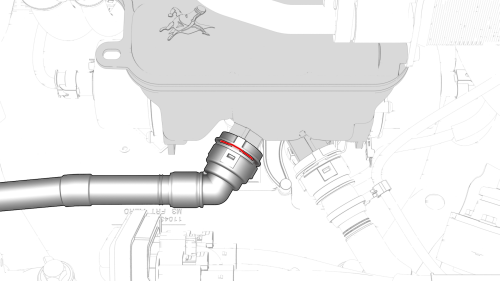
- Connect the radiator outlet hose to the front right of the superbottle, and then install the clip.
- Connect the radiator inlet hose to the front left of the superbottle, and then install the clip.
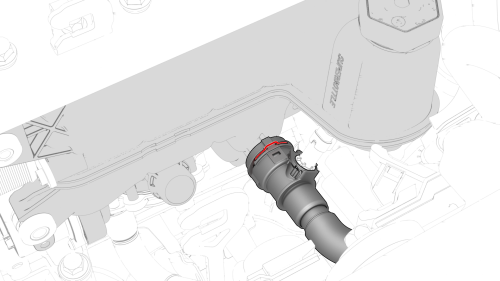
- Remove the plugs from the front drive unit heat exchanger-superbottle hose and coolant port.
.png)
- Connect the front drive unit heat exchanger-superbottle hose to the heat exchanger, and then install the clip.
- Remove the coolant drain container from underneath the vehicle, and then install the front aero shield panel. See Panel - Aero Shield - Front (Remove and Replace).
.png)
- Install new o-rings onto the suction/liquid line fitting, install the
suction/liquid line fitting into the chiller and EXV assembly, and then
install the bolt that attaches the suction/liquid line to the chiller and
EXV assembly.
.png) Torque 5.5 Nm
Torque 5.5 Nm - Install the shock tower brace. See Brace - Shock Tower (Remove and Replace).
- Connect the A/C lines to the vehicle, and then initiate an A/C vacuum and leak test.
- Install the 12V battery. See Battery - 12V (Remove and Replace).
- When the A/C vacuum and leak test is complete, recharge the refrigerant. See A/C Refrigerant (Recovery and Recharge).
- Connect 12V power. See 12V Power (Disconnect and Connect).
- Perform a cooling system vacuum refill. See Cooling System (Vacuum Refill).
- Connect a charge cable to the vehicle.
- Connect a laptop with Toolbox to the vehicle.
- Using Toolbox, run the 5-way valve actuator self-test, "TEST-SELF_VCFRONT_X_FIVE-WAY-VALVE."
Note: This Toolbox routine tests and calibrates the 5-way valve actuator.
- In Toolbox, click the play button next to "TEST-SELF_VCFRONT_X_THERMAL-PERFORMANCE", and then select Run.
- When the thermal performance test is complete, disconnect the charge cable from the vehicle.
- Disconnect the laptop from the vehicle.
- Install the underhood storage unit. See Underhood Storage Unit (Remove and Replace).
- Install the cabin intake duct. See Duct - Cabin Intake (Remove and Replace).
- Install the rear underhood apron. See Underhood Apron - Rear (Remove and Replace).
- Install the 2nd row lower seat cushion. See Seat Cushion - Lower - 2nd Row (Remove and Replace).
READ NEXT:
 Superbottle (RWD) - Remove
SPECIAL TOOLS
Kit, Svc Plug, Cooling Hose, Model 3 (1135762-00-A)
Remove
Disconnect 12V power. See 12V Power (Disconnect and Connect).
Remove the underhood storage unit. See Underhood Storage Uni
Superbottle (RWD) - Install
Install
Install the superbottle to the shock tower brace, and then install the
nuts that attach the superbottle to the shock tower brace.
Install the superbottle to the shock tower brace, and
SEE MORE:
Fascia - Rear (Remove and Install)
Remove
Remove the 2nd row lower seat cushion
Remove the trunk sill trim.
Remove the LH and RH taillights.
On each side of the vehicle, remove the bolt that attaches the corner of
the rear fascia to the body.
Torque 4 Nm
Raise the vehicle partially.
Release the clips and the push nut
Cover - Penthouse (Remove and Replace) - Install
Install
Caution:
Replace all patchbolts.
Replace all nyloc nuts.
Use an IPA wipe to clean any residue from the high voltage controller
mounting bolt holes and both the inside and outside of the penthouse cover
at the bolt holes.
If the aluminum tape retrofit patch is damaged, remove it,
© 2019-2025 Copyright www.tmodel3.com
