Tesla Model 3: Fascia - Rear (Remove and Install)
Tesla Model 3 2017-2026 Service Manual / Body / Bumper / Fascia / Fascia - Rear (Remove and Install)

Remove
- Remove the 2nd row lower seat cushion
- Remove the trunk sill trim.
- Remove the LH and RH taillights.
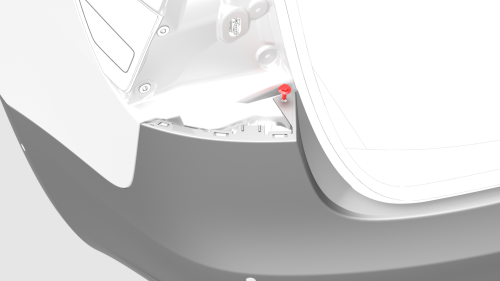
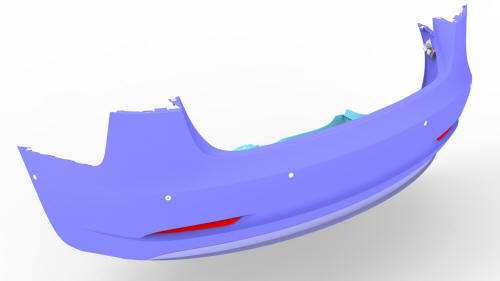
- On each side of the vehicle, remove the bolt that attaches the corner of
the rear fascia to the body.
 Torque 4 Nm
 - Raise the vehicle partially.
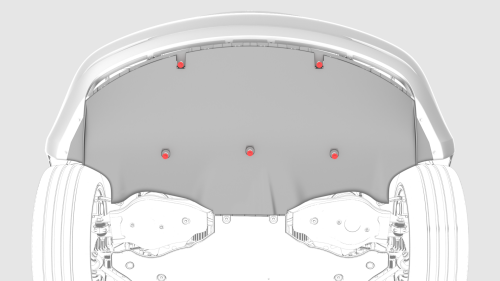
- Release the clips and the push nut that attach the rear portion of the
LH rear wheel liner to the body.
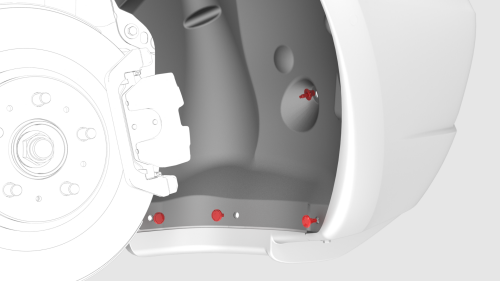
- On each side of the vehicle, remove the bolt that attaches the fascia to
the rear quarter panel.
 Torque 2 Nm
 - Release the clips that attach the rear portion of the RH rear wheel
liner to the body.
- Raise the vehicle fully.
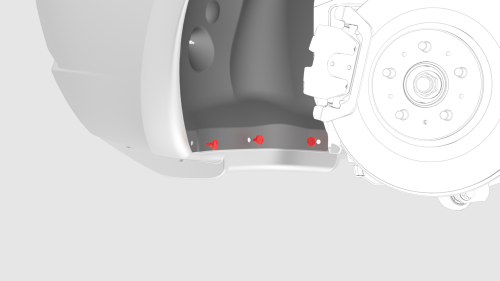
- Remove the bolts that attach the rear portion of the mid aero shield
panel.
 Torque 4
Nm
Torque 4
Nm -
 Remove the bolts that attach the rear diffuser to the body.
Torque 4 Nm
Remove the bolts that attach the rear diffuser to the body.
Torque 4 Nm
- Partially lower the vehicle.
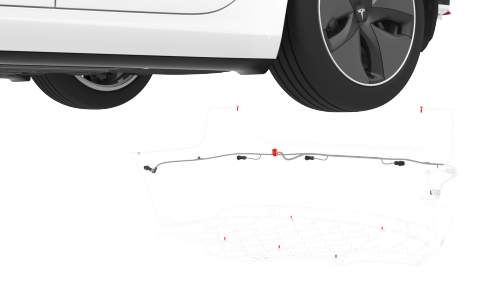
- Disconnect the rear fascia electrical harness.
- With an assistant, remove the rear fascia from the vehicle.
Caution:
Carefully remove the rear fascia from the body so that the corner fastener clips do not damage the rear quarter panel.
Install
Installation procedure is the reverse of removal.
READ NEXT:
 Fascia - Rear - Lower (Remove and Replace)
DRAFT
Warning:
This procedure was derived from pre-production computer models, and
might not reflect the real-world situation. Warnings and cautions might be
missing. Follow safety requirements
Fascia - Rear - Upper (Remove and Replace)
Remove
Remove the rear fascia.
Remove all of the rear parking distance sensors.
Release the tabs that attach the LH and RH rear reflectors to the rear
fascia, and then remove the reflecto
Grille - Fascia - Front (Remove and Replace)
DRAFT
Warning:
This procedure was derived from pre-production computer models, and
might not reflect the real-world situation. Warnings and cautions might be
missing. Follow safety require
SEE MORE:
Seat Back - 2nd Row - RH (Remove and Install)
Remove
Remove the 2nd row lower seat cushion. See
Seat Cushion - Lower - 2nd Row (Remove and Replace).
Remove the RH 2nd row seat side bolster. See
Bolster - Side - Seat - 2nd Row - LH (Remove and Replace).
Release the clips that attach the bolster bracket, and the remove the
bracket fr
Shield - Dust - Brake - Rear - LH (Remove and Replace)
Shield - Dust - Brake - Rear - LH - Remove
SPECIAL TOOLS
Card, Magnetic Field Viewer (1062500-00-A)
Tool, Hub Puller, Hydraulic (1096075-00-A)
Remove
No
© 2019-2026 Copyright www.tmodel3.com
