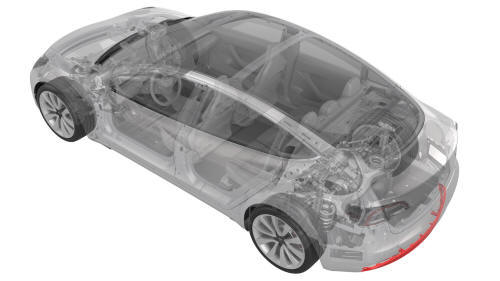
Tesla Model 3: Fascia - Rear - Lower (Remove and Replace)
Tesla Model 3 2017-2026 Service Manual / Body / Bumper / Fascia / Fascia - Rear - Lower (Remove and Replace)
DRAFT
Warning:
This procedure was derived from pre-production computer models, and might not reflect the real-world situation. Warnings and cautions might be missing. Follow safety requirements and use extreme caution when working on or near high voltage systems and components.
Do not redistribute this content.
Remove
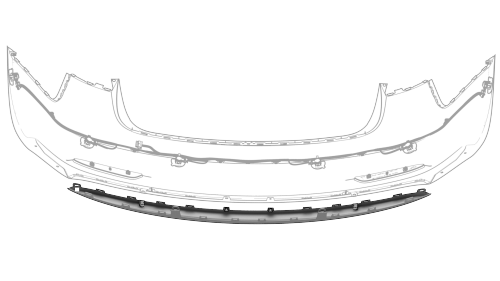
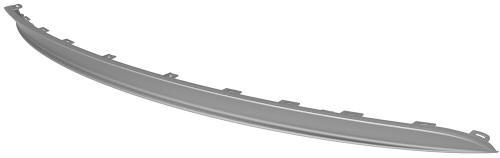
- Remove the rear fascia diffuser.
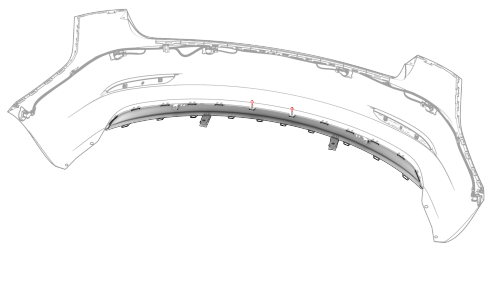
- Remove the bolts (x2) that attach the lower rear fascia to the upper
rear fascia.
 Torque 3
Nm
Torque 3
Nm
- Release the clips (x10) that attach the lower fascia to the upper fascia,
and separate the fascias.
Install
Installation procedure is the reverse of removal.
READ NEXT:
 Fascia - Rear - Upper (Remove and Replace)
Remove
Remove the rear fascia.
Remove all of the rear parking distance sensors.
Release the tabs that attach the LH and RH rear reflectors to the rear
fascia, and then remove the reflecto
Grille - Fascia - Front (Remove and Replace)
DRAFT
Warning:
This procedure was derived from pre-production computer models, and
might not reflect the real-world situation. Warnings and cautions might be
missing. Follow safety require
Valance - Front Fascia (Remove and Replace)
Remove
Remove the front aero shield panel.
Release the clips (x2) that attach the valance to the stabilizer bar
brackets.
Remove the push clips (x4) that attach the LH and RH sides of t
SEE MORE:
Sensor - Relative Humidity and Temperature (Remove and Replace)
Remove
Remove the lower quad camera cover. See Quad Camera Cover - Lower
(Remove and Replace).
Remove the rear view mirror. See Mirror - Rear View (Remove and
Replace).
Remove the forward facing camera. See Camera - Forward Facing (Remove
and Replace).
Disconnect the electrical co
Harness - Trunk (Remove and Replace)
Harness - Trunk- Remove
Remove
Remove the package tray trim. See Trim - Package Tray (Remove and
Install).
Disconnect the trunk electrical harness connectors.
Remove and discard the bolt that attaches the ground strap to the body.
Push the trunk electrical wiring harness through
© 2019-2026 Copyright www.tmodel3.com
