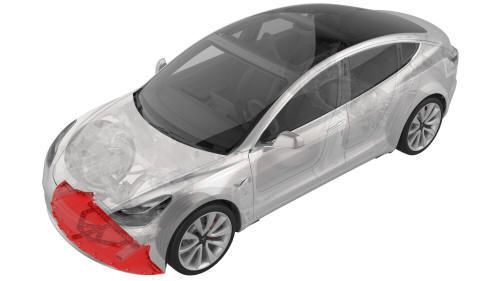
Tesla Model 3: Valance - Front Fascia (Remove and Replace)
Tesla Model 3 2017-2026 Service Manual / Body / Bumper / Fascia / Valance - Front Fascia (Remove and Replace)
Remove
- Remove the front aero shield panel.
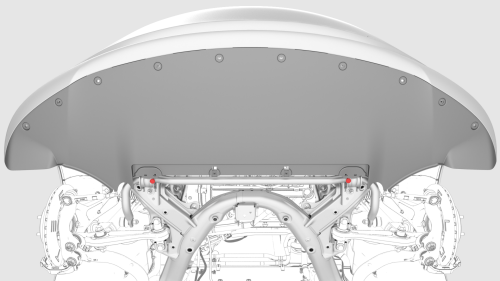
- Release the clips (x2) that attach the valance to the stabilizer bar brackets.
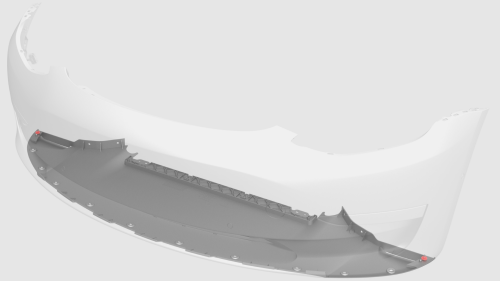
- Remove the push clips (x4) that attach the LH and RH sides of the valance to the wheel liners.
Note: Remove the outer clips as necessary to allow for easier access to the nuts behind the wheel liner.
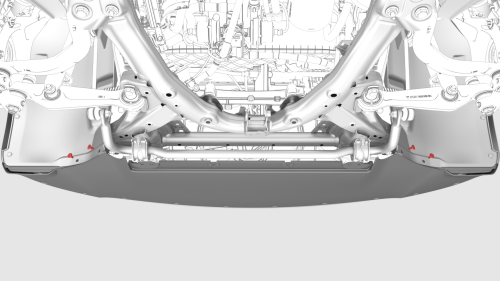
Remove the nuts (x2) at the LH and RH corners of the valance.
Note: The nuts are accessed from behind the front of the wheel liners.
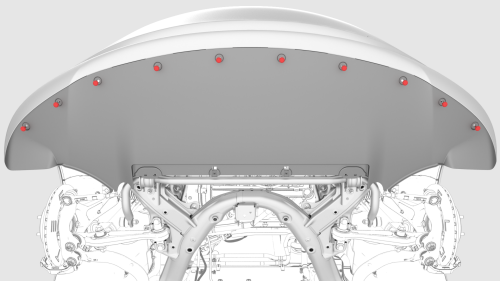
- Remove the push clips (x10) that attach the valance to the front fascia, and then remove the valance from the vehicle.
Note: Remove clips from the center first and work outward.

Install
Installation procedure is the reverse of removal.
- Install the valance to the front fascia, and install the push clips (x10) that attach the valance to the fascia.
Note: Fasten the clips at the far left and far right first and work inward.
.png)
- Install the nuts (x2) at the LH and RH corners of the valance.
 Torque 3 Nm
Note: The nuts are accessed from behind the front of the wheel liners.
.png)
- Install the push clips (x4) that attach the LH and RH sides of the valance to the wheel liners.
Note: Install the outer clips if removed earlier.
.png)
- Fasten the clips (x2) that attach the valance to the stabilizer bar brackets.
- Install the front aero shield panel.
READ NEXT:
 Brace - Shock Tower (Remove and Replace)
Remove
Open all the doors.
Lower all the windows.
Remove the 2nd row lower seat cushion.
Remove the rear underhood apron.
Remove the cabin intake duct.
Remove the underhood storage unit
Dis
Bracket - Crash Can - LH (Remove and Replace)
DRAFT
Warning:
This procedure was derived from pre-production computer models, and
might not reflect the real-world situation. Warnings and cautions might be
missing. Follow safety requirements
SEE MORE:
Actuator - Bleed - LH (Remove and Replace)
Remove
Remove the cross car beam. See
Beam - Cross Car (Remove and Replace).
Disconnect the electrical wiring harness connector from the LH bleed
actuator.
Remove the bolts that attach the actuator to the HVAC module, and then
remove the actuator from the module.
Torque 2.3 Nm
HV Battery (RWD) (Remove and Replace)
HV Battery (RWD) - Remove
SPECIAL TOOLS
Adapter, Lift Pad, Model 3 (1453419-00-A)
Key, Seat Belt Release, Model 3 (1133787-00-A)
ASY, Battery Table, Manual Lift (1020566-00-F)
Top Plate, Battery Table, Manual Lift (1020566-99-A)
Hoist, H-Frame EMEA (1129166-00-A)
Gantry, Adjustable, Aluminum (107336
© 2019-2026 Copyright www.tmodel3.com
