Tesla Model 3: Switch - Brake Light (Remove and Replace)

Remove
- Remove the LH center console side panel carpet. See Carpet - Side Panel - Center Console - LH (Remove and Replace).
- Disconnect 12V power. See 12V Power (Disconnect and Connect).
- Remove the driver footwell cover. See Cover - Footwell - Driver (Remove and Replace).
- Remove the driver knee airbag. See Airbag - Knee - Driver (Remove and Install).
- Remove the LH footwell duct. See Duct - Footwell - LH (Remove and Replace).
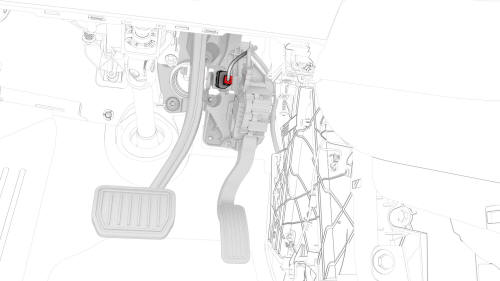
- Disconnect the electrical harness from the brake light switch connector.
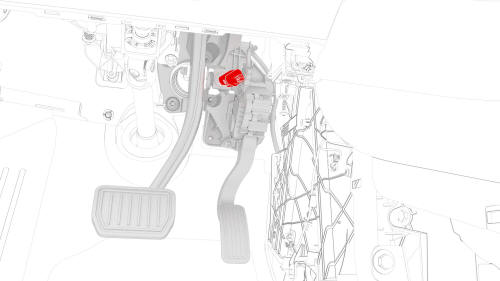
- Rotate the brake light switch 45 degrees counterclockwise, and then remove brake light switch from the accelerator and brake pedal assembly.
Caution:
After the brake light switch has been removed,
do not allow anything to touch, bump, strike, or
press the brake pedal, until the brake light
switch is securely installed.
Install
Caution: Do not allow anything to touch, bump, strike, or press the brake pedal, until the brake light switch is securely installed.- Make sure that the following conditions are met before starting to install the brake switch:
- The brake booster and the brake pedal must be installed in the vehicle before the installation of the brake switch.
- The brake pedal is in the home position (not pressed).
- Gently insert the brake light switch into the clip until it stops.
Caution: Do not push so hard as to move the brake pedal. If the brake pedal has moved, remove the brake light switch and repeat this step.
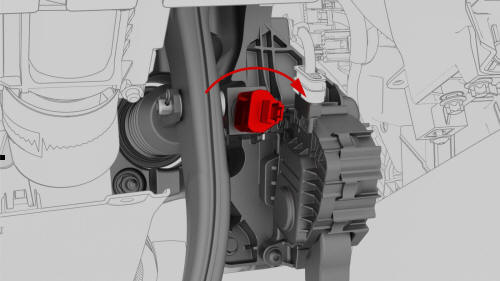
- Rotate the switch 45 degrees clockwise to secure the brake light switch in the accelerator and brake pedal assembly.
Note: Make sure that the brake switch electrical connector release tab is toward the RH side of the vehicle with the connector pins vertical.
- Connect the electrical harness to the brake light switch connector, and then perform a push-pull-push check to make sure the connection is secure.
- Install the LH footwell duct. See Duct - Footwell - LH (Remove and Replace).
- Install the driver knee airbag. See Airbag - Knee - Driver (Remove and Install).
- Install the driver footwell cover. See Cover - Footwell - Driver (Remove and Replace).
- Install the LH center console side panel carpet. See Carpet - Side Panel - Center Console - LH (Remove and Replace).
- Reconnect 12V power. See 12V Power (Disconnect and Connect).
- Connect a laptop with Toolbox to the vehicle.
- Click on "Actions" and type "Brake Switch" into the search field.
- Click the play button next to "TEST_BRAKE-DI_X_STIFFNESS-TEST-PRESSURE-UNBURNISHED-AND-DI-BRAKE-SWITCH", and then select Run.
- If the test fails, refer to Toolbox article #52544 for additional information.
- If the test passes, disconnect the laptop from the vehicle.
READ NEXT:
 Cap - Wheel (Remove and Replace)
SPECIAL TOOLS
Wheel Trim Removal Tool (1044206-00-A)
Remove
Remove the wheel cap according to the type of wheel.
18 inch pinwheel wheel: See step
2
19 inch stiletto wheel: See step
3
SEE MORE:
Sensor - Airbag - C-Pillar - LH (Remove and Replace)
Remove
Open all doors.
Lower all windows.
Remove the 2nd row lower seat cushion. See Seat Cushion - Lower - 2nd
Row (Remove and Replace).
Remove the rear underhood apron. See Underhood Apron - Rear (Remove and
Replace).
Disconnect 12V power. See 12V Power (Disconnect and Connect).
Remov
USB Hub - Center Console - Rear (Remove and Replace)
Remove
Remove the center console air vent panel. See Panel - Air Vent - Center
Console (Remove and Replace).
Remove the screws that attach the vent unit to the center console air
vent panel, and remove the vent unit from the panel
Torque 1.6 Nm
Remove the screws that attach the r
