Tesla Model 3: Switch - Exterior Release - Trunk (Remove and Replace)
Tesla Model 3 2017-2026 Service Manual / Closures / Latches Strikers and Pinch Sensors / Switch - Exterior Release - Trunk (Remove and Replace)
Remove
- Remove the trunk lid trim. See Trim - Lid - Trunk (Remove and Replace).
.jpg)
.jpg)
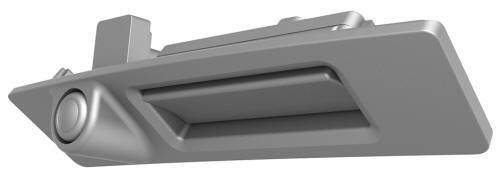
- Disconnect the electrical connectors from the trunk exterior release switch and the rear facing camera.
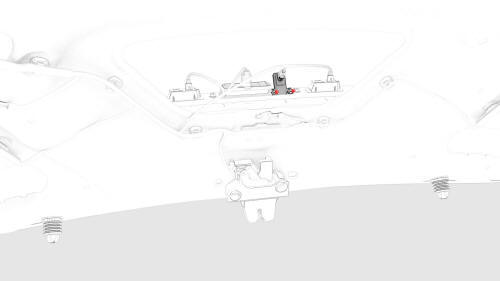
- Remove the bolts that attach the rear facing camera to the trunk exterior release switch, and remove the camera from the switch.
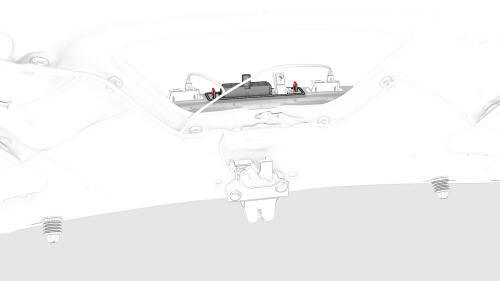
- Remove the nuts that attach the trunk exterior release switch to the
trunk lid, and remove the switch from the vehicle.
.png) Torque 4 Nm
Torque 4 Nm
Install
Installation procedure is the reverse of removal.
READ NEXT:
 Hall Sensor - Exterior Release - Door - Front - LH (Remove and Replace)
Remove
Remove the LH front door trim panel. See Panel - Door Trim - Front - LH
(Remove and Install).
Remove the LH front door inner belt seal. See Seal - Inner Belt - Front
Door - LH (Remove
Hall Sensor - Exterior Release - Door - Rear - LH (Remove and Replace)
Remove
Remove the rear LH door trim panel. See Panel - Door Trim - Rear - LH
(Remove and Install).
Remove the LH rear door inner belt seal. See Seal - Inner Belt - Rear
Door - LH (Remove and
SEE MORE:
Cover - Seat Back - 2nd Row Seat - RH (Remove and Replace)
Remove
Remove the 2nd row lower seat cushion. See
Seat Cushion - Lower - 2nd Row (Remove and Replace).
Remove the RH 2nd row seat side bolster. See
Bolster - Side - Seat - 2nd Row - LH (Remove and Replace).
Remove the RH 2nd row seat back. See
Seat Back - 2nd Row - RH (Remove and Install).
Autosteer
Note: Autosteer is a BETA feature.
Autosteer builds upon Traffic-Aware Cruise
Control, intelligently keeping Model 3 in its
driving lane when cruising at a set speed.
Autosteer also allows you to use the turn
signals to move Model 3 into an adjacent lane. Using
the vehicle's camera(s), t
© 2019-2026 Copyright www.tmodel3.com
