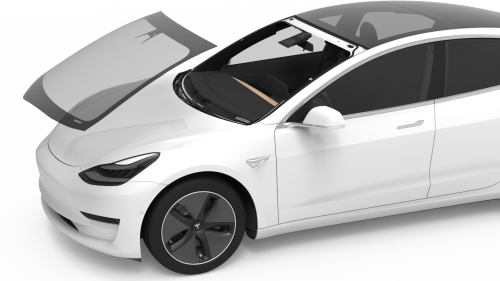
Tesla Model 3: Windshield (Remove and Replace) - Remove
Tesla Model 3 2017-2024 Service Manual / Body / Windshield and Body Glass / Windshield (Remove and Replace) / Windshield (Remove and Replace) - Remove
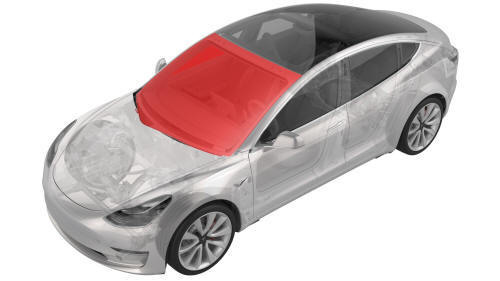
Remove
- Remove the cowl screen panel. See Panel - Cowl Screen (Remove and Replace).
- Disconnect the electrical harness from the windshield heater connector.
- Partially close the hood.
Caution:
Use care not to damage the dashboard.
- Place a fender cover across the dashboard to protect the dashboard.
- Remove the headliner. See Headliner (Remove and Install).
- Remove the forward facing camera. See Camera - Forward Facing (Remove and Replace).
- Remove the GPS antenna. See Antenna - GPS (Remove and Replace).
- Remove the relative humidity and temperature sensor. See Sensor - Relative Humidity and Temperature (Remove and Replace).
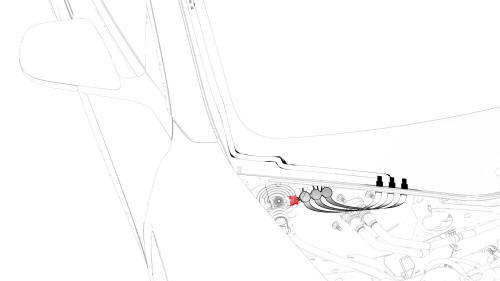
- Remove the screw that attaches the windshield electrical harness to the windshield bracket.
- Remove both the LH and RH lower A-pillar trim. See Trim - A-Pillar - Lower - LH (Remove and Replace).
- Release the clips that attach the windshield electrical harness to the RH A-pillar area.
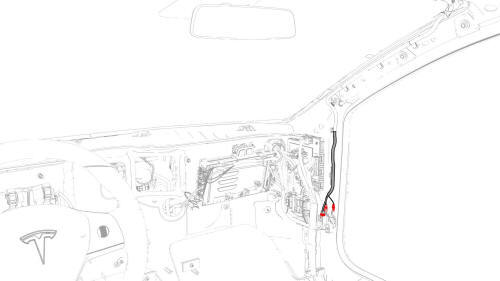
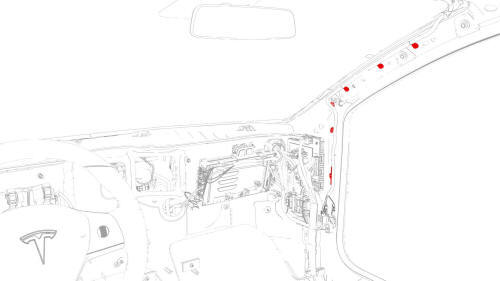
- Disconnect the 3 windshield electrical harness connectors from the RH vehicle harness, and pull windshield electrical harness up through the opening on the RH side of the instrument panel.
- Tape the windshield electrical harness to the inside of the windshield assembly.
- Release the clips that attach the windshield electrical harness to the fastener track, and then remove the electrical harness and fastener track from the windshield.
- Apply masking tape to the exterior of the LH and RH A-pillars to protect the paint from damage.
- Cut a suitable length of square wire to use with T-handles.
- Secure the wire to the starter tool and push the tool through the urethane at the RH lower side of the windshield assembly.
- Remove the wire from the starter tool and remove the tool from the urethane.
- Secure each end of the wire with a T-handle.
- With an assistant, use the T-handles to cut the urethane that attaches the windshield assembly to the body.
Caution:
Use care when cutting the urethane at the upper corners and around the VIN plate.
- Attach suction cups to the LH and RH sides of the windshield assembly.
- With an assistant, remove the windshield assembly from the vehicle.
- Remove the suction cups from the windshield assembly.
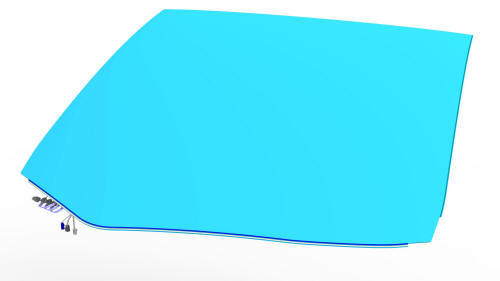
- Use a razor blade to remove the old urethane from the windshield flange on the vehicle.
READ NEXT:
 Windshield (Remove and Replace)- Install
Install
Note: Use soft materials to protect the windshield and to prevent
scratching.
Place the new windshield on a support stand with the windshield bracket
facing up.
Install the GPS antenn
Paint Defect Rectification
Note: This procedure was designed to be performed on flat or
near-flat metal body panels with original factory paintwork. Any deviation from
these circumstances can alter cutting times, tool speeds,
SEE MORE:
Removing the Maintenance Panel
To check fluid levels, remove the maintenance
panel:
Open the hood.
Pull the maintenance panel upward to
release the clips that hold it in place.
If checking the Battery coolant, remove
the cabin intake trim panel by pulling it
upwards to release the clips that hold it i
Shunt - HV Battery (Remove and Replace)
SPECIAL TOOLS
Ratchet, 1/4" Sq Dr, HV Insulated (1057602-00-A)
Ext Bar, Wobble, 1/4" Dr, HV Insulated (1057603-00-A)
Skt, 1/4" Sq Dr, 13mm, HV Insulated (1057606-00-A)
Resistance meter, microohm, Hioki RM 3548 (1076927-00-A)
Warning: Only technicians who have been trained in High Voltage
Awarenes
© 2019-2024 Copyright www.tmodel3.com
