Tesla Model 3: Adjust Front Camber and Caster
Tesla Model 3 2017-2024 Service Manual / Suspension / Adjustment / Four Wheel Alignment (Check and Adjust) / Adjust Front Camber and Caster
- If the front camber and caster are within specification and do not require adjustment, adjust the front toe. See Adjust Front Toe.
- Remove the cowl screen panel. See Panel - Cowl Screen (Remove and Replace).
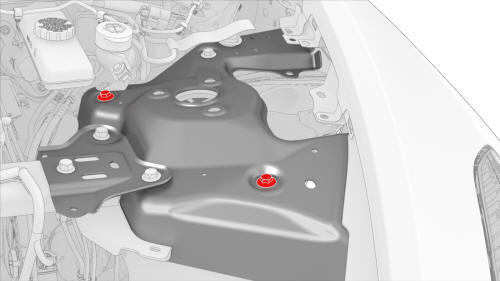
- Mark the location of the LH FUCA mount bolts by drawing a circle around each.
Note: The circles provide a reference for the adjustment process.
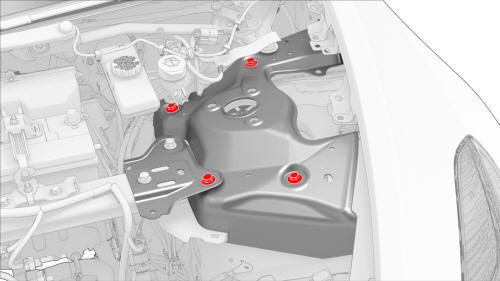
- Slightly loosen, but do not remove, the LH FUCA mount bolts.
- Adjust the front LH camber to -0.50º +/- 0.45º (+/- 0.60º split) and the LH caster to +5.7º +/- 1.0º (+/- 1.0º split).
- Negative Caster
- Negative Camber
- Positive Caster
- Positive Camber
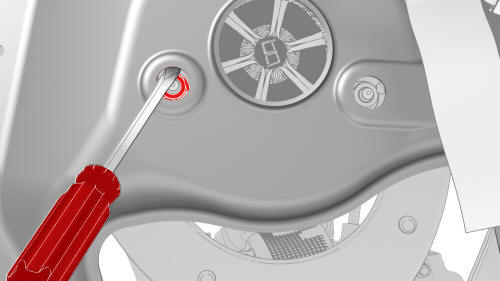
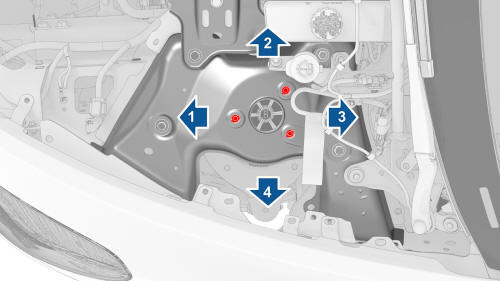
- Use a pry tool or large screwdriver to pry between the damper mounting nuts and body openings, so as to move the FUCA mount inside the shock tower.
- Moving the FUCA mount out from the centerline makes positive camber.
- Moving the FUCA mount in toward the centerline makes negative camber.
- Moving the FUCA mount to the rear makes positive caster.
- Moving the FUCA mount to the front makes negative caster.
- When the front LH camber and LH caster are at the correct setting, have
an assistant tighten the FUCA mount bolts to hold the position.
.png) Torque 30 Nm
Torque 30 Nm - Perform a caster sweep, center and set the steering wheel, and check the alignment.
- Repeat step 3 through step 8 as necessary.
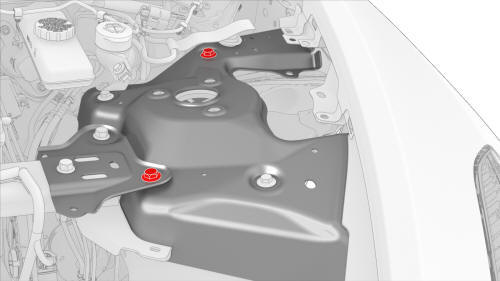
- When the front LH camber and LH caster are correct, tighten the larger
LH FUCA mount bolts.
 Torque 62 Nm
- Tighten the smaller LH FUCA mount bolts.
 Torque 35 Nm
 - Perform step 3 through step 11 for the RH side of the vehicle if necessary.
- Adjust the front toe. See Adjust Front Toe.
READ NEXT:
 Adjust Front Toe
If the front toe is within specification and does not require adjustment,
complete the alignment. See
Complete the Alignment.
Loosen the jam nut on the LH inner tie rod.
Rotate the LH i
SEE MORE:
Sensor - Ambient Air Temperature (Remove and Replace)
Remove
Remove the front fascia. See
Fascia - Front (Remove and Install).
Disconnect the electrical harness from the ambient air temperature
sensor connector.
Release the clip that attaches the ambient air temperature sensor to the
lower grille, and then remove the sensor from the lo
Quad Camera Cover - Lower (Remove and Replace)
Remove
Use a trim tool to remove the lower quad camera cover.
Remove the tether from the lower quad camera cover, and then remove the
lower quad camera cover.
Install
Installation procedure is the reverse of removal.
© 2019-2024 Copyright www.tmodel3.com
