Tesla Model 3: Airbag - Knee - Front Passenger (Remove and Replace)
Tesla Model 3 2017-2026 Service Manual / Safety and Restraint / Airbags / Airbag - Knee - Front Passenger (Remove and Replace)
Remove
- Remove the 2nd row lower seat cushion. See Seat Cushion - Lower - 2nd Row (Remove and Replace).
- Remove the rear underhood apron. See Underhood Apron - Rear (Remove and Replace).
- Disconnect 12V power. See 12V Power (Disconnect and Connect).
- Remove the passenger footwell cover. See Cover - Footwell - Passenger (LHD) (Remove and Replace).
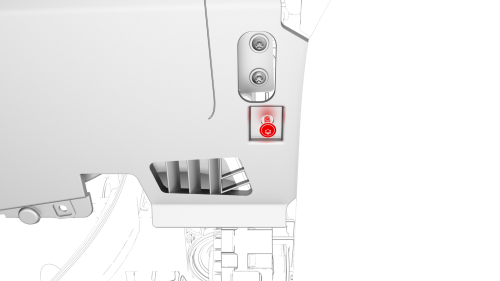

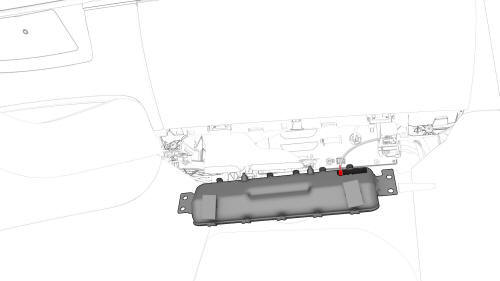
- Remove the bolts (x2) that attach the front passenger knee airbag to the
instrument panel.
.png) Torque 2 Nm
Torque 2 Nm
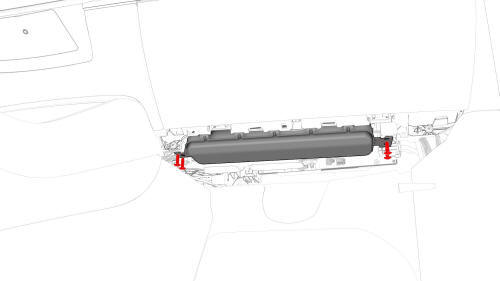
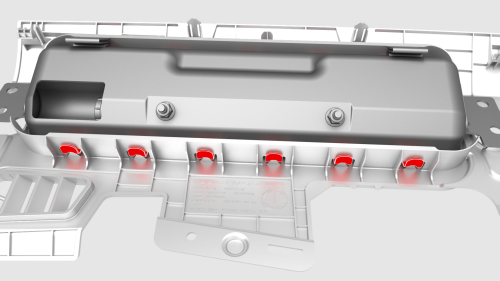
- While supporting the front passenger knee airbag, remove and discard the
bolts (x4) that attach the front passenger knee airbag to the instrument
panel.
 Torque 8 Nm or
.png) Torque 8 Nm
Torque 8 Nm
- Disconnect the electrical connector from the front passenger knee airbag.
- Remove the front passenger knee airbag and closeout trim panel as an assembly from the vehicle.
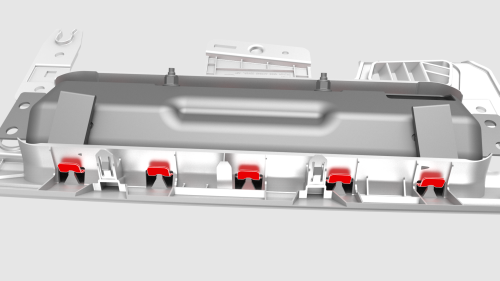
- Unhook the tabs (x11) that attach the front passenger knee airbag to the
closeout trim panel, and then remove the airbag from the panel.
Install
Installation procedure is the reverse of removal, except for the following:
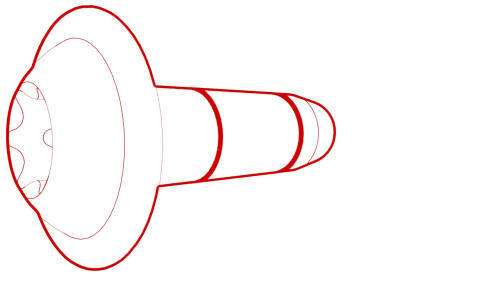
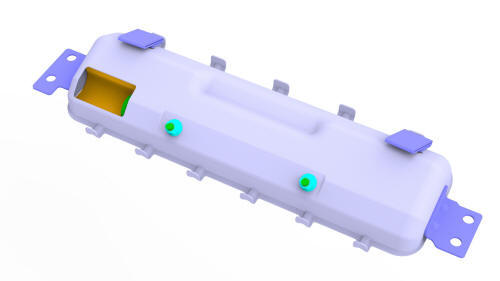
Note: Install new Torx External E10 bolts (x4) on the front
passenger knee air bag. Do not use Torx T30 bolts (pictured).
.jpg)
Replace all patchbolts.
READ NEXT:
 Airbag - Side - Driver (Remove and Replace)
DRAFT
Warning:
This procedure was derived from pre-production computer models, and
might not reflect the real-world situation. Warnings and cautions might be
missing. Follow safety requirements a
Module - Restraint Control (Remove and Replace)
Note:
This procedure was formulated using a release candidate or production
model. Follow safety requirements and use extreme caution when working on or
near high-voltage systems and components.
SEE MORE:
Underhood Apron - Rear (Remove and Replace)
Remove
Open the hood.
Release the clips (x12) that attach the rear underhood apron to the
vehicle, and then remove the apron from the vehicle.
Install
Installation procedure is the reverse of removal.
Vehicle Identification Number (VIN)
VIN Locations
The Vehicle Identification Number (VIN) is visible in the following locations:
The bottom corner of the driver side of the windshield
The label on the driver door jamb
On the touchscreen after touching the Tesla "T"
The RH upper b-pillar; can be seen when the upper B-pilla
© 2019-2026 Copyright www.tmodel3.com
