Tesla Model 3: Bracket - Fascia Side to Fender - LH (Remove and Replace)
Tesla Model 3 2017-2026 Service Manual / Body / Bumper / Fascia / Bracket - Fascia Side to Fender - LH (Remove and Replace)
Remove

LH shown, RH similar; one clip is behind the
knuckle
- Remove the LH and RH front wheels.
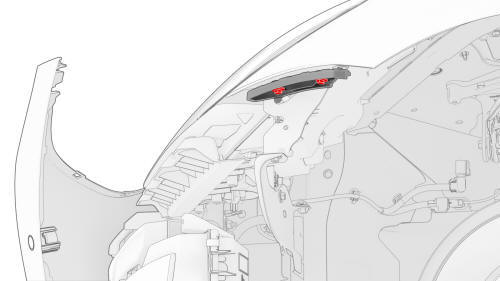
- Release the clips (x9) that attach the front portion of the LH wheel arch liner to the vehicle, and then move the liner aside to perform the following steps.
LH shown, RH similar
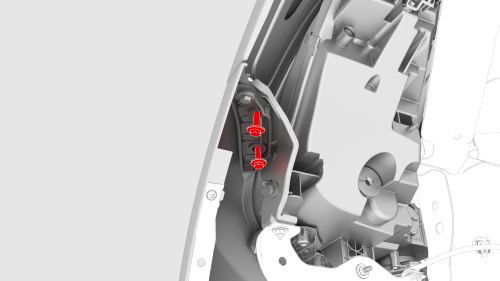
- Loosen the bolts that attach the front fascia to the LH front fender
 Torque
4 Nm
Torque
4 Nm
LH shown, RH similar
- Remove the bolt that attaches the front fascia to the LH front fender.
Torque 3 Nm
LH shown, RH similar
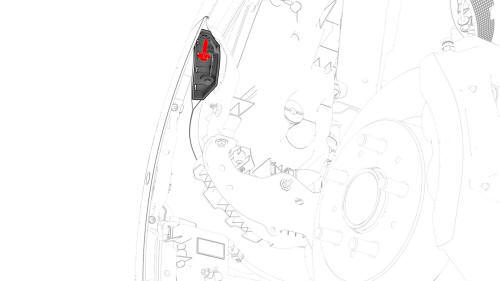
- Carefully pull aside the corner of the front fascia to gain access to the LH fascia side to fender bracket.
- Remove the bolts that attach the LH fascia side to fender bracket to the LH front fender, and then remove the bracket from the vehicle.
Install
Installation procedure is the reverse of removal, except for the following:
- Align the fascia to the fender before tightening the bolts that attach the fascia to the fender.
READ NEXT:
 Bracket - Rear - Center (Remove and Replace)
Remove
Remove the rear fascia.
Release the clips that attach the rear Bluetooth passive entry antenna
electrical harness to the center rear bracket assembly.
Remove rear Bluetooth pass
Bracket - Rear Wing - LH (Remove and Replace)
Remove
LH shown, RH similar
Remove the 2nd row lower seat cushion.
Open the trunk, and then remove the LH and RH trunk stops.
Remove the trunk floor trim.
Remove the trunk sill trim.
Remove
Bracket - Taillight - LH (Remove and Replace)
Remove
Remove the 2nd row lower seat cushion.
Open the trunk and remove the LH liftgate stop.
Remove the trunk floor trim.
Remove the trunk sill trim.
Remove the LH 2nd row seat side bolste
SEE MORE:
Striker - Door - Front - LH (Remove and Replace)
Remove
Open the LH front door.
Mark the position of the LH front door striker using masking tape.
Remove the bolts that attach the LH front door striker to the body, and
then remove the striker from the vehicle.
Install
Hand-tighten the bolts that attach the LH front door st
Damper - Glove Box (Remove and Replace)
Remove
Remove the glove box. See
Glove Box (LHD) (Remove and Replace).
Remove the pin that attach the glove box damper to the glove box using
needle nose pliers.
Fully open the glove box.
Note: When the glove box is closed, the glove box damper will not
clear for removal.
Turn
© 2019-2026 Copyright www.tmodel3.com
