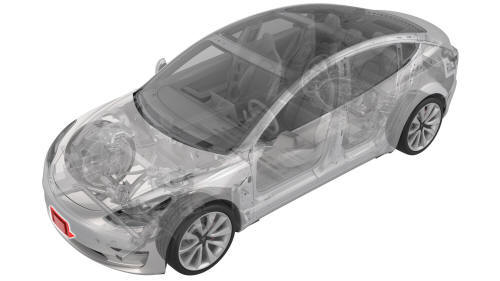
Tesla Model 3: Bracket - License Plate - Front (EMEA) (Retrofit using Jig)
Tesla Model 3 2017-2026 Service Manual / Exterior Fittings / License Plate Mountings / Bracket - License Plate - Front (EMEA) (Retrofit using Jig)
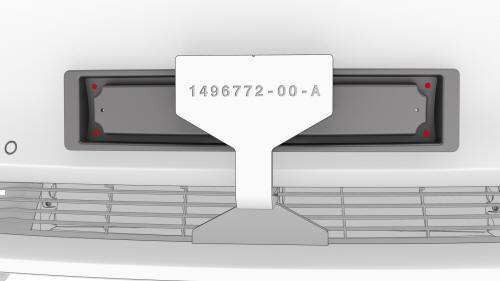
SPECIAL TOOLS
Front license plate bracket jig, Model 3, EMEA (1496772-00-A )
Procedure
- Clean the front center surface of the front fascia with isopropyl alcohol (IPA) wipe, and then allow surface to dry before continuing.
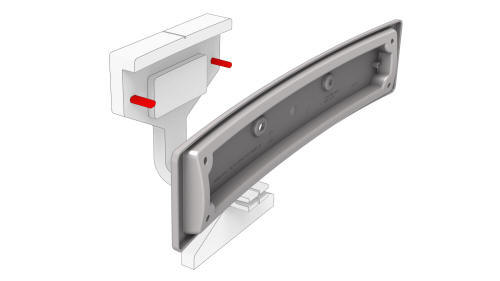
- Put the front license plate bracket on the jig: Line up the 2 holes on the front license plate bracket with the alignment pins on the jig.
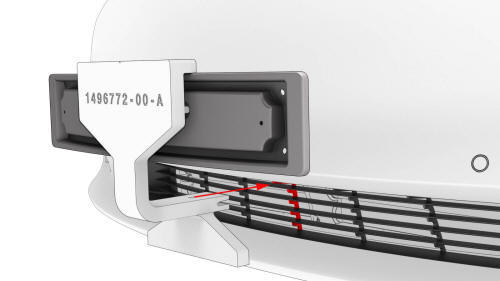
- Put the jig on the front fascia: Line up the center indicator (cut out slit) with the center of the front fascia grille.
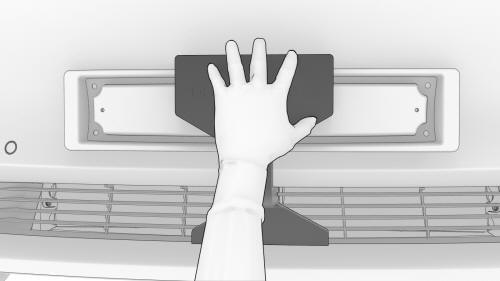
Note: Apply enough force on the head of the jig causing an even contact surface with the front fascia grille and the front license plate bracket.
Note: Make sure to hold the jig by placing your hand on the head of the jig.
- Wear eye and ear protection before continuing.
- Use a 7/64 in (3 mm) drill bit to drill 4 holes through the front fascia.
Caution:
Only drill through the top surface of the front fascia. Drilling too far can result in damage to the vehicle.
- Install the self tapping screws (part number 1104972-00-A) (x4) that
attach the front license plate bracket to the front fascia.
.png) Torque
1 Nm
Torque
1 Nm
Caution:
Do not over torque the screws to prevent damage to the front fascia.
- Remove the jig by sliding it out from the front fascia grille
READ NEXT:
 Bracket - License Plate - Front (EMEA) (Retrofit using Template)
Procedure
Clean the front center surface of the front fascia.
Align the template with the parking sensors, and then use masking tape
to hold the template in place.
LH side shown, RH s
Bracket - License Plate - Front (Remove and Replace)
Remove
Remove the screws that attach the front license plate to the front
license plate bracket, and then remove the license plate.
Use a trim tool around the perimeter of the front li
Bracket - License Plate - Front (NA) (Retrofit)
Retrofit
Clean the front center surface of the front fascia.
Remove the backing from the long horizontal tape strip on the new front
license plate bracket.
Fold the backing of the v
SEE MORE:
Wheels and Tires
Note: For instructions on how to jack/lift Model 3
Tire Specifications (Factory)
Tire pressures vary depending on the type of tires fitted. Refer to the tire
pressures printed on
the Tire and Loading Information label. This label is located on the center door
pillar and is
visible wh
Glass - Door - LH - Rear (Remove and Replace)
SPECIAL TOOLS
Tool, Window Switch Bypass, Model 3 (1135305-00-A)
XP-10 Power Supply, XP-10 (1129348-00-A)
Warning: The side impact airbag deployment depends on the front door
sensor's ability to detect a side impact from air pressure. Make sure that there
are no uncovered holes in the front doo
© 2019-2026 Copyright www.tmodel3.com
