Tesla Model 3: Cooling System (Vacuum Refill)
Tesla Model 3 2017-2026 Service Manual / Thermal Management / Cooling System / Cooling System (Vacuum Refill)
SPECIAL TOOLS
Refiller, Cooling System (1050448-00-A)
Procedure
Note: It is important that the drive rails remain off throughout this procedure. If the drive rails become active, such as from touching the brake pedal, an error is displayed in Toolbox. If this happens, you must disable the drive rails, and repeat the step where the error occurred.
- Remove the underhood storage unit. See Underhood Storage Unit (Remove and Replace).
- Remove the outer HVAC plenum duct. See Duct - HVAC Plenum - Outer (Remove and Replace).
- In Toolbox, select Actions and type "thermal" into the search field.
- Click the play button next to the PROC_VCFRONT_X_THERMAL-FILL-DRAIN action, and then select Run to set the 5-way valve to series mode.
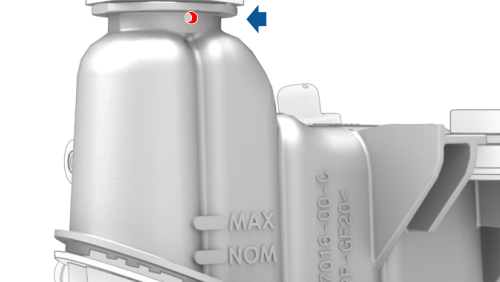
- Remove the cap from the superbottle
.png)
- Set a container having at least 15 L of coolant in front of the thermal beam and on top of the fan module.
- Make sure that the end of the coolant refill hose of the vacuum refill tool is fully submerged in the coolant container.
- Plug the superbottle weep hole with a piece of butyl rope.
- Attach the vacuum refill tool to the superbottle with the conical adapter.
- Make sure that coolant refill valve and air inlet valve of the vacuum refill tool are both closed.
- Place the end of the overflow hose of the vacuum refill tool into an empty container.
- Connect the supply air line to the vacuum refill tool and make sure the minimum pressure is 5.5 bar (80 psi).
- Open the air inlet valve and allow the tool to evacuate the cooling system for 10 seconds.
- Slowly open the coolant refill valve to draw coolant into the coolant refill hose. Close the valve when the hose is full of coolant.
- Monitor the gauge for 30 seconds to verify that vacuum is maintained in the cooling system.
- Open the air inlet valve for at least 3 minutes, and when the gauge stops rising, close the valve.
- Slowly open the coolant refill valve to draw coolant into the cooling system. When the gauge stops moving, close the valve.
- Open the air inlet valve for at least 3 minutes, and monitor the air bubbles seen in the superbottle.
- When air bubbles are no longer seen and the gauge stops rising, close the valve.
- Remove the vacuum refill tool from the superbottle, lift the coolant refill hose from the container, and allow the hose to drain into the container.
- Disconnect the supply air line from the tool.
- Remove both coolant containers from the vehicle, and have a coolant refill bottle standing by.
- Add coolant to the superbottle, so that the liquid level is approximately 6mm (0.25 in) above the MAX line.
- In Toolbox, type "vcfront" into the search field.
- Click the play button next to the TEST-RESET_VCFRONT action, and then select Run.
- Click the play button next to the TEST_VCFRONT_X_THERMAL-COOLANT-AIR-PURGE action, and then select Run.
Note: Monitor the coolant level in the superbottle, and add coolant to keep it approximately 6mm (0.25 in) above the MAX line. Coolant pump speeds can be monitored in Garage, under the PT Thermal tab. If pump speeds exceed 6900 rpm, there is still air entrapped in the system. Repeat the procedure from step 3.
- If the penthouse cover was removed as part of another procedure, monitor the coolant input and output tubes and fittings for leaks during the air purge.
- Remove the piece of butyl rope from the superbottle weep hole.
- Add coolant to the superbottle, so that the liquid level is approximately 6mm (0.25 in) above the MAX line, and then install the cap on the superbottle.
- Install the outer HVAC plenum duct. See Duct - HVAC Plenum - Outer (Remove and Replace).
- Install the underhood storage unit. See Underhood Storage Unit (Remove and Replace).
READ NEXT:
 Hose - Chiller to Car Computer and HV Battery Supply Manifold (Dual Motor) (Remove
and Replace)
Hose - Chiller to Car Computer and HV Battery Supply Manifold (Dual Motor) (Remove
and Replace)
SPECIAL TOOLS
Plug,Car Computer Fluid Port (1119171-00-A)
Kit, Svc Plug, Cooling Hose, Model 3 (1135762-00-A)
Remove
Remove the front subframe assembly. See Subframe Assembly - Front (Dual
Motor
Hose - Return - HV Battery (Remove and Replace)
Remove
Remove the HV battery. See HV Battery (RWD) (Remove and Install).
Release the clip and disconnect the RH inner HV battery return hose
fitting from the RH end of the HV battery platter
Hose - Return - Powertrain (Remove and Replace)
Remove
Remove the HV battery. See HV Battery (RWD) (Remove and Install).
Release the clips (x5) that attach the powertrain return (lower) hose to
the RH side of the HV battery, and remove the
SEE MORE:
Platter Enclosure Coolant Leak Test
SPECIAL TOOLS
Drive Unit Pressure Test Fixture (1053600-00-C)
Kit, Coolant Leak Test Adapters, Model 3 (1132185-00-B)
Kit, Coolant Drain & Fill Adapters, M3 (1133843-00-A)
Kit, Svc Plug, Cooling Hose, Model 3 (1135762-00-A)
Procedure
Disconnect 12V power. See
12V Power (Disconnect and Connect
Carpet - Front - RH (Remove and Replace)
Remove the front passenger seat. See
Seat - Driver (Remove and Replace).
Remove the center console. See
Center Console (Remove and Install).
Release the clips that attach the RH front carpet to the vehicle, and
then remove the RH front carpet from the vehicle.
Install
Installation proc
© 2019-2026 Copyright www.tmodel3.com
