Tesla Model 3: Evaporator- Install
Tesla Model 3 2017-2024 Service Manual / Thermal Management / Refrigerant System / Evaporator (Remove and Replace) / Evaporator- Install
Install
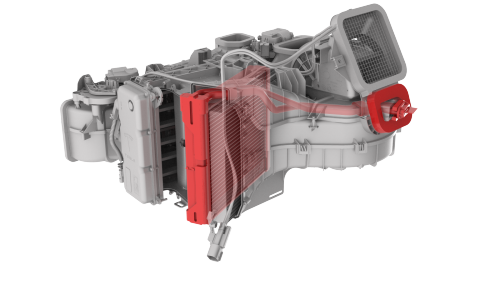
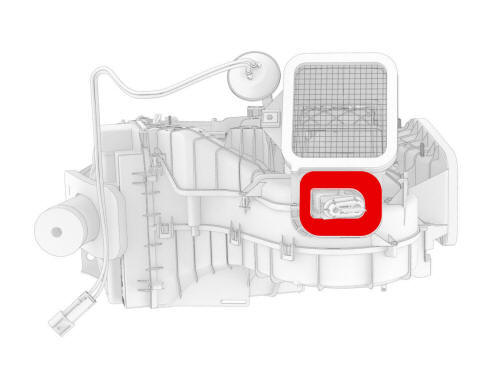
- Install the new evaporator into the HVAC assembly.
Caution:
Do not damage the temperature sensor when installing the new evaporator into the HVAC assembly.
Note: Make sure that the evaporator slides into the HVAC assembly with the correct channels until the evaporator stops. The evaporator pipes must line up with the slots for the evaporator covers on the HVAC assembly.
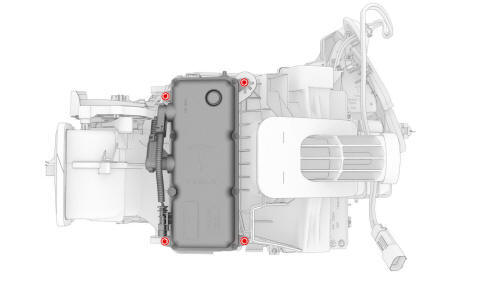
- Install the screws that attach the evaporator upper cover to the HVAC
assembly.
.jpg) Torque 1.4 Nm
Torque 1.4 Nm
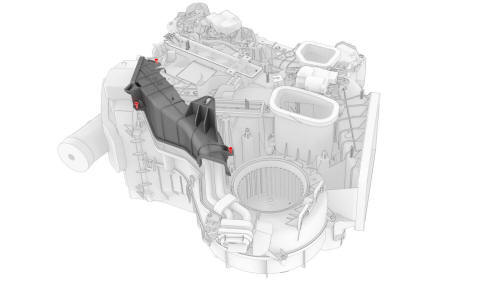
- Install the HVAC inlet onto the HVAC assembly.
Note: Insert the 2 tabs into the slots on the HVAC assembly at an angle, and then set flat onto the HVAC assembly.
- Install the screws that attach the HVAC inlet to the HVAC assembly.
Torque 1.4 Nm
- Connect the HVAC inlet actuator electrical connector.
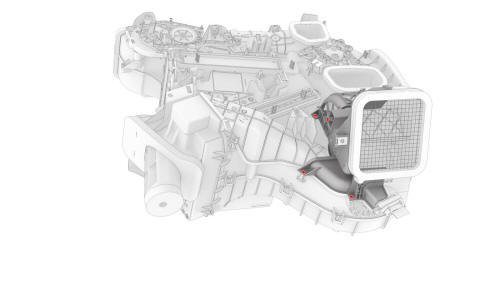
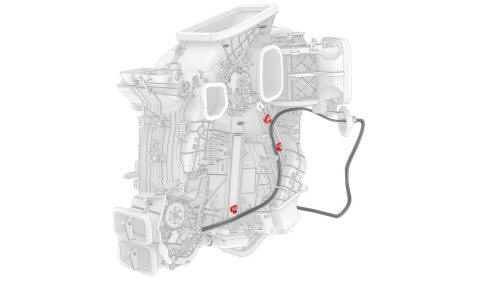
- Install the seal onto the HVAC assembly around the evaporator pipes.
Note: The seal should be flushed against the HVAC assembly, even though the evaporator pipes are at an angle.
- Install the screws that attach the lower evaporator cover onto the HVAC
assembly.
Torque
1.4 Nm
Note: Make sure that the dowels on the lower evaporator cover engage the HVAC assembly.
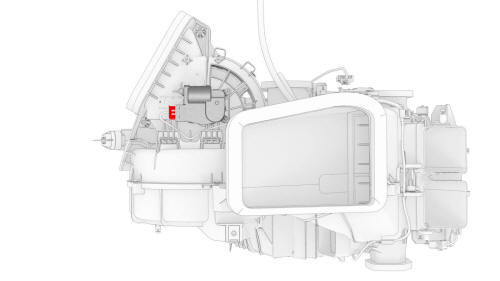
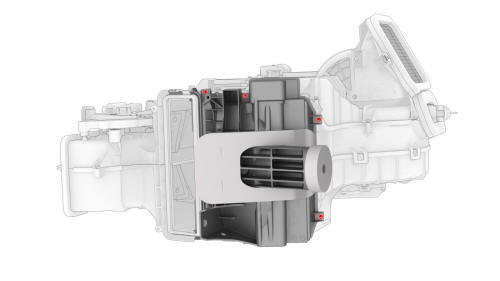
- Install the PTC heater into the HVAC assembly.
Note: The PTC heater will slide into the HVAC assembly one way only.
- Install the screws that attach the PTC heater to the HVAC assembly.
.png) Torque 2.9 Nm
Torque 2.9 Nm
- Install the clips that attach PTC heather electrical harness onto the HVAC assembly.
- Install new O-ring seals onto the HVAC assembly.
- Install the HVAC assembly in the vehicle. See HVAC Assembly (Remove and Replace).
READ NEXT:
 Module - Cooling Fan- Remove
Remove
Raise and support the vehicle. See
Raise Vehicle - 2 Post Lift
Remove the 2nd row lower seat cushion. See
Seat Cushion - Lower - 2nd Row (Remove and Replace).
Remove the rear underhood
Module - Cooling Fan - Install
Install
LH Side
RH Side
With an assistant, put the cooling fan module into position from below
the vehicle, and then hand-tighten the bolts that attach the bottom of the
cooling fan module
SEE MORE:
Module - Restraint Control (Remove and Replace)
Note:
This procedure was formulated using a release candidate or production
model. Follow safety requirements and use extreme caution when working on or
near high-voltage systems and components.
Remove
Remove the LH and RH center console side panel carpets. See Carpet -
Side Panel - Center
Sensor - Wheel Speed - ABS - Rear - LH (Remove and Replace)
Remove
Remove the rear LH wheel. See Wheel (Remove and
Install).
© 2019-2024 Copyright www.tmodel3.com
