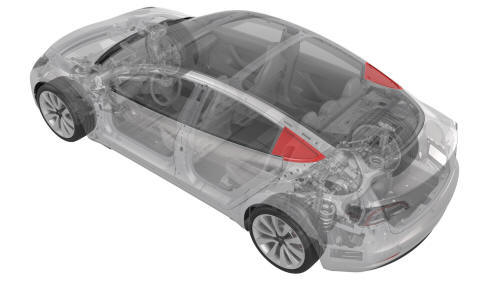
Tesla Model 3: Glass - Body - Rear Quarter - LH (Remove and Replace)
Glass - Body - Rear Quarter - LH (Remove and Replace)-
Remove
Remove
- Open the LH rear door.
- Fully lower the LH rear window.
- Open the trunk.
- Release the clip that attaches the rear primary seal to the C-pillar
using a clip prytool.
- Pull the LH rear primary seal from the rear quarter glass area by
pulling towards the front of the vehicle.
- Remove the LH 2nd row seat side bolster. See Bolster - Side - Seat - 2nd
Row - LH (Remove and Replace).
- Remove the LH side rail trim. See Trim - Side Rail - LH (Remove and
Install).
- Remove the LH upper C-pillar trim. See Trim - C-Pillar - Upper - LH
(Remove and Replace).
- Break the locating posts on the interior side of the LH rear quarter
body glass using diagonal cutters and a flat head screwdriver to assist with
the removal of the glass.
- Clean the exterior area of the LH rear quarter body glass.
- Apply masking tape to the rear around the LH rear quarter body glass to
protect the body and paint.
- Using a plastic trim tool, pry out the rear edge of the LH quarter
brightwork from the LH rear quarter body glass to release, and then work
across the glass to remove it from the vehicle.
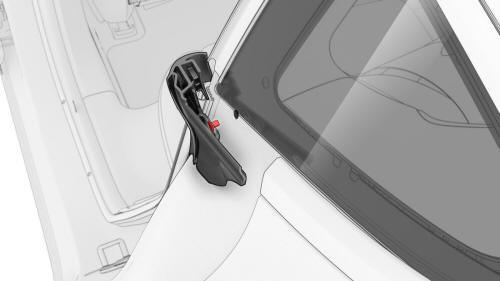
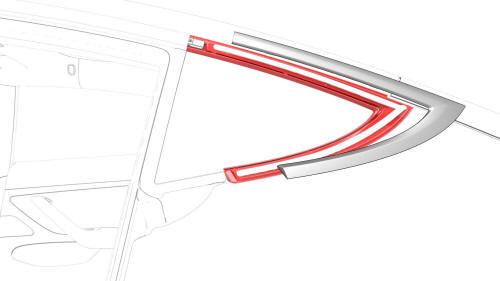
Caution:
Use caution with the clip that attaches the rear quarter brightwork to
the LH upper body side brightwork.
- Remove any remaining clip parts from the upper portion of the LH quarter
brightwork.
- Using a retractable blade knife, cut down the rubber seal around the LH
rear quarter body glass to allow greater access when removing the glass.
Note: This action will avoid causing damage to the body and keep
the wire from getting stuck in the seal when cutting the LH rear quarter body
glass.
- Set up a pair of T-handles with square wire 6 feet long.
- Wrap the square wire around the rear edge of the LH rear quarter body
glass between the body the seal.
- Cut the LH rear quarter body glass from the body, and then remove glass
from the vehicle.
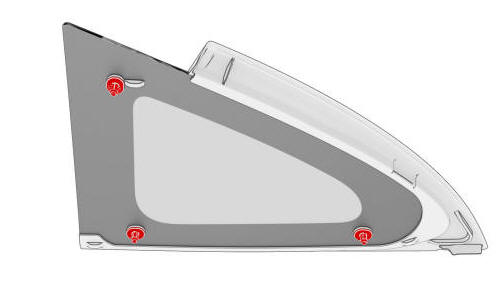
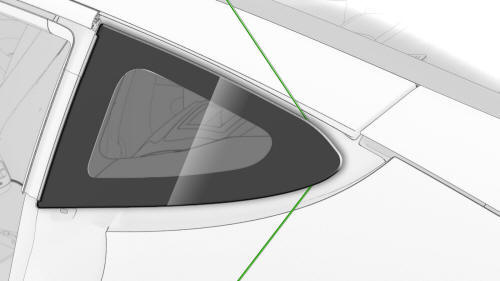
Tip: Use a sawing motion to cut through the urethane.
- Clean the remaining urethane from the body using a winged scraper set.
- Remove the masking tape from the rear quarter glass area.
- Clean the body around the urethane path with an isopropyl alcohol (IPA)
wipe. Allow the area to dry for at least 1 minute.
Glass - Body - Rear Quarter - LH (Remove and Replace)-
Install
Install
- Apply primer to the urethane path and any areas where the paint was
damaged during the removal of the LH rear quarter body glass. Allow primer
to dry for at least 1 minute before continuing.
- Prepare the caulking gun and urethane.
Note: The urethane opening must be 7 mm wide and 12 mm tall.
- Apply urethane to the body following the original path.
- Position the new LH rear quarter body glass over the vehicle and slide
the rear quarter brightwork clip into the upper brightwork.
Note: Make sure the locating posts are aligned with the holes on
the body, and then install the rear quarter body glass onto the body by applying
pressure from the rear locating post, and then work forward.
Note: Start from the rear locating post will help with the fitment
of the rear quarter brightwork to the body.
- Secure the LH rear quarter body glass with tape while the urethane is
curing.
- Fully seat the LH rear primary seal.
- Secure the clip at the C-pillar.
- Close the trunk.
- Install the LH upper C-pillar trim. See Trim - C-Pillar - Upper - LH
(Remove and Replace).
- Install the LH side rail trim. See Trim - Side Rail - LH (Remove and
Install).
- Install the LH 2nd row seat side bolster. See Bolster - Side - Seat -
2nd Row - LH (Remove and Replace)
- Close the LH rear door.
- Remove the masking tape after the urethane has cured.
Caution:
Do not drive the vehicle until the adhesive manufacturer's recommended
minimum drive-away time has passed. Dow Betaseal Express has a drive-away time
of 1 hour minimum in temperatures of 0˚F (-18˚C) or warmer. If using an
equivalent product, refer to the adhesive packaging for the safe drive-away
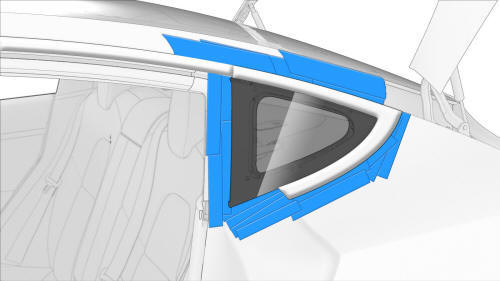
time. If necessary, leave the tape applying pressure to the glass on the vehicle
and advise the customer that they can remove it after 24 hours. Additionally,
advise the customer that they should avoid high driving speeds and speed bumps
for the next 24 hours.
READ NEXT:
Remove
Remove the headliner. See Headliner (Remove and Install).
Measure and record the gaps from the fixed roof glass to windshield,
body sides, and backlight glass.
Note: The gap measuremen
SEE MORE:
Remove
Remove and secure the customer's belongings from the glove box, if
needed.
Remove the 2nd row lower seat cushion. See
Seat Cushion - Lower - 2nd Row (Remove and Replace).
Remove the rear underhood apron. See
Underhood Apron - Rear (Remove and Replace).
Disconnect 12V power. See
1
Remove
Remove the headliner. See Headliner (Remove and Install).
Disconnect the electrical harness from the LH headliner tweeter
connector.
Disconnect the electrical harness from the front overhead console
connector.
Disconnect the electrical harness from the RH headliner tweeter
connec