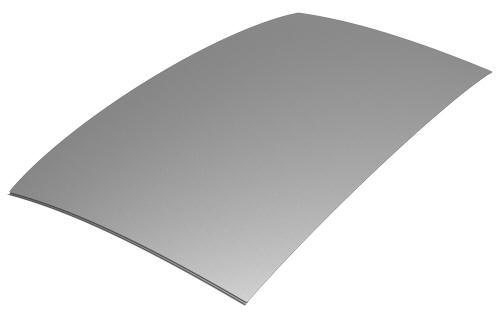
Tesla Model 3: Glass - Roof - Fixed (Remove and Replace)
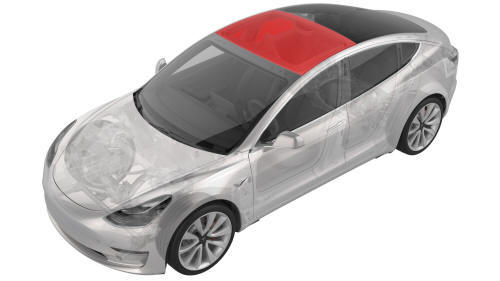
Remove
- Remove the headliner. See Headliner (Remove and Install).
- Measure and record the gaps from the fixed roof glass to windshield, body sides, and backlight glass.
Note: The gap measurements are used for the installation of the fixed roof glass.
- Apply masking tape to protect the paint on the vehicle.
- Cut a suitable length of square wire to use with T-handles.
- With an assistant, insert the tool through the roof glass urethane at either rear corner.
Note: Use a flat plastic trim tool to protect the seal.
- Attach the square wire and pull the tool back through into the vehicle.
- Insert the square wire into one T-handle.
Note: Make sure that there is adequate wire to attach it to a second T-handle.
- With an assistant, use the T-handles to cut the urethane that attaches the fixed roof glass to the body.
Caution:
Use caution near the roof rack brackets (x4), windshield seal, and backlight glass seal.
Note: Use a flat plastic trim tool to protect the seal.
- Cut the square wire, and then remove the square wire and T-handles from the vehicle.
- Attach suction cups (x2) to each corner of the fixed roof glass.
- With an assistant, remove the fixed roof glass from the vehicle.
- Remove the suction cups from the fixed roof glass.
- Wipe the body to clean the surfaces with isopropyl alcohol wipes.
Install
- Attach suction cups (x2) to each corner of the new fixed roof glass.
- Clean the leading edge of the fixed roof glass with isopropyl alcohol wipes. Allow the surface to dry before continuing to the next step.
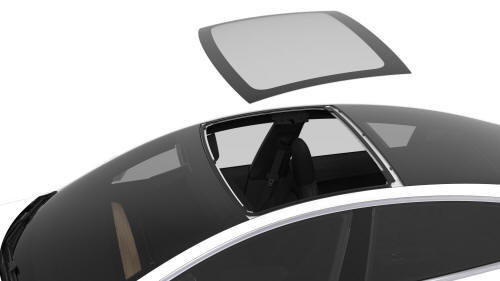
- With an assistant, position the fixed roof glass onto the vehicle for a dry fit.
- With an assistant, remove the fixed roof glass and set it on a stand.
- Clean the urethane path on the vehicle with an isopropyl alcohol wipes. Allow the surface to dry before continuing to the next step.
- Apply urethane primer to the vehicle body along the urethane path and in areas that were damaged during removal of the fixed roof glass.
Note: Allow the primer to dry for at least 1 minute.
- Remove the masking tape from the vehicle.
- Apply urethane to the body following the original path.
- With an assistant, install the new fixed roof glass onto the vehicle, but do not set it yet.
- Align the datum at the rear of the glass to the body.
- Using the gap measurements that were recorded during removal of the fixed roof glass, press the new fixed roof glass onto the body.
- Verify that the clearances with the windshield, body sides, and backlight glass are within the gap measurements and adjust, if necessary.
- Remove the suction cups from the new fixed roof glass.
- Apply tape to attach the fixed roof glass temporarily.
- Reposition the windshield and backlight glass seals, if necessary.
Note: Spray glass cleaner to lubricate the seals, if necessary.
- Install the headliner. See Headliner (Remove and Install).
- Remove the masking tape after the urethane has cured.
Caution:
Do not drive the vehicle until the adhesive manufacturer's recommended minimum drive-away time has passed. Dow Betaseal Express has a drive-away time of 1 hour minimum in temperatures of 0˚F (-18˚C) or warmer. If using an equivalent product, refer to the adhesive packaging for the safe drive-away time. If necessary, leave the tape applying pressure to the glass on the vehicle and advise the customer that they can remove it after 24 hours. Additionally, advise the customer that they should avoid high driving speeds and speed bumps for the next 24 hours
READ NEXT:
 Sensor - Relative Humidity and Temperature (Remove and Replace)
Remove
Remove the lower quad camera cover. See Quad Camera Cover - Lower
(Remove and Replace).
Remove the rear view mirror. See Mirror - Rear View (Remove and
Replace).
Remove the forward f
Windshield (Remove and Install)
Windshield (Remove and Install)-Remove
Remove
Open all doors and lower all windows.
Open the hood.
Remove the rear underhood apron. See Underhood Apron - Rear (Remove and
Replace).
Remove th
SEE MORE:
Horn - High Tone (Remove and Replace)
Remove
Remove the rear underhood apron. See
Underhood Apron - Rear (Remove and Replace).
Remove the cabin intake duct. See
Duct - Cabin Intake (Remove and Replace).
Remove the hood latch cover. See
Cover - Hood Latch (Remove and Replace).
Remove the underhood storage unit carpet. See
Carp
Autopilot
This is a thorough rundown of the Autopilot Advanced Driver Assistance System (ADAS). It discusses autopilot's features and constraints while highlighting how it improves driving safety and comfort.
This section gives a summary of the functioning of several Autopilot features, including Traffic-Awa
