Tesla Model 3: Harness - Body - RH- Install
Tesla Model 3 2017-2025 Service Manual / Electrical / Harnesses / Harness - Body - RH (Remove and Replace) / Harness - Body - RH- Install
Install
- Install the RH body harness into the vehicle.
- Partially close all doors.
- Raise the vehicle.
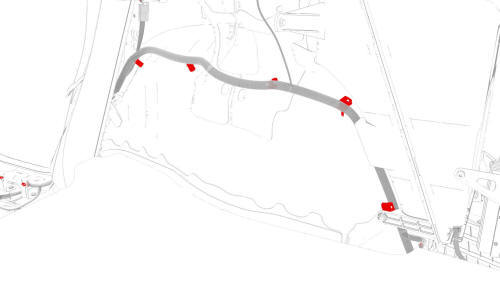
- Move the rear portion of the electrical harness in through the RH side of the trunk bulkhead.
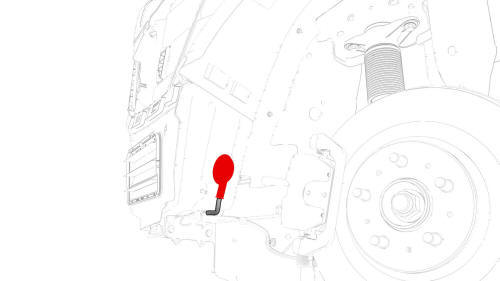
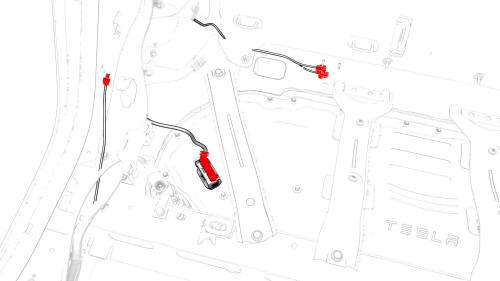
- Connect the electrical harness to the rear subframe harness connector and the RH electric parking brake connector.
- Fasten the clips that attach the electrical harness to the body in the rear subframe area.
- Lower the vehicle.
- With an assistant, remove the vehicle from the lift.
Caution:
The vehicle is safely pushed for only a very short distance and at a very slow speed.
- Position wheel chocks.
- Open all doors.
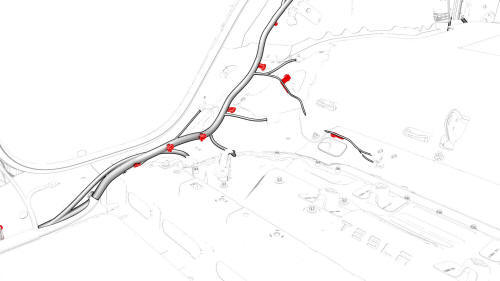
- Fasten the clips that attach the electrical harness to the body in the rear fascia area.
- Install the rear fascia. See Fascia - Rear (Remove and Install).
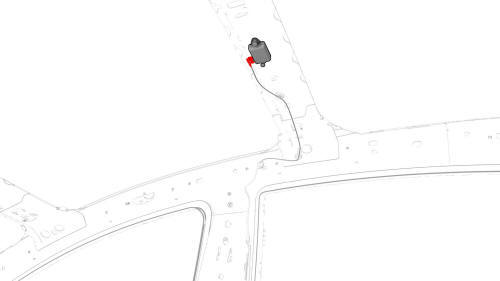
- Fasten the clips that attach the electrical harness to the body at the RH side of the tail lamp area.
- Fasten the clips that attach the electrical harness to the body at the RH side of the trunk area.
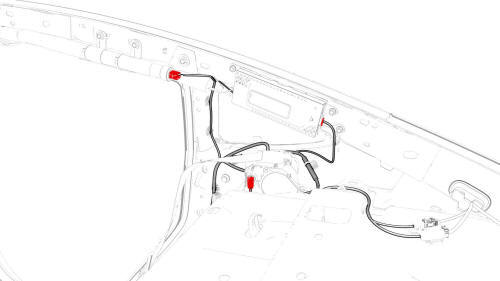
- Connect the electrical harness to the audio tuner connector, the RH rear seat belt buckle connector, and the RH side curtain airbag connector.
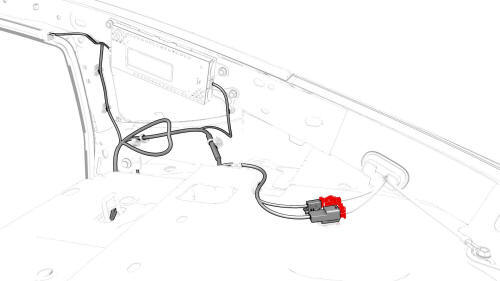
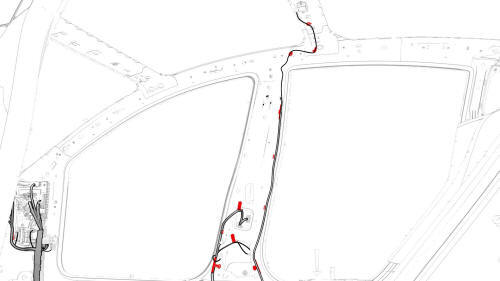
- Connect the electrical harness to the trunk electrical harness connectors that are located under the package tray.
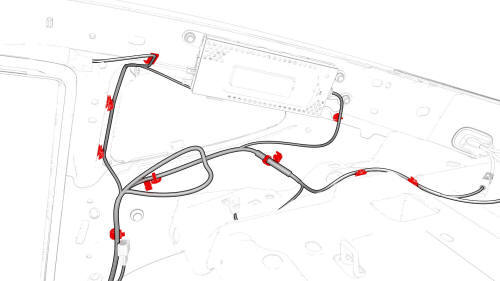
- Fasten the clips that attach the electrical harness to the body in the C-pillar area.
- Connect the electrical harness to the C-pillar airbag sensor connector, the HV battery controller connector, and the rear seat belt buckle connectors.
.png)
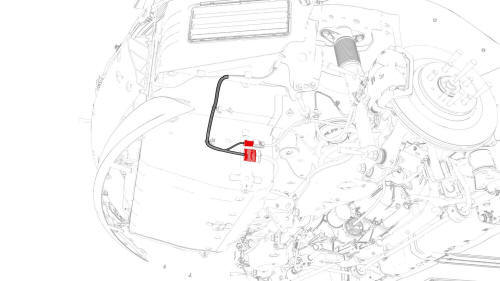
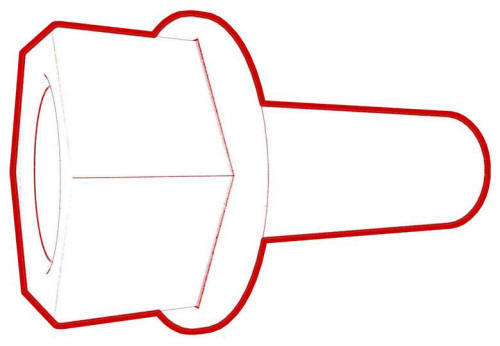
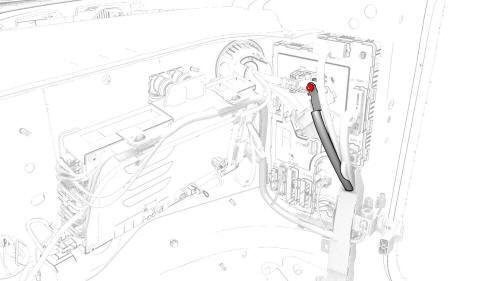
- Connect the positive 12V output cable to the DCDC passthrough, install a
new nut to attach the cable, and mark the nut with a green paint pen after
torque.
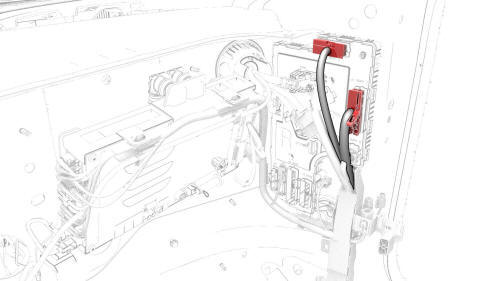
.png) Torque 9 Nm
Torque 9 Nm
Caution: Make sure that the rubber boot is not trapped under the cable lug or pinched between the cable lug and nut.
- Replace the cover on the positive 12V output cable at the DCDC passthrough, and then press down to attach the cover
- Fasten the clips that attach the electrical harness to the body in the C-pillar lower area.
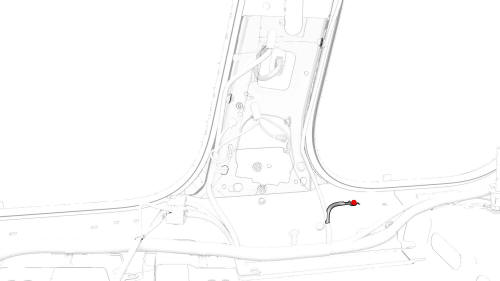
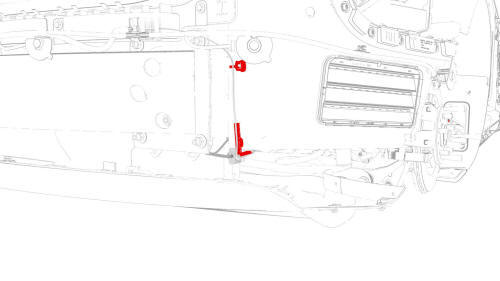
- Install a new bolt to attach the electrical harness ground strap to the
body in the lower B-pillar area.
 Torque 8 Nm
- Connect the electrical harness to the connectors in the lower B-pillar area.
- Connect the electrical harness to the B-pillar antenna connector.
- Fasten the clips that attach the electrical harness to the body in the A-pillar and B-pillar areas.
- Install a new bolt to attach the electrical harness ground strap to the
body in the passenger footwell area
Torque 8 Nm
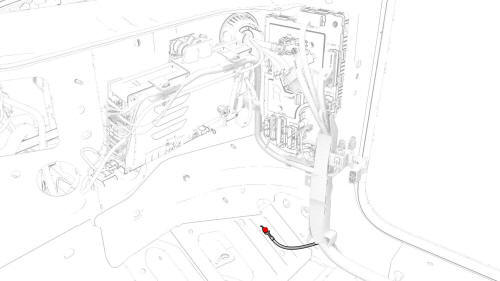
- Connect the electrical harness to the car computer connectors.
- Fasten the clips that attach the electrical harness to the car computer.
- Install the electrical harness ground strap to the RH body controller
module, and then install the nut that attaches the ground strap to the
module. Torque 9
Nm
- Connect the electrical harness to the RH body controller module connectors.
- Install the headliner. See Headliner (Remove and Install).
- Fold the carpet back from the LH side, and then fasten the clips that attach the carpet to the body.
- Install the B-pillar applique. See Applique - B-Pillar - LH (Remove and Replace).
- Install the package tray trim. See Trim - Package Tray (Remove and Install).
.jpg)
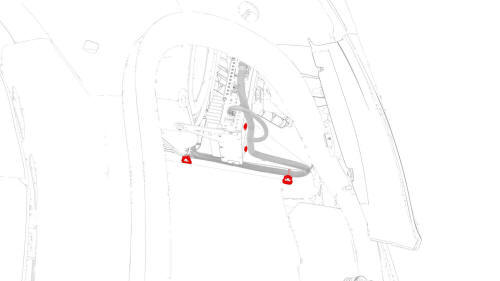
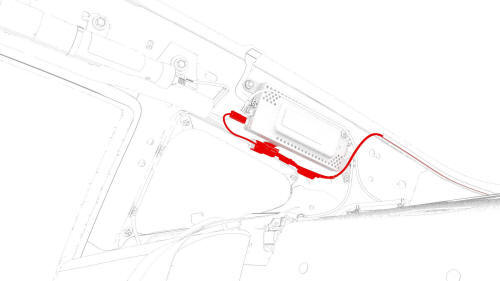
- Connect the electrical harness to the LH antenna amplifier connector.
.jpg)
- Connect the electrical harness to the package tray electrical harness connector and the tuner connectors.
- Install the RH upper C-pillar trim. See Trim - C-Pillar - Upper - LH (Remove and Replace).
- Install the RH lower B-pillar trim. See Trim - B-Pillar - Lower - LH (Remove and Replace).
- Install the RH upper B-pillar trim. See Trim - B-Pillar - Upper - LH (Remove and Replace).
- Install the rear RH sill panel trim. See Trim - Sill Panel - Rear - LH (Remove and Replace).
- Install the 2nd row RH seat side bolster. See Bolster - Side - Seat - 2nd Row - LH (Remove and Replace).
- Install the LH upper C-pillar trim. See Trim - C-Pillar - Upper - LH (Remove and Replace).
- Install the LH side rail trim. See Trim - Side Rail - LH (Remove and Replace).
- Install the LH lower B-pillar trim. See Trim - B-Pillar - Lower - LH (Remove and Replace).
- Install the LH upper B-pillar trim. See Trim - B-Pillar - Upper - LH (Remove and Replace).
- Install the LH rear sill panel trim. See Trim - Sill Panel - Rear - LH (Remove and Replace).
- Install the 2nd row LH seat side bolster. See Bolster - Side - Seat - 2nd Row - LH (Remove and Replace).
- Install the front passenger seat. See Seat - Driver (Remove and Replace).
- Install the RH footwell duct. See Duct - Footwell - RH (Remove and Replace).
- Install the glove box. See Glove Box (LHD) (Remove and Replace).
- Install the front passenger's knee air bag. See Airbag - Knee - Front Passenger (Remove and Replace).
- Install the RH lower A-pillar trim. See Trim - A-Pillar - Lower - LH (Remove and Replace).
- Install the LH lower A-pillar trim. See Trim - A-Pillar - Lower - LH (Remove and Replace).
- Install the rear underhood apron. See Underhood Apron - Rear (Remove and Replace).
- Install the fasteners (x2) that attach the rear fascia to the rear corners of the body.
- Install the LH and RH tail light assemblies. See Taillight - LH (Remove and Replace).
- Install the subwoofer. See Subwoofer (Remove and Replace).
- Install the RH side rear trunk trim. See Trim - Side - Trunk - RH (Remove and Replace).
- Install the LH side rear trunk trim. See Trim - Side - Trunk - LH (Remove and Replace).
- Install the floor rear trunk trim. See Trim - Floor - Trunk (Remove and Replace).
- Install the LH and RH trunk stops.
- Install the 2nd row lower seat cushion. See Seat Cushion - Lower - 2nd Row (Remove and Replace).
- Close the trunk.
- Remove the wheel chocks.
- Connect 12V power. See 12V Power (Disconnect and Connect).
READ NEXT:
 Harness - Door - Front - LH (Remove and Replace)
Remove
Partially raise the vehicle to a comfortable working height. See Raise
Vehicle - 2 Post Lift.
Remove the 2nd row lower seat cushion. See Seat Cushion - Lower - 2nd
Row (Remove and Repl
Harness - Door - Rear - LH (Remove and Replace)
Warning: The side impact airbag deployment depends on the front door
sensor's ability to detect a side impact from air pressure. Make sure that there
are no uncovered holes in the front door shell
Harness - Drive Unit - Front (Remove and Replace)
Remove
Partially raise the vehicle to a comfortable working height. See Raise
Vehicle - 2 Post Lift.
Remove the 2nd row lower seat cushion. See Seat Cushion - Lower - 2nd
Row (Remove and Repl
SEE MORE:
Center Console (Remove and Replace)
Remove
Remove the center console assembly. See
Center Console (Remove and Install).
Install
With an assistant, install the center console into the vehicle as
follows:
Tilt the front of the center console downwards.
Slide the center console towards the front of the vehicle.
Tilt th
Subframe Assembly - Rear - Remove
SPECIAL TOOLS
Fixture, Subframe, Model 3 (1099645-00-B)
Lifting Sling, Drive Unit, Model 3 (NA, APAC) (1130279-00-A)
Adapter, Subframe, Body Shop, Model 3 (1130481-00-A)
Tool, Hub Puller, Hydraulic (1096075-00-A)
Tool, Axle Extraction, Model 3 (1133386-00-A)
Lever Lock, HV Connector, Model 3 (1140
© 2019-2025 Copyright www.tmodel3.com
