Tesla Model 3: Hood (Remove and Replace) - Install
Tesla Model 3 2017-2024 Service Manual / Body / Body Panels / Hood (Remove and Replace) / Hood (Remove and Replace) - Install
Install
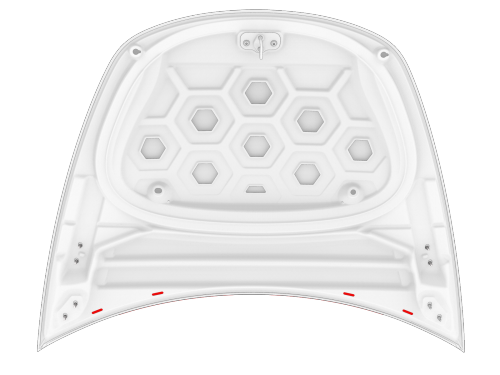
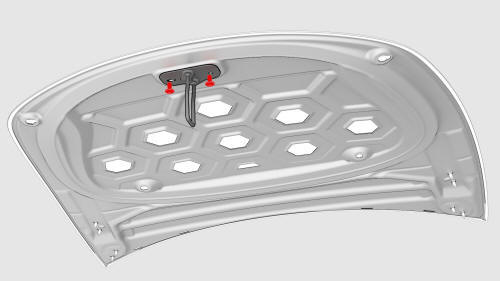
- Install the hood plugs on the new hood.
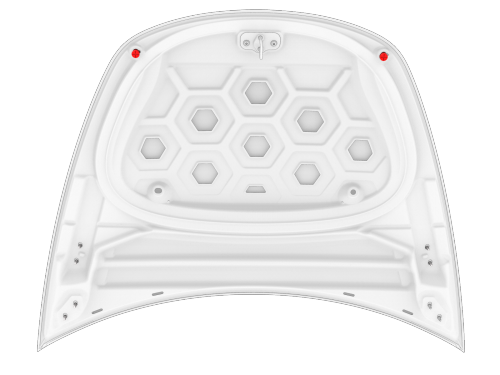
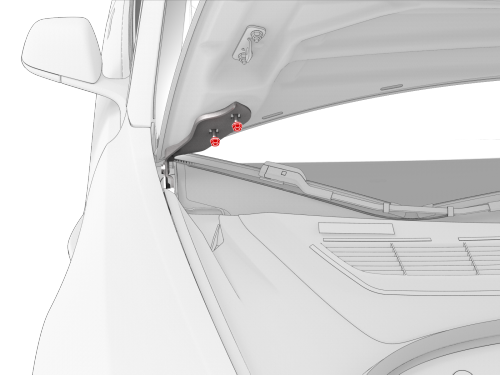
- Position the LH and RH hood strut brackets on the new hood, and then
tighten the nuts that attach the brackets to the hood.
 Torque 15 Nm
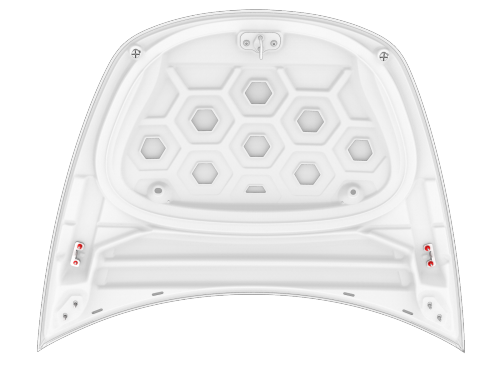
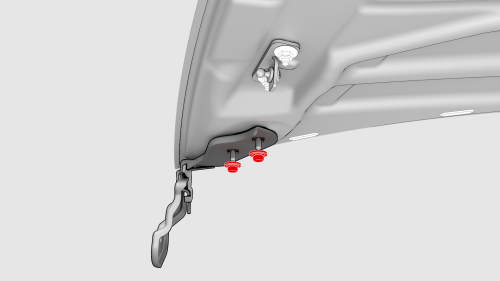
 - Position the hood striker on the new hood, and then hand tighten the bolts that attach the striker to the hood.
RH shown, LH similar
- With assistance, position the hood on the vehicle, and then hand tighten the nuts that attach the LH and RH hood hinges to the hood.
- Support the hood with a hood prop.
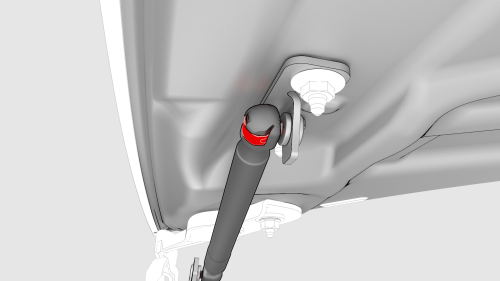
- Position the LH and RH hood gas struts on the LH and RH hood hinges, and then install the clips that attach the struts to the hinges.
- Carefully close the hood, and then check hood fitment.
- Perform gap and flush adjustments on the hood assembly, if necessary.
- Tighten the nuts that attach the hood assembly to the LH and RH hood hinges. Torque 15 Nm
- Tighten the bolts that attach the hood striker to the hood assembly.
 Torque 18 Nm
 - Clean the LH and RH hood hinge bolts and the surrounding area with isopropyl alcohol (IPA), and then let dry for at least 1 minute.
- If necessary, apply touch up paint matching the vehicle's body color to the LH and RH hood hinge studs/nuts.
- Clean the front of the hood with IPA, and then install a front Tesla badge. See Tesla Badge - Front (Remove and Replace).
READ NEXT:
 Trunk (Remove and Install)- Remove
Remove
Remove the trunk lid trim. See Trim - Lid - Trunk (Remove and Replace).
Disconnect the LH and RH rear fog/reverse light electrical connectors.
Disconnect the rear facing ca
Trunk (Remove and Install) - Install
Install
With an assistant, position and align the trunk lid to the trunk hinges,
and then hand-tighten the bolts that attach the hinges to the trunk lid.
Push the trunk harness through the trunk
SEE MORE:
Inverter Coolant Leak Test
DRAFT
Warning:
This procedure was derived from pre-production computer
models, and might not reflect the real-world situation. Warnings
and cautions might be missing. Follow safety requirements and
use extreme caution when working on or near high voltage s
HV Battery Air Leak Test
Pack Enclosure Leak Tester, HV Battery (1026636-00-A)
Pack Kit, Enclosure, Leak Test, HV Battery, Complete (1140501-00-A)
Kit, Encl Leak Test Adapters, HV Battery (1144879-00-A)
Procedure
Perform the vehicle electrical isolation procedure. See
Vehicle Electrical Isolation Procedure.
Remove the p
© 2019-2024 Copyright www.tmodel3.com
