Tesla Model 3: Inverter - Rear Drive Unit - Remove
.jpg)
SPECIAL TOOLS
Skt, 3/8in Dr, 10EP Torx Plus External (1130479-00-A)
Lever Lock, HV Connector, Model 3 (1140311-00-A)
Remove
- Use Toolbox to open the Rear Drive Inverter - Remove and Replace Autodiag, and click Run Network.
- In the Rear Drive Inverter - Remove and Replace Autodiag, run PROC_DI_X_STORE-DATA-APP to store the application data and run PROC_PM_X_STORE-DATA-BOOT to store the bootloader data.
- Follow the instructions in the Rear Drive Inverter - Remove and Replace Autodiag to perform the rest of this procedure.
- Remove the laptop from the vehicle, but do not close Toolbox 3.
- Remove the rear subframe assembly. See Subframe Assembly - Rear (Remove and Install).
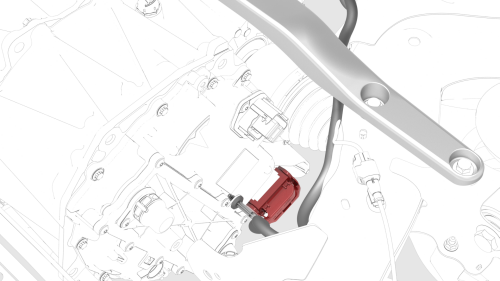
- Remove the LH rear drive unit mount. See Mount - Rear Drive Unit - LH (Remove and Replace).
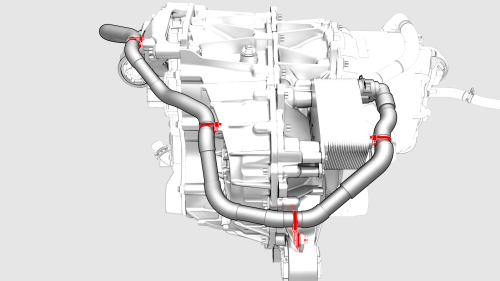
- Release the clips that attach the upper cooler hose to the rear drive unit.
- Disconnect the electrical harness from the inverter low voltage connector.
.png)
- Release the clip, disconnect the rear drive unit inlet hose from the inverter coolant inlet, and then plug the inlet.
.jpg)
- Release the clip that attaches the rear drive unit inlet hose to the HV harness bracket, and then remove the hose from the rear drive unit.
.png)
- Remove the bolt that attaches the HV harness bracket to the inverter.
.png)
- Slide the release to unlock the HV harness connector.
.png)
- Lift the handle on HV harness connector, disconnect the harness from the inverter connector, and then remove the harness from the rear drive unit.
- Secure an ESD strap to the inverter housing.
.png)
- Remove the 3-phase access label.
.png)
- Remove the bolts (x2) that attach the 3-phase access cover to the rear drive unit.
.png)
- Remove and discard the 3-phase access cover.
.png)
- Remove and discard the bolts (x3) that attach the 3-phase terminals to the inverter assembly.
.png)
- Remove and discard the bolts (x12) that attach the inverter to the gearbox assembly.
- Carefully remove the inverter assembly from the rear
drive unit and allow the coolant to drain.
.jpg)
- Remove and discard the inverter gasket.
READ NEXT:
 Inverter - Rear Drive Unit - Install
Install
Secure the ESD strap to the replacement inverter
housing.
Powertrain Coolant - Drain
SPECIAL TOOLS
Drive Unit Pressure Test Fixture (1053600-00-C)
Kit, Coolant Leak Test Adapters, Model 3
(1132
SEE MORE:
Window Motor / Regulator Assembly - Rear - LH (Remove and Replace)
SPECIAL TOOLS
Rivnut Install Kit, for NA (1054712-00-A )Rivnut Install Kit, for EMEA
(1054712-01-A )
Service rivnut (1004296-00-A)Service bolt (1015888-00-C)
Warning: The side impact airbag deployment depends on the front door sensor's
ability to detect a side impact from air pressure. Make sure
Beam - Cross Car (Remove and Replace) - Install
Install
With an assistant, position the cross car beam in the vehicle for
installation.
Caution:
Do not damage the interior when installing the cross car beam in the
vehicle.
Hand-tighten the bolts that attach the LH and RH corners of the cross
car beam to the body.
Hand-tighten the b
