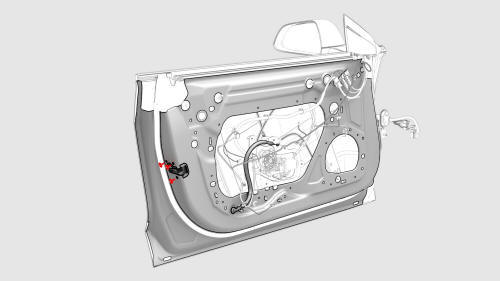
Tesla Model 3: Latch - Door - Front - LH (Remove and Replace)
Tesla Model 3 2017-2026 Service Manual / Closures / Latches Strikers and Pinch Sensors / Latch - Door - Front - LH (Remove and Replace)
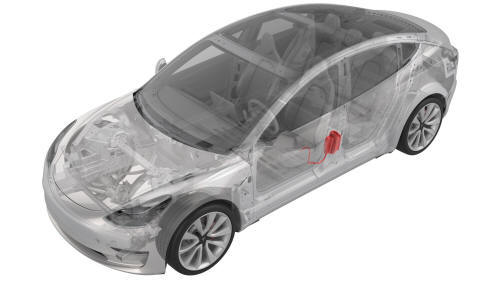
Remove
- Remove the front LH door closeout panel. See Closeout Panel - Door - Front - LH (Remove and Install).
- Disconnect the electrical harness from the door latch connector.
READ NEXT:
 Latch - Door - Rear - LH (Remove and Replace)
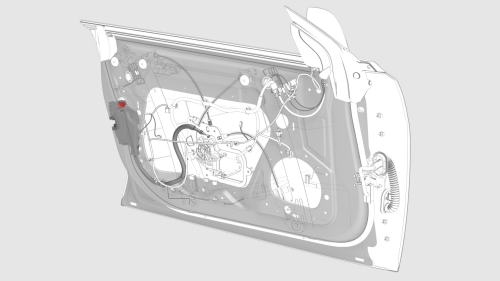
Remove
Remove the front LH door closeout panel. See Closeout Panel - Door -
Front - LH (Remove and Install).
Disconnect the electrical harness from the door latch connector.
Remove
Latch - Hood (Remove and Replace)
Remove
Remove the rear underhood apron. See Underhood Apron - Rear (Remove and
Replace).
Remove the cabin intake duct. See Duct - Cabin Intake (Remove and
Replace).
Remove the hood latch co
Latch - Trunk (Remove and Replace)
Remove
Remove the trunk lid trim. See Trim - Lid - Trunk (Remove and Replace).
Disconnect the electrical connector from the trunk latch.
Remove the bolts that attach the trunk latch to
SEE MORE:
Radiator (Remove and Replace)
Remove
Remove the cooling fan module. See Module - Cooling Fan (Remove and
Install).
Release the clips that attach the active grille shutter to the cooling
fan module, and then remove the active grille shutter from the module.
Remove the screws that attach the radiator to the con
Switch - Brake Light (Remove and Replace)
Remove
Remove the LH center console side panel carpet. See
Carpet - Side Panel - Center Console - LH (Remove and
Replace).
Disconnect 12V power. See 12V Power (Disconnect
© 2019-2026 Copyright www.tmodel3.com
