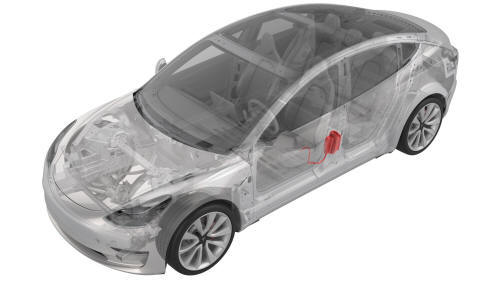
Tesla Model 3: Latch - Door - Rear - LH (Remove and Replace)
Tesla Model 3 2017-2026 Service Manual / Closures / Latches Strikers and Pinch Sensors / Latch - Door - Rear - LH (Remove and Replace)
Remove
- Remove the front LH door closeout panel. See Closeout Panel - Door - Front - LH (Remove and Install).
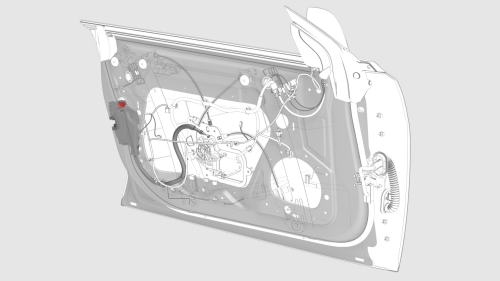
- Disconnect the electrical harness from the door latch connector.
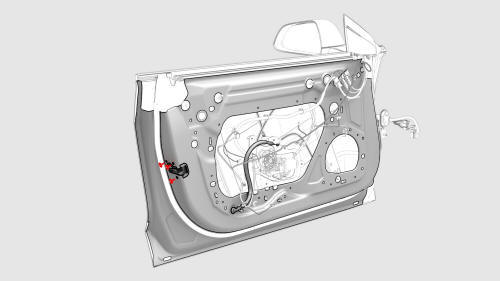
- Remove the bolts that attach the latch to the rear of the door.
 Torque 10 Nm
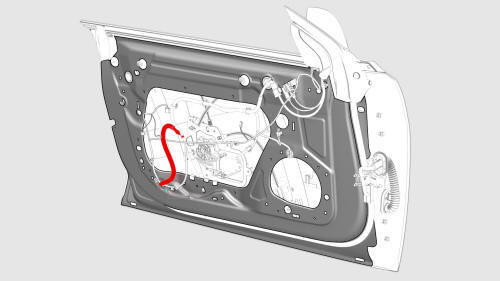
- Press the latch cable grommet in through the door, and move the cable in
through the opening while simultaneously removing the latch from the door.
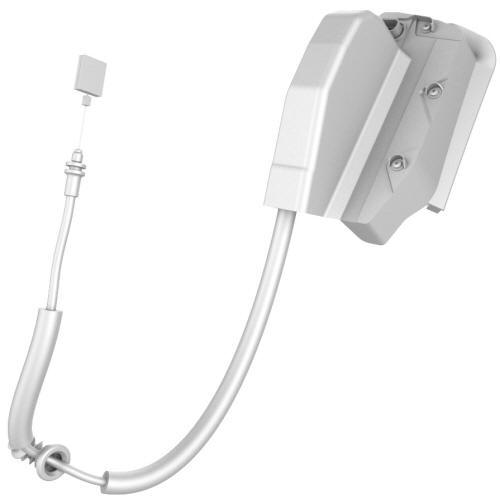
Install
Installation procedure is the reverse of removal, except for the following:
Note: When installing the latch, pull on the grommet and not the cable to seat the grommet in the door.
READ NEXT:
 Latch - Hood (Remove and Replace)
Remove
Remove the rear underhood apron. See Underhood Apron - Rear (Remove and
Replace).
Remove the cabin intake duct. See Duct - Cabin Intake (Remove and
Replace).
Remove the hood latch co
Latch - Trunk (Remove and Replace)
Remove
Remove the trunk lid trim. See Trim - Lid - Trunk (Remove and Replace).
Disconnect the electrical connector from the trunk latch.
Remove the bolts that attach the trunk latch to
Manual Release - Door - Rear - LH (Actuate)
Open Rear Door Using Manual Release Cable
Note: This procedure describes how to manually open the rear door
on a vehicle that does not have 12V power.
Remove the bolt that attaches the access
SEE MORE:
Actuator - Latch - Hood - Primary (Remove and Replace)
Remove
Remove the rear underhood apron. See Underhood Apron - Rear (Remove and
Replace).
Remove the cabin intake duct. See Duct - Cabin Intake (Remove and
Replace).
Remove the hood latch cover. See Cover - Hood Latch (Remove and
Replace).
Remove the underhood storage unit. See Underhoo
Contactor - Positive - HV Battery (Remove and Replace)
Contactor - Positive - HV Battery-Remove
SPECIAL TOOLS
Ratchet, 1/4" Sq Dr, HV Insulated (1057602-00-A)
Ext Bar, Wobble, 1/4" Dr, HV Insulated (1057603-00-A)
Magnet, Flexible, HV Insulated, 18" (1057607-00-A)
Socket, 1/4" Dr, Deep,10 mm,Thin Wall, Insul (1133768-00-A)
Resistance meter, microohm, H
© 2019-2026 Copyright www.tmodel3.com
