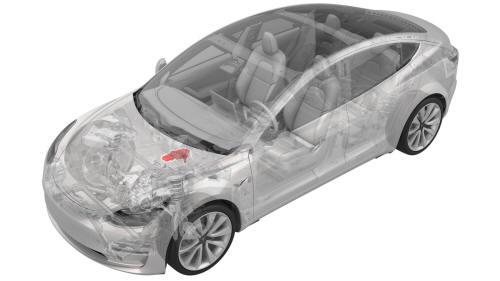
Tesla Model 3: Master Cylinder and Reservoir Assembly - Remove
SPECIAL TOOLS
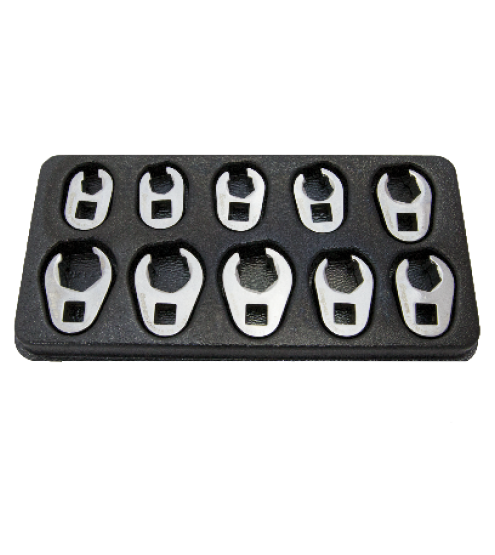
Flare nut crowfoot set (1079041-00-A)
Remove
Caution: Brake fluid dissolves paint. Have clean towels and plenty of water standing by to wash spilled brake fluid off painted surfaces.Note: Dispose of used brake fluid in a manner consistent with local environmental codes.
- Raise and support the vehicle. See Raise Vehicle - 2 Post Lift.
- Remove all 4 wheels. See Wheel (Remove and Install).
- Remove the 2nd row lower seat cushion. See Seat Cushion - Lower - 2nd Row (Remove and Replace).
- Remove the rear underhood apron. See Underhood Apron - Rear (Remove and Replace).
- Disconnect 12V power. See 12V Power (Disconnect and Connect).
- Remove the cabin intake duct. See Duct - Cabin Intake (Remove and Replace).
- Remove the hood latch cover. See Cover - Hood Latch (Remove and Replace).
- Remove the underhood storage unit carpet. See Carpet - Underhood Storage (Remove and Install).
- Remove the underhood storage unit. See Underhood Storage Unit (Remove and Replace).
- Remove the wiper arms. See Wiper Arms (Remove and Replace).
- Remove the LH and RH shock tower covers. See Cover - Shock Tower - LH (Remove and Replace).
- Remove the cowl screen panel. See Panel - Cowl Screen (Remove and Replace).
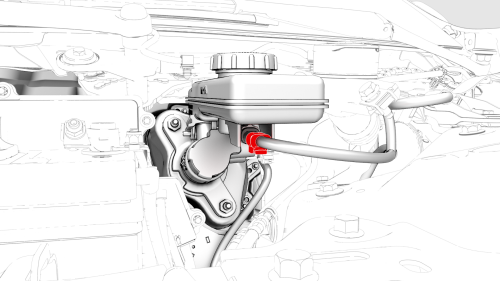
- Disconnect the electrical connector from the brake fluid reservoir.
- Place absorbent towels under the brake fluid reservoir.
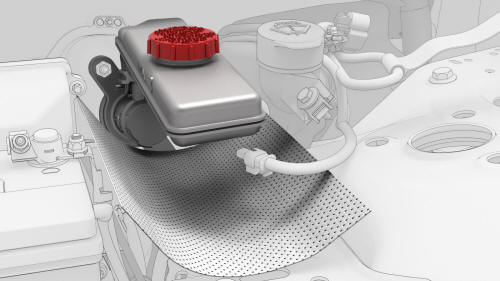
- Clean the area around the brake fluid reservoir, and then remove the brake fluid reservoir cap.
- Use a brake fluid syringe to remove the brake fluid from the reservoir.
- Install the brake fluid reservoir cap.
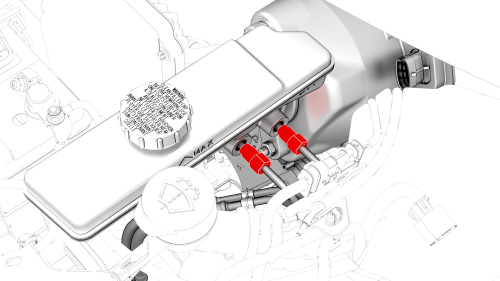
- Loosen the nuts that attach the brake lines to the booster, and then slide the nuts back on the brake lines.
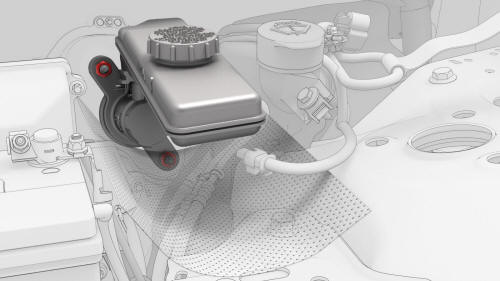
- Remove the nuts that attach the master cylinder to the brake booster.
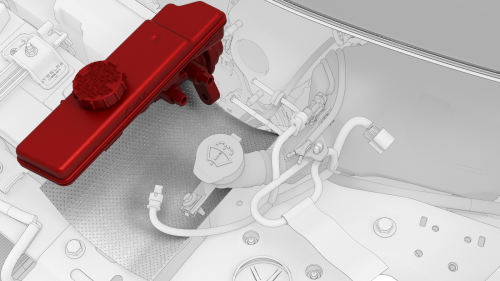
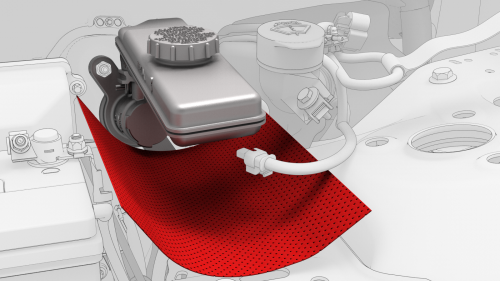
- Remove the master cylinder and reservoir assembly
from the vehicle.
Note: Make sure the master cylinder o-ring is
also removed.

READ NEXT:
 Master Cylinder and Reservoir
Assembly - Install
Master Cylinder and Reservoir
Assembly - Install
Install
Position the reservoir and master cylinder
in the vehicle
SEE MORE:
Panel - Cowl Screen (Remove and Replace)
Remove
Remove the rear underhood apron. See
Underhood Apron - Rear (Remove and Replace).
Remove the cabin intake duct. See
Duct - Cabin Intake (Remove and Replace).
Remove the hood latch cover. See
Cover - Hood Latch (Remove and Replace).
Remove the underhood storage unit carpet. See
Car
Module - Body Controller - Front (Dual Motor) - Remove
Remove
Remove the 2nd row lower seat cushion. See Seat Cushion - Lower - 2nd
Row (Remove and Replace).
Remove the rear underhood apron. See Underhood Apron - Rear (Remove and
Replace).
Remove the cabin intake duct. See Duct - Cabin Intake (Remove and
Replace).
Remove the underhood stora
