Tesla Model 3: Seal - Secondary - Front Door - LH (Remove and Replace)
Tesla Model 3 2017-2026 Service Manual / Closures / Seals Body Closures / Seal - Secondary - Front Door - LH (Remove and Replace)
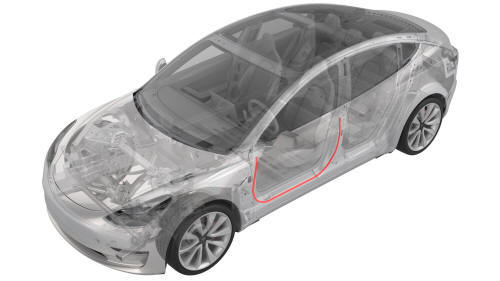
Remove
- Open the LH front door.
- Use narrow-width tape to carefully mark the location of the secondary seal around the door.
Caution:
Make sure that the edge of the tape accurately follows the edge of the seal.
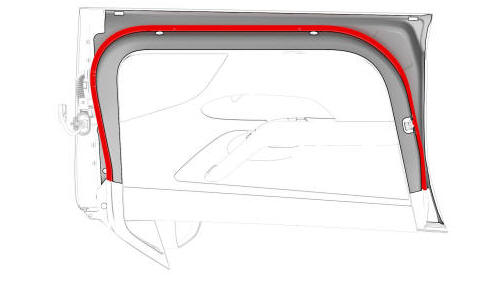
- Release the ends of the door secondary seal from the rear of the inner belt seal and the door glass run seal.

- Slowly peel the length of the secondary seal from the perimeter of the door.
- Clean any remaining adhesive or residue from the door.
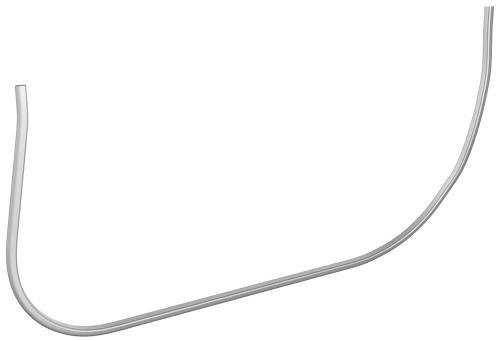
Install
- Peel a short section of seal backing and insert the end of the seal into the rear of the inner belt seal.
Note: Make sure that both edges of the seal are under the cutouts for the inner belt seal.
- Peel the seal backing and carefully position the edge of the seal to the edge of the marking tape while working around the rear door
Note: Make sure that the drain holes of the seal are at the bottom of the door.
Note: Do not stretch the seal as it is applied to the door.
Note: Make sure that the open edge of the seal is facing the inside of the door.
- Insert the end of the seal into the door glass run seal.
- Use a seam roller to attach the seal to the door.
- Remove the marking tape from the door, and close the door.
READ NEXT:
 Seal - Secondary - Rear Door - LH (Remove and Replace)
Remove
Open the LH rear door.
Use narrow-width tape to carefully mark the location of the secondary
seal around the door.
Caution:
Make sure that the edge of the tape accurately follows the
Seal - Trunk (Remove and Replace)
Remove
Open the trunk.
Lift up the rear trunk floor, and then remove it from the vehicle.
Remove the trunk sill trim. See
Trim - Sill - Trunk (Remove and Replace).
Release the trunk seal
SEE MORE:
Seat Back - 2nd Row - RH (Remove and Install)
Remove
Remove the 2nd row lower seat cushion. See
Seat Cushion - Lower - 2nd Row (Remove and Replace).
Remove the RH 2nd row seat side bolster. See
Bolster - Side - Seat - 2nd Row - LH (Remove and Replace).
Release the clips that attach the bolster bracket, and the remove the
bracket fr
Pipe - High Pressure - Compressor to Condenser (Remove and Replace)
Pipe - High Pressure - Compressor to Condenser- Remove
Remove
Raise and support the vehicle. See Raise Vehicle - 2 Post Lift.
Remove the 2nd row lower seat cushion. See Seat Cushion - Lower - 2nd
Row (Remove and Replace).
Remove the rear underhood apron. See Underhood Apron - Rear (Remove an
© 2019-2026 Copyright www.tmodel3.com
