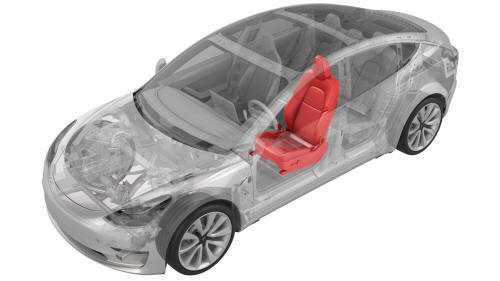
Tesla Model 3: Seat - Driver (Remove and Replace)- Remove
SPECIAL TOOLS
Key, Seat Belt Release, Model 3 (1133787-00-A)
Torx Plus T45 (1082447-07-A)
Remove
Note: Though the driver seat is described, the procedure is the same for the front passenger seat.
- Remove the LH lower A-Pillar trim. See Trim - A-Pillar - Lower - LH (Remove and Replace).
- Insert the seat belt release key into the bottom of the seatbelt pretensioner coupling to release the seatbelt from the pretensioner.
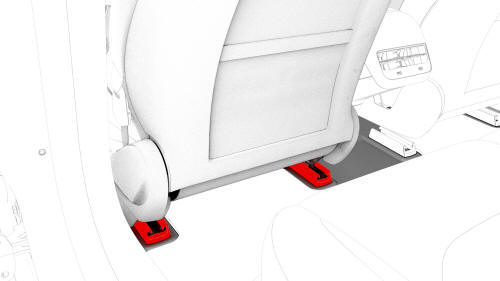
- If replacing the seat with a new one, release the clips that attach the driver seat track rear covers, and then remove the track rear covers from the vehicle. Otherwise, skip to 9
- Remove and discard the bolts (x2) that attach the rear of the driver seat to the body.
Caution:
Use only the Torx Plus T45 bit to remove the seat bolts.
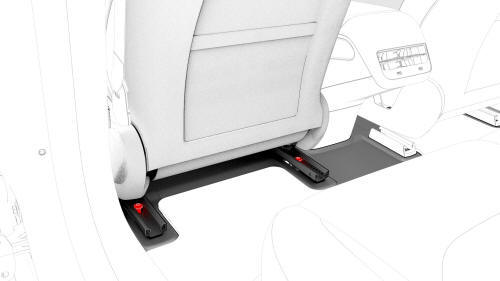
- Move the seat fully rearward.
- Remove the driver seat track front covers.
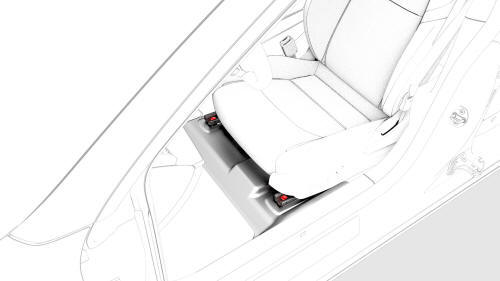
- Remove and discard the bolts (x2) that attach the front of the driver seat to the body.
Caution:
Use only the Torx Plus T45 bit to remove the seat bolts.
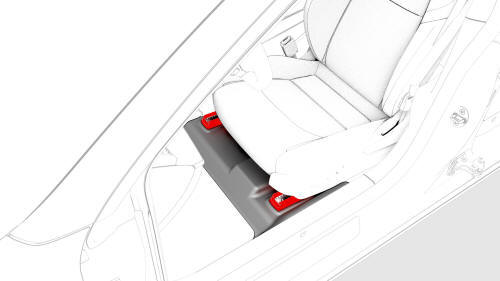
- Adjust the seat cushion height to maximum.
Caution:
Do not allow the seat headrest to compress the sun visor as it might crack the mirror.
- Move the seat fully forward.
Caution:
Do not allow the seat headrest to compress the sun visor as it might crack the mirror.
- Disconnect 12V power. See 12V Power (Disconnect and Connect).
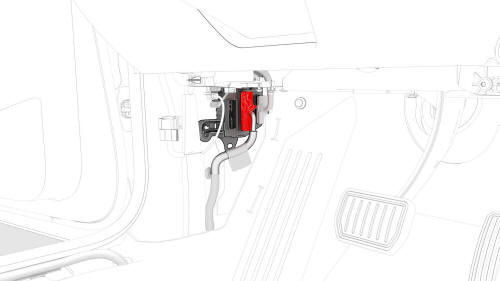
- Disconnect the seat electrical harness connector from the LH body controller.
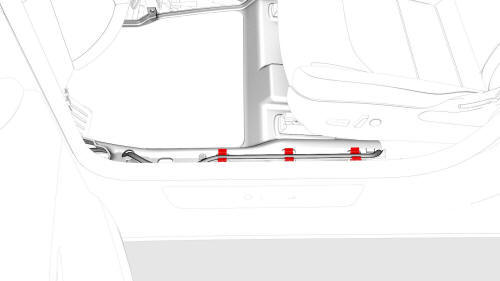
- Release the clips that attach the seat electrical harness to the body.
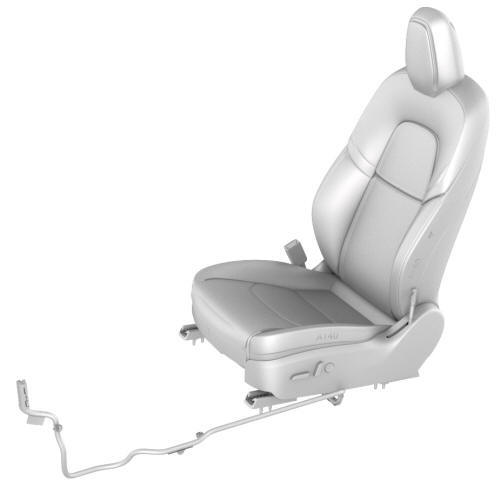
- With an assistant, remove the seat from the vehicle.
Note: Lift the seat, tilt the seat back, rotate the cushion toward
the door, and remove the seat from the vehicle, cushion first.
Caution: If discarding the entire seat, Service Centers must remove the seat-mounted airbag and pre-tensioner before discarding the seat. Follow local Environmental Health and Safety (EH&S) best practices to dispose of the airbag and the pre-tensioner (for example, place the airbag and the pre-tensioner into the appropriate hazardous waste receptacles located in the Service Center). Then dispose of the seat. Refer to Service Bulletin SI-19-20-001.
READ NEXT:
 Seat - Driver (Remove and Replace) - Install
Install
Note: Though the driver seat is described, the procedure is the
same for the front passenger seat.
With an assistant, install the seat into the vehicle.
Note: Lift the seat sideways with t
Trim - Headrest - Driver (Remove and Replace)
DRAFT
Warning:
This procedure was derived from pre-production computer models, and
might not reflect the real-world situation. Warnings and cautions might be
missing. Follow safety requirements
SEE MORE:
Harness - Trunk- Install
Install
Move the trunk electrical harness in through the trunk bulkhead.
Fasten the clips that attach the trunk electrical harness to the trunk
lid.
Install new bolts (x2) to attach the trunk electrical harness ground
straps to the trunk lid.
Torque 8 Nm
Connect the trunk e
Car Computer - Remove
SPECIAL TOOLS
Plug,Car Computer Fluid Port (1119171-00-A)
Kit, Battery Coolant Drain & Fill (1065131-00-A)
Kit, Computer Purge Adapters, Model 3 (1473522-00-A)
Kit, Svc Plug, Cooling Hose, Model 3 (1135762-00-A)
Remove
If "Tow Mode" is active, then disable "Tow Mode."
If the car computer is
