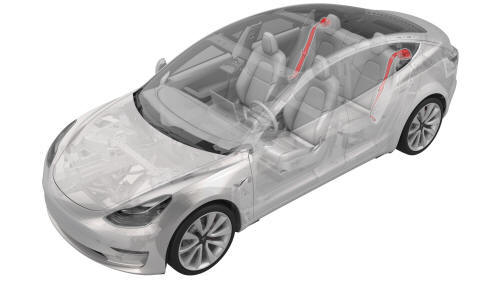
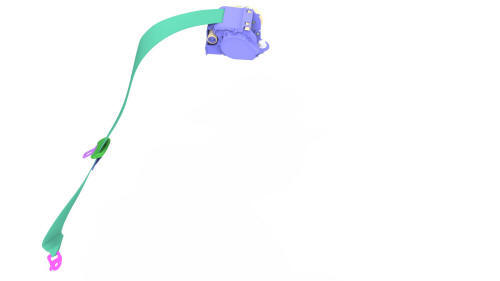
Tesla Model 3: Seatbelt - 2nd Row - LH (Remove and Replace)
Tesla Model 3 2017-2026 Service Manual / Safety and Restraint / Seatbelts / Seatbelt - 2nd Row - LH (Remove and Replace)
Remove
- Remove the rear underhood apron. See Underhood Apron - Rear (Remove and Replace).
- Remove the cabin intake duct. See Duct - Cabin Intake (Remove and Replace).
- Disconnect 12V power. See 12V Power (Disconnect and Connect).
- Remove the LH 2nd row seat side bolster. See Bolster - Side - Seat - 2nd Row - LH (Remove and Replace).
- Remove the LH side rail trim. See Trim - Side Rail - LH (Remove and Replace).
- Remove the LH upper C-pillar trim. See Trim - C-Pillar - Upper - LH (Remove and Replace).
- Remove the LH rear C-pillar trim. See Trim - C-Pillar - Rear - LH (Remove and Replace).
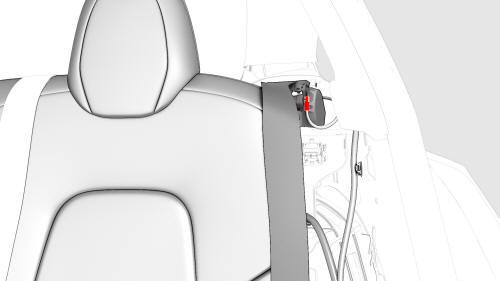
- Remove and discard the bolt that attaches the 2nd row LH lower seat belt anchor to the body.
- Release the clips (x2) that attach the bezel to the LH rear upper C-pillar trim, and then slide the bezel off the seatbelt.
- Guide the seatbelt through the LH rear upper C-pillar trim, and the remove the trim from the vehicle.
- Disconnect the electrical connector from the 2nd row LH seat belt retractor.
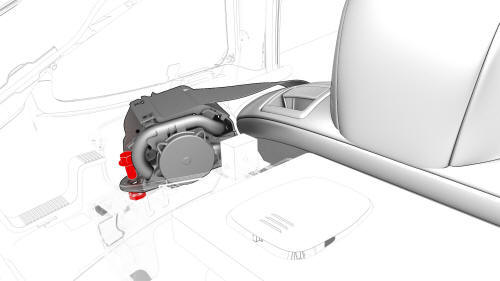
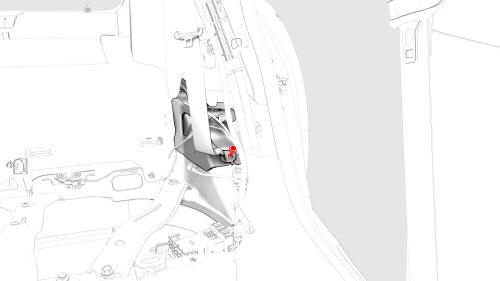
- Remove and discard the bolt that attaches the 2nd row LH seat belt
retractor to the body, and then remove the retractor from the vehicle.
Install
- Install the 2nd row LH seat belt retractor to the body, and then install
a new bolt to attach the retractor to the body.
 Torque 30 Nm
- Connect the electrical connector to the 2nd row LH seat belt retractor.
- Install the bezel onto the seatbelt, and then attach the clips (x2) to the LH rear upper C-pillar trim.
- Install a new bolt that attaches the 2nd row LH lower seat belt anchor
to the body.
 Torque 30 Nm
 - Install the LH rear C-pillar trim. See Trim - C-Pillar - Rear - LH (Remove and Replace).
- Install the LH upper C-pillar trim. See Trim - C-Pillar - Upper - LH (Remove and Replace).
- Install the LH side rail trim. See Trim - Side Rail - LH (Remove and Replace).
- Install the LH 2nd row seat side bolster. See Bolster - Side - Seat - 2nd Row - LH (Remove and Replace).
- Connect 12V power. See 12V Power (Disconnect and Connect)
- Install the cabin intake duct. See Duct - Cabin Intake (Remove and Replace).
- Install the rear underhood apron. See Underhood Apron - Rear (Remove and Replace).
READ NEXT:
 Pretensioners
Pretensioner - Outboard Lap - 1st Row - LH (Remove and Replace)
Note: This procedure was formulated using a release candidate or
production model. Follow safety requirements and use extreme caution
Sensor - Airbag - B-Pillar - LH (Remove and Replace)
Remove
Remove the LH instrument panel end cap. See End Cap - Instrument Panel -
LH (Remove and Replace).
Remove the LH middle A-pillar trim. See Trim - A-Pillar - Middle - LH (Remove
and Repl
SEE MORE:
Skid Plate - HV Battery - Front (Remove and Replace)
Remove
Remove the front aero shield. See
Panel - Aero Shield - Front (Remove and Replace).
Remove the bolts and clips that attach the skid plate to the battery,
and then remove the plate from the battery.
Install
Installation procedure is the reverse of removal.
About Autopilot
How It Works
Your Model 3 includes the following Autopilot components that actively
monitor the surrounding
roadway:
A camera is mounted above the rear license plate.
Ultrasonic sensors are located in the front and rear bumpers.
A camera is mounted in each door pillar.
Three cameras
© 2019-2026 Copyright www.tmodel3.com
