Tesla Model 3: Skull Cap - Door Mirror - LH (Remove and Replace)
Tesla Model 3 2017-2026 Service Manual / Exterior Fittings / Exterior Mirrors / Skull Cap - Door Mirror - LH (Remove and Replace)
Remove
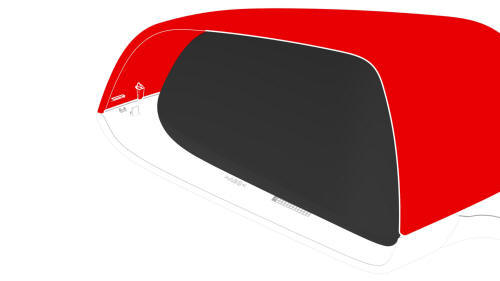
Outside Edge of Skull Cap
Inside Edge of Skull Cap
- Pull outward to release the clips that attach the rear of the LH door mirror skull cap to the LH door mirror.
- Pry up along the inside and outside edge of the LH door mirror skull cap, working toward the front of the skull cap.
- Release the remaining clips that attach the LH door mirror skull cap to
the LH door mirror, and then remove the skull cap from the door mirror.

Install
Installation procedure is the reverse of removal.
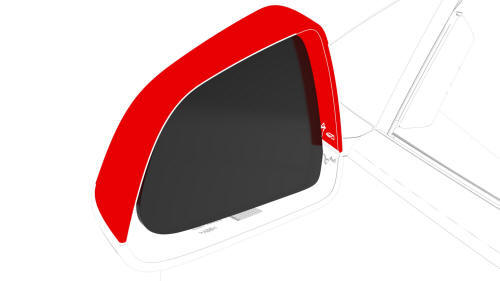
- Position the LH door mirror skull cap over the LH door mirror, and align the skull cap tabs to the door mirror.
Outside Edge of Skull Cap
- Push down on the top of the LH door mirror skull cap to fasten the clips that attach the skull cap to the LH door mirror.
Inside Edge of Skull Cap
Note: Press at the inside and outside edges of the skull cap, until an audible click is heard.
READ NEXT:
 Applique - B-Pillar - LH (Remove and Replace)
Applique - B-Pillar - LH (Remove and Replace) -
Remove
Remove
Open the LH front and rear doors.
Release the clips that attach the B-pillar applique fastener cover to
the vehicle, and the
SEE MORE:
Security Settings
About the Security System
If Model 3 does not detect an authenticated
phone, key fob, or key card and a locked door
or trunk is opened, an alarm sounds and the
headlights and turn signals flash. To deactivate
the alarm, press any button on the mobile app
or tap your key card or key fob against
Overhead Console - Rear (Remove and Replace)
Remove
Release the clips (x2) that attach the rear overhead console to the
headliner, and then lower the console from the headliner.
Caution:
To avoid damaging the headliner, do not pry against the headliner.
Insert a 90 degree trim tool near the dome light and pull downwards to rele
© 2019-2026 Copyright www.tmodel3.com
