Tesla Model 3: Subframe Assembly - Front (RWD) - Install
Tesla Model 3 2017-2026 Service Manual / Chassis / Subframe Assembly - Front (RWD) (Remove and Install) / Subframe Assembly - Front (RWD) - Install
Install
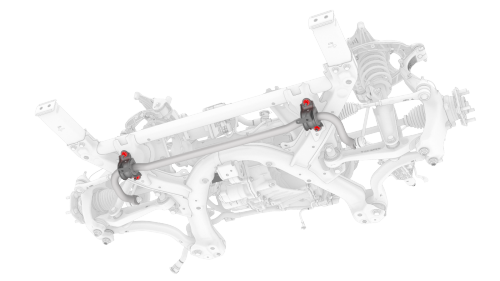
- Position the subframe lifting tool against the front subframe, and then attach the straps (x3) to the subframe.
Note: Make sure to align the two subframe lifting tool guides with the front subframe.
- Lower the front drive unit onto the front subframe
Note: Make sure not to move the rear front drive unit support posts from their previous positions.
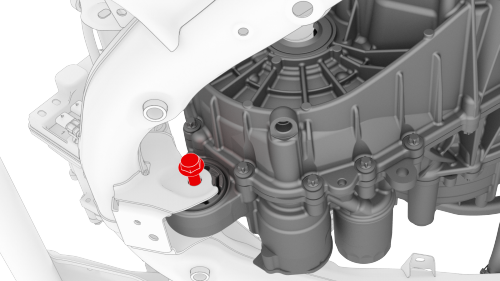
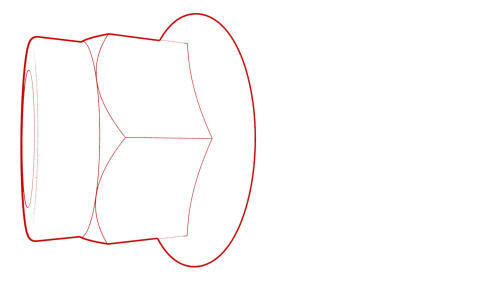
- Install the bolt that attaches the front drive unit to the front
subframe.
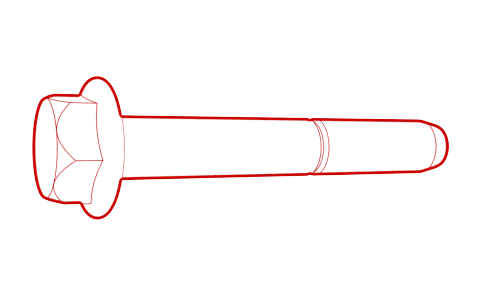 Torque 80 Nm
 - Lower the gantry hook until the drive unit sling is slack.
- Remove the drive unit sling hooks from the front drive unit.
- Remove the drive unit sling from the gantry hook.
- Move the subframe lifting tool to a working area.
.png)
Other assemblies hidden for clarity
- Position the front drive unit harness on the front subframe, and then install the clips that attach the front drive unit harness to the subframe.
.png)
- Install the clips that attach the front drive unit harness to the front drive unit inverter.
.png)
- Install the clip that attaches the front drive unit harness to the front drive unit motor.
.png)
- Connect the oil pump connector, and then engage the locking tab.
Important: Perform a push-pull test to verify that the connector is fully attached.
.png)
- Connect the resolver logic connector, and then engage the locking tab.
Important: Perform a push-pull test to verify that the connector is fully attached.
.png)
- Connect the front drive unit inverter logic connector, close the handle, and then engage the locking tab.
Important: Perform a push-pull test to verify that the connector is fully attached.
- Install the LH and RH front drive unit halfshafts on the front drive unit.
.png)
- Hand-tighten the bolts that attach the LH and RH front subframe crash can brackets to the front subframe.
- Position the front stabilizer bar on the front subframe.
- Install new nuts to attach the front stabilizer bar to the front
subframe, and then mark each nut with a paint pen.
 Torque
35 Nm
Torque
35 Nm - Install the steering rack. See Steering Rack (Dual Motor) (Remove and Replace).
Caution: 2nd generation front subframes cannot accommodate 1st generation (discontinued) steering racks. A 2nd generation (currently available) steering rack must be installed.
- Install the front subframe assembly into the vehicle. See Subframe Assembly - Front (Dual Motor) (Remove and Install).
READ NEXT:
 Subframe Assembly - Front (RWD) (Remove and Replace)
Caution:
Vehicles built before March 25th, 2019 have 1st generation front
subframes. Vehicles built on March 25th, 2019 and after have 2nd generation
front subframes. When a 1st generation subfra
Subframe Assembly - Rear - Remove
SPECIAL TOOLS
Kit, EPB Release, Handheld (1134520-00-A)
XP-10 Power Supply, XP-10 (1129348-00-A)
Fixture, Subframe, Model 3 (1099645-00-B)
Lever Lock, HV Connector, Model 3 (1140311-00-A)
Remove
U
SEE MORE:
Valance - Front Fascia (Remove and Replace)
Remove
Remove the front aero shield panel.
Release the clips (x2) that attach the valance to the stabilizer bar
brackets.
Remove the push clips (x4) that attach the LH and RH sides of the
valance to the wheel liners.
Note: Remove the outer clips as necessary to allow for easier
ac
Latch - Seat Back - 2nd Row - LH (Remove and Replace)
Remove
Remove the 2nd row center seatbelt assembly. See
Seatbelt - 2nd Row - Center (Remove and Replace).
Release the cable clip that attaches the latch bracket to the seat back.
Release the clip that attaches the bracket stud to the seat back.
Remove the bolts that attach th
© 2019-2026 Copyright www.tmodel3.com
