Tesla Model 3: Switch - Window - Front Passenger (Remove and Replace) - Install
Tesla Model 3 2017-2024 Service Manual / Closures / Door Glass and Regulators / Switch - Window - Front Passenger (Remove and Replace) / Switch - Window - Front Passenger (Remove and Replace) - Install
Install
- Install the front passenger window switch onto the RH front door trim panel.
- Install the puddle light onto the RH front door trim panel
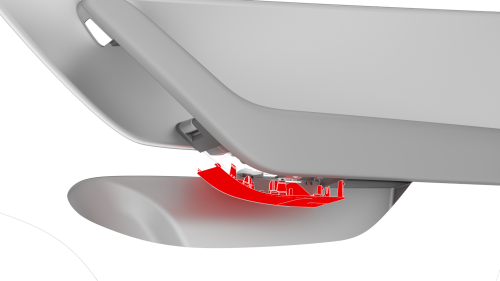
- Install the lower bolt cover onto the RH front door trim panel.
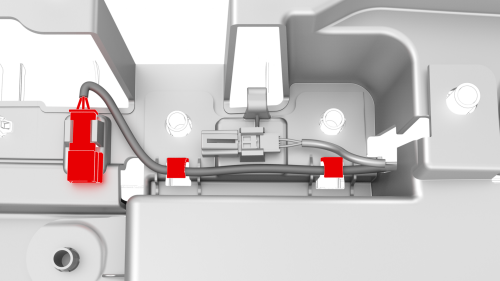
- Install the clips that attach the window switch wiring harness to the RH front door trim panel, and then connect the window switch electrical connector

- Install the puddle light electrical connector to the RH front door trim panel
- Install the RH front door trim panel. See Panel - Door Trim - Front - LH (Remove and Install).
READ NEXT:
 Switch - Window - Rear (Remove and Replace)
Remove
Remove the LH rear door trim panel. See
Panel - Door Trim - Rear - LH (Remove and Install).
Release the clips that attach the rear window switch to the door trim
panel.
Ti
Window Motor / Regulator Assembly - Front - LH (Remove and Replace)
Warning: The side impact airbag deployment depends on the front door
sensor's ability to detect a side impact from air pressure. Make sure that there
are no uncovered holes in the front door shells.
Window Motor / Regulator Assembly - Rear - LH (Remove and Replace)
SPECIAL TOOLS
Rivnut Install Kit, for NA (1054712-00-A )Rivnut Install Kit, for EMEA
(1054712-01-A )
Service rivnut (1004296-00-A)Service bolt (1015888-00-C)
Warning: The side impact airbag deploym
SEE MORE:
Activate Transport Mode
Transport Mode keeps the parking brake
disengaged while winching Model 3 onto a
flatbed truck. When active, Transport Mode
displays a message indicating that the vehicle
will remain free-rolling. The following are
required to enable Transport Mode:
12V power is required. You are unable to
Traction Control
How It Works
The traction control system constantly
monitors the speed of the front and rear
wheels. If Model 3 experiences a loss of
traction, the system minimizes wheel spin by
controlling brake pressure and motor power.
By default, the traction control system is on.
Under normal condit
© 2019-2024 Copyright www.tmodel3.com
