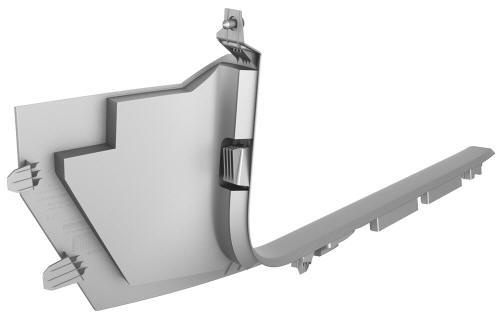
Tesla Model 3: Trim - A-Pillar - Lower - LH (Remove and Replace)
Tesla Model 3 2017-2026 Service Manual / Interior Trim / Pillar and Sill Trim / Trim - A-Pillar - Lower - LH (Remove and Replace)
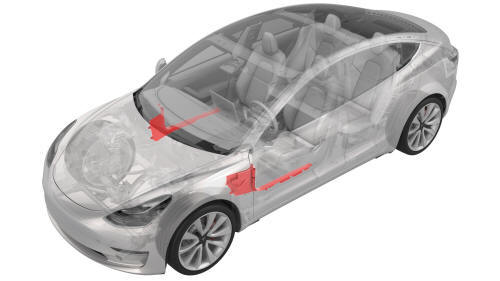
Remove
- Open the LH front door.
- Remove the LH instrument panel end cap. See End Cap - Instrument Panel - LH (Remove and Replace).
- Remove the LH middle A-Pillar trim panel. See Trim - A-Pillar - Middle - LH (Remove and Replace).
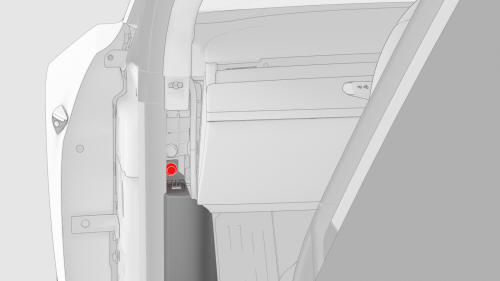
- Release the topmost clip on the LH lower A-pillar trim.
- Pull the rearmost part of the LH lower A-pillar trim upward to release the clips and tabs, and then pull the entire trim rearward to remove the trim from the vehicle.
Note: Remove any remaining LH lower
A-pillar trim clips from the LH A-pillar and sill, and if the LH lower A-pillar
trim is to be later installed, remove all clips from the trim.
Install
Installation procedure is the reverse of removal, except for the following:
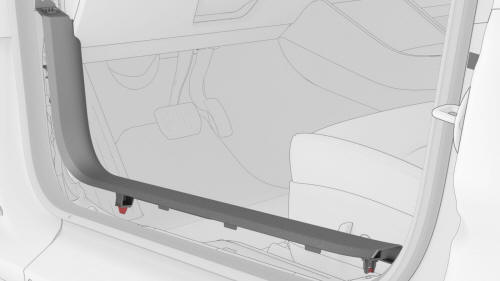
- If reusing the same LH lower A-pillar trim, install new clips onto the trim.
- Make sure that the tabs at the front of the trim engage properly, and that the trim fits tight against the A-pillar.
- Make sure that the door seal overlaps the LH lower A-pillar trim.
READ NEXT:
 Trim - A-Pillar - Middle - LH (Remove and Replace)
Remove
Remove the LH instrument panel end cap. See
End Cap - Instrument Panel - LH (Remove and Replace).
Release the upper clip that attaches the LH middle A-Pillar trim, and
then pull o
Trim - A-Pillar - Upper - LH (Remove and Replace)
Remove
Open the LH front door.
Remove the LH instrument panel end cap. See
End Cap - Instrument Panel - LH (Remove and Replace).
Remove the LH middle A-Pillar trim. See
Trim - A-Pillar - Midd
Trim - B-Pillar - Lower - LH (Remove and Replace)
Remove
Remove the LH instrument panel end cap. See
End Cap - Instrument Panel - LH (Remove and Replace).
Remove the LH middle A-pillar trim. See
Trim - A-Pillar - Middle - LH (Remove and Replac
SEE MORE:
Panel - Aero Shield - Mid (Remove and Replace)
Remove
Raise and support the vehicle. See
Raise Vehicle - 2 Post Lift.
Remove the bolts (x13) that attach the mid aero shield panel to the
vehicle, and then remove the panel from the vehicle.
Install
Apply a thin bead of Loctite 222 to the threads of the bolts (x13) that
atta
Lumbar Support - Backrest - Driver Seat (Remove and Replace)
Remove
Remove the driver seat back shell. See
Shell - Seat Back - Driver (Remove and Replace).
Release the clips that attach the outboard side of the seat back
cover to the seat back frame, and then expose the air bag connector.
Disconnect the electrical harness from the dr
© 2019-2026 Copyright www.tmodel3.com
