Tesla Model 3: Windshield (Remove and Install)- Install
Tesla Model 3 2017-2024 Service Manual / Body / Windshield and Body Glass / Windshield (Remove and Install) / Windshield (Remove and Install)- Install
Install
Note: Use soft materials to protect the windshield and to prevent scratching.
- Attach suction cups to the LH and RH sides of the windshield on the outside side of the windshield.
- With an assistant, position the windshield on the vehicle for a dry fit. Note any locations where the pads need to be adjusted.
Note: Add or remove to adjust the flush condition of the windshield, if needed.
- With an assistant, remove the windshield and set it back on the stand.
- Clean the urethane path on the vehicle with an Isopropyl Alcohol (IPA) wipe. Allow the surface to dry before continuing to the next step.
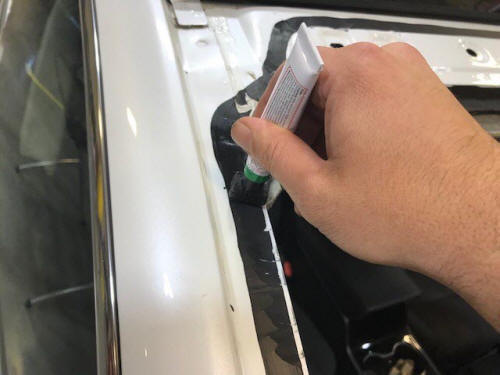
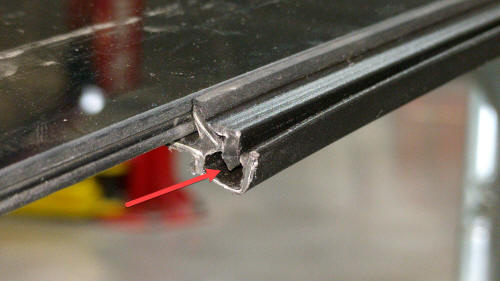
- Apply urethane primer to the vehicle body along the urethane path and in areas that were damaged during removal of the windshield
Note: Allow the primer to dry for at least 1 minute.
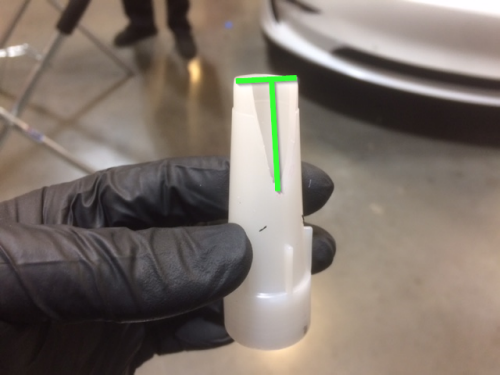
- Prepare the caulking gun and urethane.
Note: Make sure that the urethane bead has a triangular cross-section of approximate 8 mm width and 13 mm height.
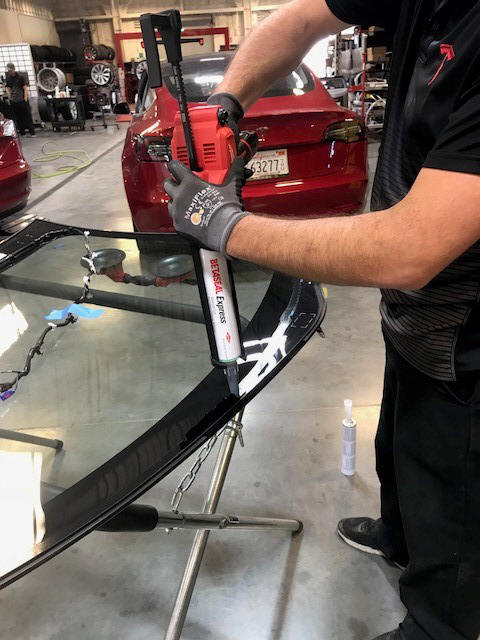
- Apply urethane to the windshield following the primer path.
- With an assistant, install the windshield on the vehicle.
Note: Make sure to align the locating pins at the top of the windshield.

- Check the gap and flush of the windshield to the body before fully seating the windshield using a gap/flush measuring tool.
- Fully seat the windshield; check the gap and flush and make adjustments, if necessary.

- Apply masking tape to secure the windshield to the body while the urethane cures.
- Remove the suction cups from the windshield.
- Remove the large towel from the instrument panel.
- Remove the masking tape holding the windshield electrical harness to the windshield.
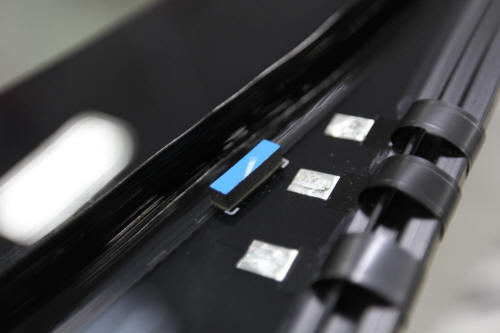
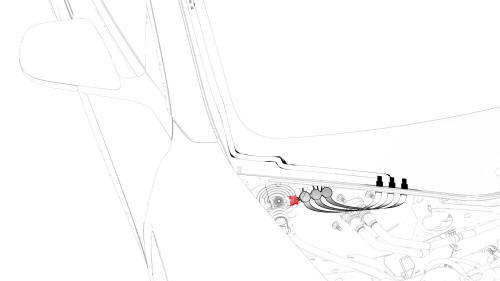
- Secure the clips (x6) that attach the windshield electrical harness to the RH A-pillar area.
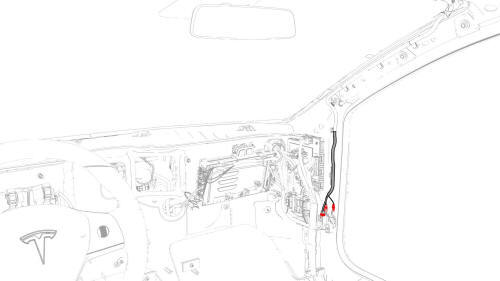
- Connect the windshield electrical harness (x3) to the RH vehicle harness connectors.
- Install the headliner. See Headliner (Remove and Install)
- Install the LH and RH side rail trims. See Trim - Side Rail - LH (Remove and Install).
- Restore the driver and front passenger seats back to their original position.
- Connect the electrical harness to the windshield heater connector.
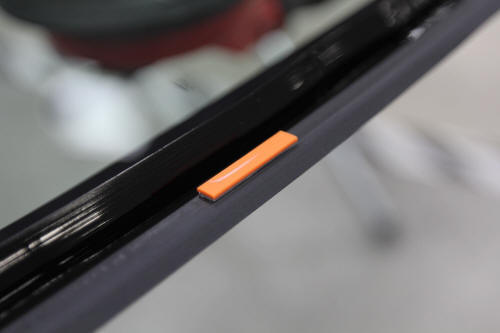
- Remove the windshield cowl protective strip.
- Install the cowl screen panel. See Panel - Cowl Screen (Remove and Replace).
- Install the LH and RH shock tower covers. See Cover - Shock Tower - LH (Remove and Replace).
- Install the LH and RH wiper arms. See Wiper Arms (Remove and Replace).
- Install the underhood storage unit. See Underhood Storage Unit (Remove and Replace).
- Install the hood latch cover. See Cover - Hood Latch (Remove and Replace).
- Install the cabin intake duct. See Duct - Cabin Intake (Remove and Replace).
- Install the rear underhood apron. See Underhood Apron - Rear (Remove and Replace).
- Perform the forward facing camera target calibration. See Camera - Forward Facing (Target Calibration).
- Remove the masking tape from the vehicle after the urethane has cured.
READ NEXT:
 Windshield (Remove and Replace) - Remove
Remove
Remove the cowl screen panel. See Panel - Cowl Screen (Remove and
Replace).
Disconnect the electrical harness from the windshield heater connector.
Partially close the hood.
Caut
Windshield (Remove and Replace)- Install
Install
Note: Use soft materials to protect the windshield and to prevent
scratching.
Place the new windshield on a support stand with the windshield bracket
facing up.
Install the GPS antenn
SEE MORE:
Busbar - DCDC Ground (Remove and Replace)
Remove
Disconnect 12V power. See
12V Power (Disconnect and Connect).
Remove and discard the nut that attaches the DCDC ground busbar to the
HV battery at the DCDC passthrough.
Remove the bolt that attaches the DCDC ground busbar to the body, and
then remove the DCDC ground busbar
A/C Refrigerant- Recovery
Prepare the AC service machine. See
Preparation.
Turn off the vehicle's climate control.
Connect a laptop with Toolbox to the vehicle.
Remove the underhood storage unit. See
Underhood Storage Unit (Remove and Replace).
Remove the caps from the A/C high pressure and low pressure ports.
C
© 2019-2024 Copyright www.tmodel3.com
